Indeed, it would be difficult to just explain an issue with words only. Having screenshots can make a difference. When troubleshooting or solving an issue on one’s PC, one of the most commonly used tools is the Steps Recorder Windows. Previously this tool was known as Problem Steps Recorder or PSR, many users have found this program so helpful in recording steps when bugs or errors are encountered. It helps document one’s actions.
If you have just read or heard about it recently and you’re wondering about more information relating to this program, you are on the right page. We’ll discuss what this tool is and how you can use it on your Windows 10 computer.
Contents: Part 1. What Is the Steps Recorder in Windows 10?Part 2. How to Use the Steps Recorder in Windows 10?Part 3. What Is the Best Steps Recorder Alternative?Part 4. In Conclusion
Part 1. What Is the Steps Recorder in Windows 10?
The Steps Recorder Windows basically, is an assistance tool that mainly helps during troubleshooting. It can record any actions taken by a user on his computer. Once captured, the information generated can be sent to groups or persons who are assisting on the issue encountered. It is a built-in tool on Windows PCs that is supported by Windows 7, 8, and 10 OS. When using this, you’ll be getting output files in ZIP format.
You have to keep in mind that when using this tool, you would need to manually start and stop it. It can’t run in the background as some apps can do and it does not do automatic sending of information. You would need to send the details gathered to specific people whom you want to reach out to.

Part 2. How to Use the Steps Recorder in Windows 10?
Upon finding out brief information relative to Steps Recorder Windows from the first section of this post, we will now be delving into discussing how you can use the tool on your Windows 10 PC.
How to Record, Save, and Send
- Firstly, launch the tool. From the “Start” menu, look for “Windows Accessories”. This is where you can find this built-in recorder.
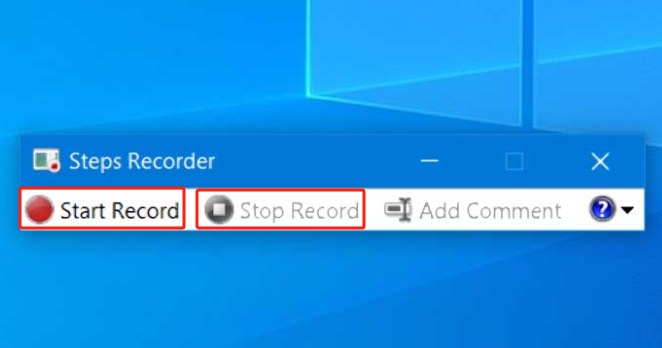
- Click the “Start Record” menu.
- You may now do the steps that you wish to be captured. Pausing for a few minutes and resuming at a later time can be done if preferred.
- Once finished, press the “Stop Record” option.
- You may review the recorded steps before tapping the “Save” button.
- Input the filename that you wish to use. You should have a file with a .zip file extension (as previously mentioned in the first part).
- To proceed and send the recording, from your email app, just simply attach the zip file.

Please take note of these things as well.
- If you wish to record the steps that you’re doing on a specific app, you have to go to that app after launching Steps Recorder Windows and then return to the recorder when done to stop.
- To open the recording, just simply open the zip file and double-click the recording.
How to Add Comments to the Steps Recorder
- Launch the recorder. The same as previously mentioned, this can be accessed from the “Start” menu.
- Begin by pressing the “Start Record” option.
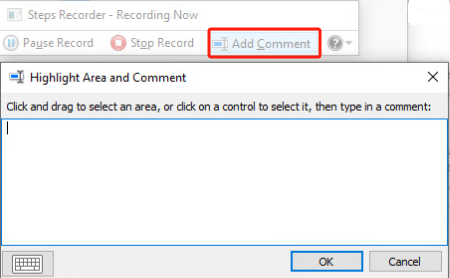
- Just perform the steps that you wish to be recorded. If you are looking at adding comments, tap the “Add Comment” option that you’ll see.
- Highlight and select the area on the screen that you wish to comment on. In the “Highlight Area” and “Comment Box”, make sure to input the texts that you like to add before pressing “OK”.
- When finished, just simply hit the “Stop Record” option.
- You may review the comments you put before saving the file.
- Name the file as you wish. It will then be saved with a .zip extension.

Alternatively, if you want to use keyboard shortcuts when adding comments at any point while you’re recording, you can hold your “Ctrl”, “Alt”, and “C” keys simultaneously.
When using the Steps Recorder Windows, you can also modify the settings if you prefer. You can do this by opening the app and then locating the “Settings” option. You can modify the “Output File”, “Enable screen capture”, and “Number of recent screen captures to store” menus. Keep in mind that when you change the settings, that will only be saved for the current session. When you close the app and reopen it later on, it will revert to the default settings. You can also enable or disable the app for your different needs.
Part 3. What Is the Best Steps Recorder Alternative?
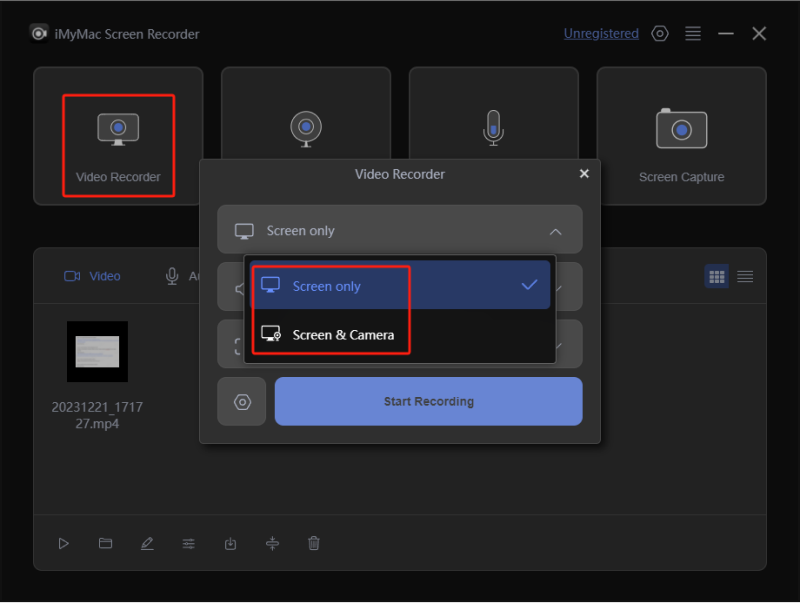
Though good enough as Steps Recorder Windows is free and is already a built-in tool on Windows 10 PCs, some users will surely find limitations and drawbacks while using this. In this instance, it would still be great to learn about a good alternative tool that can help you attend to your screen recording needs. A professional software program that’s proven reliable is the iMyMac Screen Recorder.

The abovementioned third-party software app has several added features apart from its main function – screen recording. While using this, one can decide on the recording area to capture as well as the type of sound to record. It has editing menus, real-time annotation buttons, and more. More so, its interface is simple so navigating through the app should not be a problem at all. It’s compatible with Windows and Mac computers as well so installation isn’t an issue at the same time.
Get A Free Trial Now! Normal Mac M-Series Mac Get A Free Trial Now!
Part 4. In Conclusion
Finding out more details about the Steps Recorder Windows would be so helpful for some users who aren’t on the lookout for professional options when screen recording. Given that it’s free and is a built-in app on Windows PCs makes it more appealing. However, for those who wish to have a more advanced screen recording experience, it is always best to rely on professional tools like the iMyMac Screen Recorder.


