


Whether you are creating a tutorial, displaying software, or retaining your favorite game clips, knowing how to screen record on Windows is an essential skill for your needs. In this guide, we will gradually explore the best recording tools to show you the recording process and provide recording techniques to ensure that your screen recording can be simply achieved and professional. Ready to improve your screen recording ability and unlock the possibility on a Windows device from now on? Keep Reading.
Contents: Part 1. Can You Screen Record with Windows Media Player?Part 2. How to Record Your Screen with Snipping Tool in Windows 11?Part 3. How to Screen Record on Windows 10 with Built-in Xbox Game Bar?Part 4. How to Screen Record on Windows 10 with Audio via VLC?Part 5. In Conclusion
Part 1. Can You Screen Record with Windows Media Player?
Windows Media Player (WMP) is the default multimedia player of Windows, which is widely used in video playback but not good for screen recording. Unlike professional screen recording software, WMP lacks the function of capturing screen activities. The software emphasizes that WMP is mainly designed for playback, which limits the recording function.
Although WMP is an excellent tool for you to enjoy multimedia content, the disadvantage is that it cannot record the screen will make users seek alternative solutions for effectively capturing and sharing their desktop activities.
To find a powerful and user-friendly solution on how to screen record on Windows, iMyMac Screen Recorder is an excellent choice. It provides a comprehensive set of functions that can easily capture activities on the screen. Here are the steps to record the main screen of this screen:
Get A Free Trial Now! Normal Mac M-Series Mac Get A Free Trial Now!
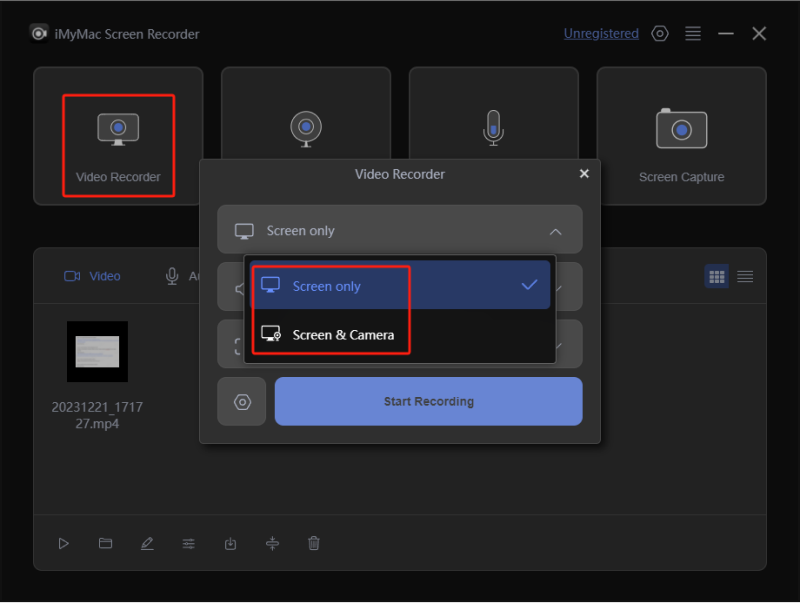
- Install and start the iMyMac Screen Recorder on your computer, and then select "Video Recorder" from the main interface.
- Select "Screen Only" to capture the entire screen or select "Screen & Camera" to record the screen and camera at the same time.
- If selecting the later one, the program will automatically detect your webcam. In case of non-detection, click "Recheck". Proceed by clicking and specifying the recording area: Full Screen, Window, or Custom Size.
- Fine-tune audio preferences by deciding whether to record system sound, microphone input, or both. Click "System Sound & Microphone" to capture both simultaneously. Alternatively, opt for "Microphone" or "System Sound" to record only one type of sound. If no sound recording is preferred, choose "None".
- Click "Start Recording" to initiate the screen capture process. If you've selected "Window" as the recording area, a window will appear displaying various program windows. Simply choose the desired window, and the software will identify it automatically.
- Conclude the recording by clicking the red stop button. The recorded file is then saved on your computer. If you need to stop the recording for a while, use the "Pause" button and resume by clicking it again when you are ready to continue recording. And the "Restart" button allows you to discard the previous recording and start a new one.
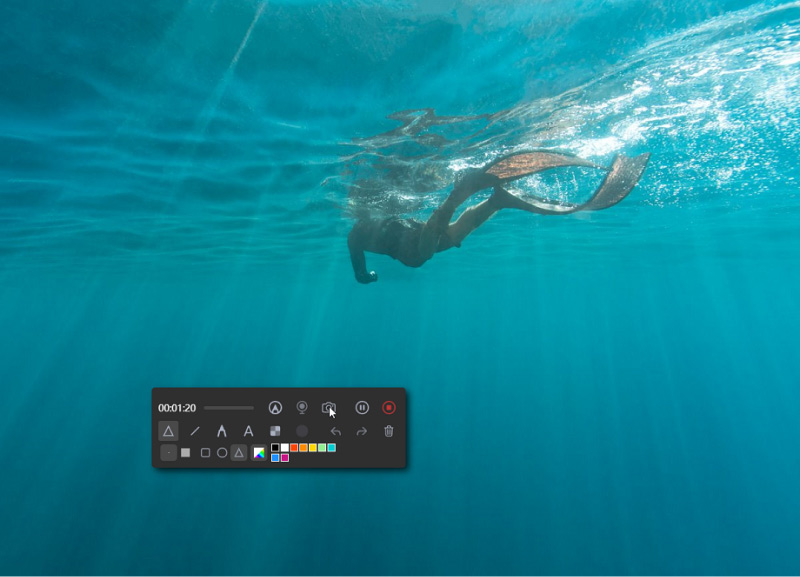
Tip: Throughout the how to screen record on Windows process, a floating toolbar with annotation tools and additional buttons will be visible. Click "Edit" to choose annotation colors and utilize tools such as lines, circles, rectangles, triangles, arrows, text, brushes, and erasers. Additionally, Undo, Redo, and Clean buttons facilitate smoother annotation. In addition to annotation tools, you'll find buttons for activating the webcam or taking screenshots while recording.
Part 2. How to Record Your Screen with Snipping Tool in Windows 11?
Windows 11 has launched an improved Snipping Tool that surpasses the traditional screenshot function and allows users to easily record their screens. Following the simple steps below on how to screen record on Windows with the function of the Snipping Tool:
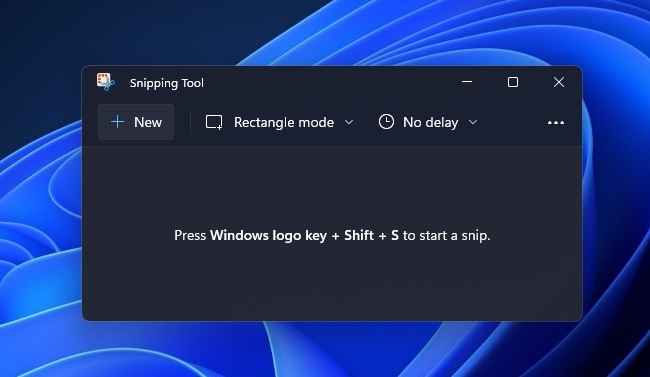
- Click the Start menu on the Windows 11 system and search for "Snipping Tool". Then launch it.
- To activate the screen recording mode, click the drop-down arrow next to "New" and select the "Screen Snip" option.
- Drag the cursor to select the screen area to be recorded. You can capture the entire screen or a specific area.
- After selecting the recording area, the Snipping Tool will start to capture your screen. At this time, a timer showing the duration of the recording will appear.
- After the recording is completed, you can make annotations or add text to your recording video. After the edition is completed, you can click "File" and then "Save As" to save your screen recording.
Windows 11's Snipping Tool provides a fast solution to help you perform screen recording, which can easily and simply capture any activities on your screen.
Part 3. How to Screen Record on Windows 10 with Built-in Xbox Game Bar?
Windows 10 comes with a powerful tool for screen recording - the built-in Xbox Game Bar. This function was originally designed for games, but it now supports capture of various screen activities. Below is how to screen record on Windows 10 using the Xbox Game Bar:
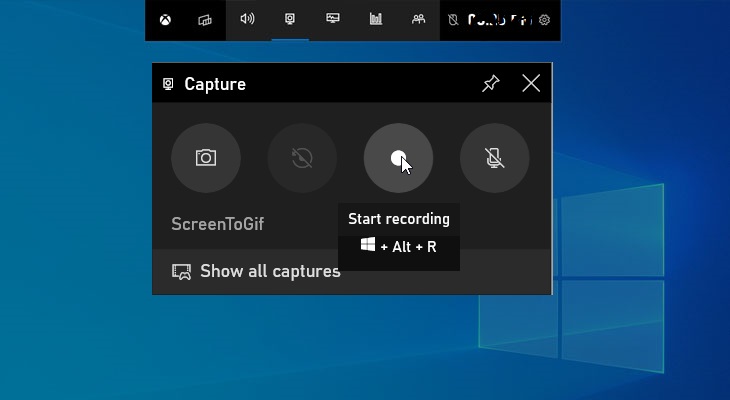
- You can press the "Windows key + G" to launch the Xbox Game Bar. If a prompt pops up, you just need to confirm that the application you want to open is indeed a game program, even if your purpose is not a game but a recording.
- To start the screen recording, click the red "Record" button located in the stacking layer of this Xbox tool. If this is your first time to use this tool for recording, the necessary permissions may need to be granted.
- Before starting recording, you can customize various settings options, including video quality, recording format, and audio settings according to your needs.
- After completing the settings, click the "Start Recording" button to capture the content you need.
- During the recording process, you can also pause or stop recording or even obtain screenshots through a small control tool appearing on the screen.
- When you want to end the recording, you only need to click the stop button. Then your recording will be automatically stored in the "Captures" folder under the "Videos" library.
The Xbox game bar provides a user-friendly and convenient method for screen recording on Windows 10 to capture and share screen activities without downloading third-party software. Whether you want to record your favorite games or show new products to users, this built-in tool can be your good choice.
Part 4. How to Screen Record on Windows 10 with Audio via VLC?
VLC Media Player is known for its various functions such as converting format and editing. In addition, it also includes a powerful function - screen recording. Use the steps below on how to screen record on Windows via VLC's screen recording function:
- If you still do not have the VLC installed on your device, download and install the latest version from its official website (https://www.videolan.org/). Then launch it.
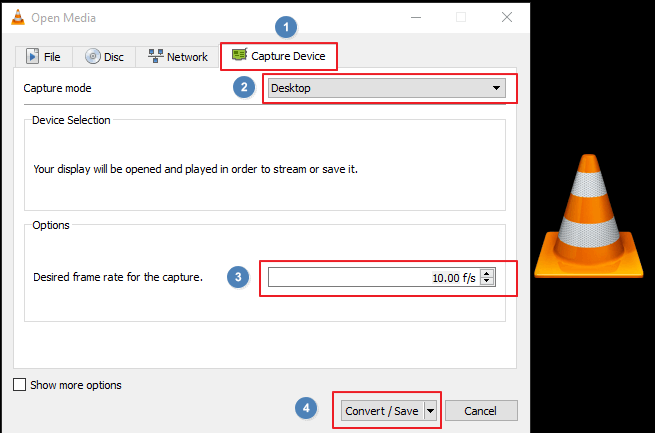
- In the top menu, click "Media" and then select "Open Capture Device".
- To start the recording mode, you need to select "Desktop" under the "Capture Device" tab. If you need to select the best frame rate for your recording, go to the "Desired frame rate" for settings.
- Tick the box next to "Show more options" and make sure that the "Play another media synchronously" option is selected. Then select "Convert" after clicking the arrow next to "Play".
- Go to the "Profile" drop-down menu to choose the video and audio format for your recording, and click the "Browse" button to select the destination of your recorded file.
- Click the "Start" button to start screen recording on Windows. VLC can also capture the audio while recording your desktop.
- Just click the stop button in the VLC player to stop recording. Then the files you record will be saved in the destination you chose before.
The VLC can capture audio while recording the screen. This function allows it to accurately and flexibly capture desktop activities on Windows 10.
Part 5. In Conclusion
Although Windows 10 provides several built-in options for screen recording, the iMyMac Screen Recorder is the best choice for a functional experience on how to screen record on Windows. Unlike Windows Media Player which lacks a screen recording function, iMyMac provides an easy-understanding interface and advanced features.
Users can easily customize the recording area, set the audio format, and use its annotation tool to obtain better screen recording. Whether you are the founder, educator, or business personnel, you can capture, edit, and share your screen activities effortlessly. It can also capture the screen and network camera at the same time, which is the preferred tool for Windows screen recording.