


Whether you're preserving precious memories or sharing a project with others, the ability to burn video to DVD is still essential. Despite the dominance of digital streaming, DVDs remain a reliable way to store and distribute videos. In this guide, we'll walk you through everything you need to know, from converting your video files to creating a playable DVD on both Windows and macOS.
Contents: Part 1. Convert Your Videos to DVD-Compliant FormatPart 2. Burn a DVD Using Built-In DVD Burning ToolsPart 3. Burn a DVD Using DVD Authoring Software (Playable DVD)Part 4. Summary
Part 1. Convert Your Videos to DVD-Compliant Format
DVD players can’t play just any video file. They require a specific format and structure. Your MP4, MOV, AVI, or MKV files must be converted to the VIDEO_TS folder structure, which contains the necessary .IFO, .BUP, and .VOB files. Before you burn video to DVD, you need to ensure your video files are in a DVD-compliant format. That's where iMyMac Video Converter comes in.
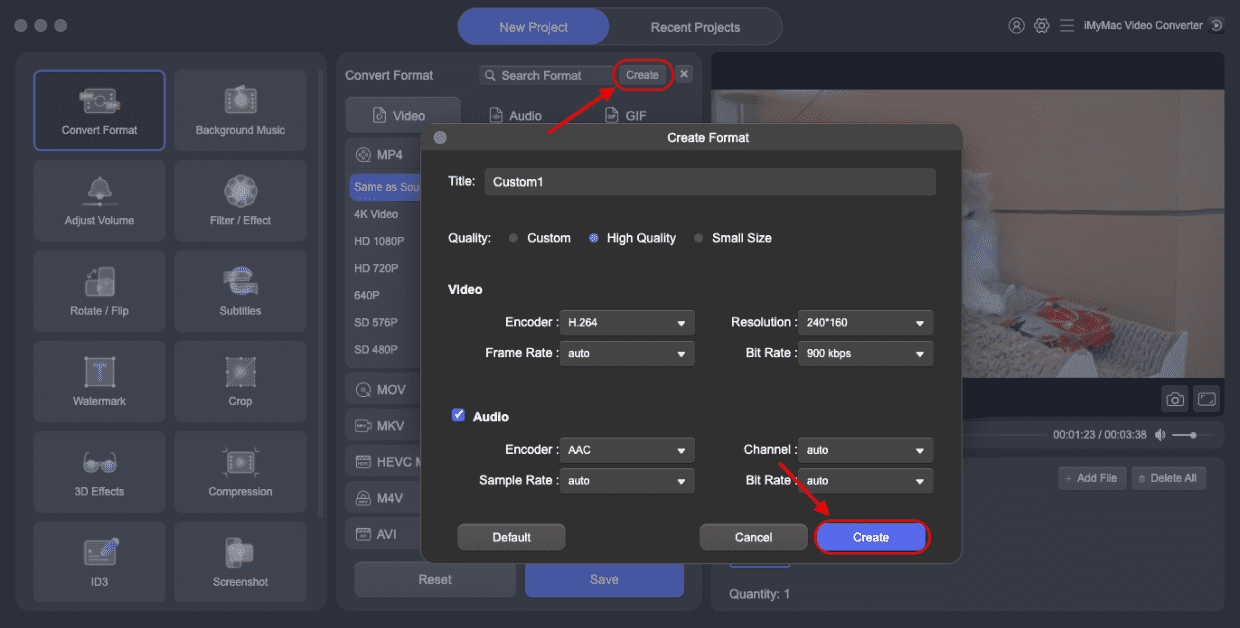
iMyMac Video Converter is an all-in-one video tool that simplifies the conversion process. It lets you convert almost any video format into a DVD-compliant format. Whether you're working with high-resolution MP4s or older AVI files, the software ensures they are transformed into VIDEO_TS structure, ready to burn.
Besides standard VIDEO_TS, iMyMac Video Converter supports a wide range of output formats. You can tailor your conversions for different needs: MP4 for online streaming, MOV for Apple devices, and VIDEO_TS for burning to DVD.
Before you burn video to DVD, use the built-in editor to trim, crop, or add effects. This gives your videos a professional touch. You can also adjust resolution, bitrate, and aspect ratio to match DVD requirements. Have multiple videos to convert? iMyMac allows batch processing, saving you time. Just queue your files and let the software do the work. By using iMyMac Video Converter, you lay the perfect groundwork to burn a video to DVD successfully.
Here's how to use it:
- Download and install iMyMac Video Converter on your Mac or Windows computer.
- Launch the program and select the "Converter" tab.
- Click on the "Add Files" button to import the audio file(s) that you want to convert to video.
- Once your file(s) have been added, select the output format as "VIDEO_TS" or any other video format you prefer.
- You can also customize the video output by adjusting settings such as resolution, bitrate, and frame rate.
- Click on the "Export" button to start the conversion process.
- Once iMyMac has done its job, your file will be transformed into a VIDEO_TS file that you can then burn video to DVD.
Part 2. Burn a DVD Using Built-In DVD Burning Tools
Once your videos are converted, it’s time to burn your video to DVD using tools already available in your operating system.
Windows: File Explorer DVD Burner
This built-in feature allows users to burn video to DVD quickly, although it doesn’t support menu creation or advanced customization. Follow these steps to burn a video DVD:
- Insert a blank DVD into your drive.
- Open File Explorer and drag the converted VIDEO_TS folder onto the DVD drive.
- Right-click the drive > “Burn to disc.”
- Choose "With a CD/DVD player" option for a playable DVD.
- Follow prompts to finalize and burn.
macOS: Finder
- Insert a blank DVD.
- Open Finder and create a new burn folder.
- Drag your VIDEO_TS folder into it.
- Click “Burn” in the top-right corner.
- Wait for macOS to finalize the burn.
While this is a simple method to burn video to DVD, it doesn't produce a fully authorized, menu-based DVD. Still, it's a great option for fast sharing and backups.
Part 3. Burn a DVD Using DVD Authoring Software (Playable DVD)
To create a fully authored DVD—complete with menus and chapters—you’ll need dedicated DVD authoring tools.
Windows: DVD Flick
DVD Flick is a free and reliable tool to burn a video DVD on Windows. It’s a great solution if you want to create professional-looking DVDs without a steep learning curve. Follow these steps to burn video to DVD:
- Download and install DVD Flick.
- Add your converted VIDEO_TS folder or supported video files.
- Customize menus, chapters, and playback options.
- Insert a blank DVD and click “Create DVD.”
- DVD Flick will encode and burn your disc.
macOS: Burn
Burn for macOS is another free tool that helps users burn video to DVD easily. Burn offers a user-friendly way to create menu-driven DVDs on Mac, making it ideal for personal or professional projects.
- Download and open Burn.
- Go to the “Video” tab and select “DVD-Video.”
- Add your VIDEO_TS folder or compatible video files.
- Insert a blank DVD and click “Burn.”
- Choose your encoding settings and proceed.
Part 4. Summary
The ability to burn video to DVD is still highly valuable, whether for backups, distribution, or personal enjoyment. With tools like iMyMac Video Converter, you can easily convert your videos to the correct format. From there, you can burn them using built-in tools or professional software like DVD Flick and Burn. Get started today and preserve your videos the right way!
