


Picture this. You’re doing some research online and all of a sudden, Chrome keeps crashing. It’s okay if it crashes once but if it keeps on crashing, then it’s no joke. You’re not going to be able to get to your favorite websites.
That could be pretty annoying. At some point, you might even panic. You’re going to wonder, what’s wrong? If Chrome keeps crashing on your computer, you’re going to have to find out why that’s happening so that you could do something about it.
The good news is that you can do something if Chrome keeps crashing. Read on to see what you can do to fix this issue.
Contents: Part 1. Reasons for Why Chrome Keeps CrashingPart 2. What to Do to Stop Chrome from CrashingPart 3. Conclusion
Part 1. Reasons for Why Chrome Keeps Crashing
If Chrome is crashing, freezing, or simply slowing down on your computer, there are a couple of reasons why. Below are the possible reasons why you’re having problems with Chrome.
Mac is Slowing Down
The first possible reason why your Chrome is crashing, freezing, or slowing down is that your Mac could be running slow. The outdated system caches could be slowing down your Mac, causing the plugins of Chrome to crash. This could also be causing the battery of your Mac to drain fast.
System File Problems
Another good reason why your Chrome keeps crashing is that the system files could be corrupted. It could also have been infected with malware.
Chrome Taking up RAM
Chrome is such a useful browser. When it works well, it is able to display the pages immediately. You usually sign into it to sync your bookmarks, autofill info, and other apps with it. With all the features and benefits it offers, it could take up a lot of your RAM and that could eventually lead it to crash, freeze, slow down, or not load at all.
Compatibility Issues with Other Apps and Programs
It’s not far from impossible that other apps and programs that you’re using could be causing it to crash, freeze, slow, or not respond at all. Some of these apps or programs could network-related or even worse, malware software that’s causing problems with Chrome.
No Internet Connection
Another possible reason why you’re Chrome is crashing, freezing, or slowing down is that there’s no internet connection.
Chrome Wasn’t Shut Down Properly
There are times when you forget to shut down an application properly. This usually happens when you’re in a hurry. You just go right ahead to shut down your computer without closing the apps that are still open.
Malicious Chrome Extensions
If your Chrome is crashing, freezing, slowing down or not responding at all, the Chrome extensions are probably malicious or badly designed. There may also be some add-ons that were once working but aren’t anymore.
Part 2. What to Do to Stop Chrome from Crashing
Given all these reasons why your Chrome is crashing, freezing, slowing down, or not responding at all, there are ways for you to work around them. This part will show you the various ways on how to work around a problematic Chrome.
Option #1: Use iMyMac PowerMyMac to Speed Up Mac
You can’t exactly blame Chrome if it’s not performing well. It could be your Mac that’s causing the problem. For all you know, your Mac can’t handle the task anymore. It’s slowing down because of the outdated caches that you have not cleared in a very long time.
Furthermore, there’s probably a lot of junk files on your Mac that’s causing it to slow down and affect the performance of your Chrome. If you want to see how your Mac is performing, then it’s time you install the iMyMac PowerMyMac.
The good thing with it is that it can also clean up the malicious extensions that are added on to your Chrome. So, if you want to keep your Mac running in top condition to avoid problems with your Chrome, then read the steps below to see how you can use it.
- Access the PowerMyMac
- Click on Junk Cleaner module, do a Scan and delete the junk files
- Click on Extensions module to disable unneeded plugin

Continue reading the detailed steps below to get a better grasp of how the PowerMyMac works. You’ll find that it’s very easy to use to keep your Mac in tip-top shape.
Step 1: Access the PowerMyMac
You can access the PowerMyMac on the website of iMyMac or you can simply click on this link. Download it so that you could install it. After that, launch it on your computer to see how simple it is to use it.
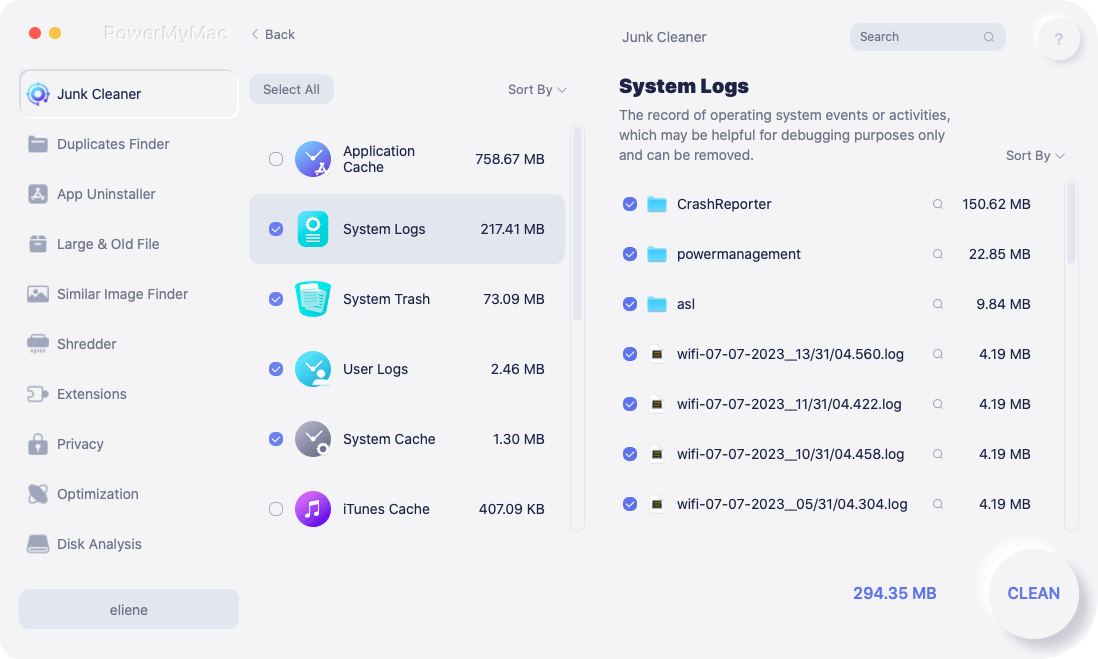
Step 2: Click on Junk Cleaner
If you want to clean out the junk files on your Mac’s system, you just have to click on Junk Cleaner. This is listed down on the screen. What this will do is to clean up those items generated by your Mac’s applications and system.
Step 3: Do a Scan
Click on the Scan button to see all those system junk that you could cleanout. After Scanning, the junk files will appear on your screen. You just have to choose which junk file to clean out. Click on the Clean tab. Once you click on that tab, your Mac will start to run pretty fast again.
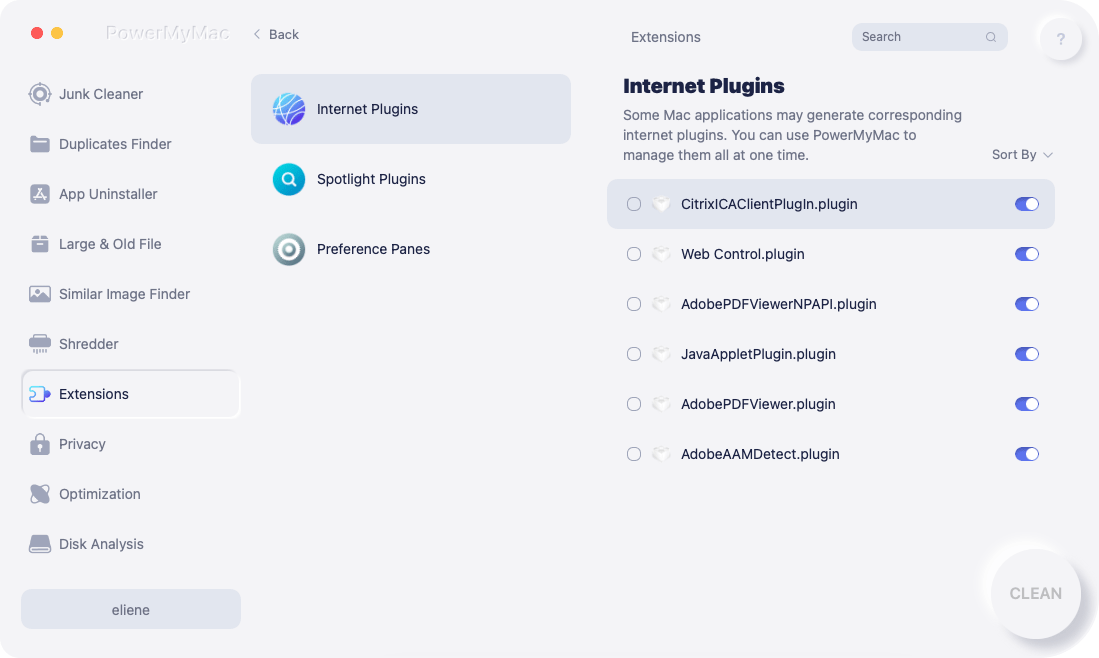
Step 4: Click on Extensions
If you want to make sure that there aren’t any malicious extensions added on to your Chrome, you can take your cursor and click on Extensions module. Click on the Scan button for all the Extensions to show up. Choose Chrome extensions and clean them out.
Option #2. Run System File Check
You can also check on the system file of your Mac. The steps below will show you how to run a file system check on your Mac.
Step 1. Restart your Mac
You need to restart your Mac. You can do that by holding down CTRL-Command-Eject. Wait for the chime to sound.
Step 2. Wait for the Screen to Load
When you hear the chime, hold down Command+S. The screen will eventually load. Don’t panic with the way your screen looks. It’s going to look dark and pretty scary at first. Wait for the lines to load on your screen.
Step 3. Type in /sbin/fsck -fy
The lines will load one at a time. When you see the line :/root#, type in /sbin/fsck -fy. Make sure to type in the line exactly the way you see it. That means it’s a must to put a space before typing in the dash (-) after the letter k. If you want, you can just copy and paste the exact path on the line. After you have typed or pasted on the line on the root, hit Enter. Once you hit Enter, just wait because the system will be checked at this point. You will see more lines appear on your screen.
Step 4. Reboot Mac
When you see the line that says ## The volume SL160 appears to be OK, then there’s nothing to worry about. On the last line where it says :/root#, type in the word reboot. Then hit Enter. If you get errors, run the command again and it should go through and say File system was modified. It’s a good idea to do this once a month to make sure your Mac is running smoothly.
Option #3. Shut Down Chrome Properly
If you’re having a problem with Chrome, make sure that it’s shut down properly. If it’s not shut down properly, it might take up a lot of your RAM. To check if it’s shut down properly, check out the steps below.
Step 1. Go to your Launchpad Area on Mac
The first thing you should do is go down to your Launchpad area on your Mac. You want to get into the available programs that are commonly used. These are the programs that you probably see quite often.
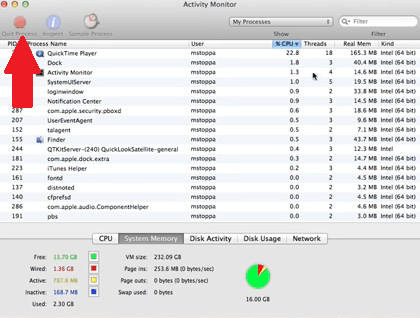
Step 2. Look for Activity Monitor
To look for the Activity Monitor, take your cursor to the tab that’s called Other. Click on Other to see Activity Monitor. The Activity Monitor is very similar to the Task Manager on a Windows PC. This is the area where you can see how much of your CPU or RAM is being used up by any application at one time.
Step 3. Shut Down Chrome Properly
Scroll down the Activity Monitor and search for Chrome. You might want to close that down properly to avoid it from crashing, freezing, or slowing down the next time you need to launch it. You could properly close that down by hitting the red button on the top, left-hand side of the screen.
Option #4. Switch to a New Profile
It’s also a good idea to switch to a new profile. The steps below will show you how to do it.
Step 1. Take Cursor to Google Chrome Settings
There are three dots, vertically aligned at the top, right-hand corner of your Chrome screen. Click on these dots.
Step 2. Click on Settings
Once you click on the three dots, the drop-down menu of your Google Chrome settings will appear. Scroll down and click on Settings. You will find this below Edit and above Help.
Step 3. Click on Chrome Name and picture
On top of the screen, under People, click on Chrome name and picture. You can edit a person by adding another. Just change the number and choose a profile. You can also just click on the word Add if you click on the icon before the three vertically-aligned dots.
Option #5. Check Chrome Compatibility with Apps and Programs
You can also check the compatibility of Chrome with the apps and programs that you’re using. It may be that you’ve just installed a new app or program that could bring about compatibility problems. The steps below will show you how to do it.
Step 1. Go to Google Chrome Settings
Got to Google Chrome settings by clicking on the three vertically-aligned dots you see at the top, right-hand side of the screen.
Step 2. Click on Settings
Scroll down the drop-down menu until you see Settings. Click on Settings.
Step 3. Go to Advanced
When you get to the Settings page, take your cursor to the left panel and look for Advanced. Click on it.
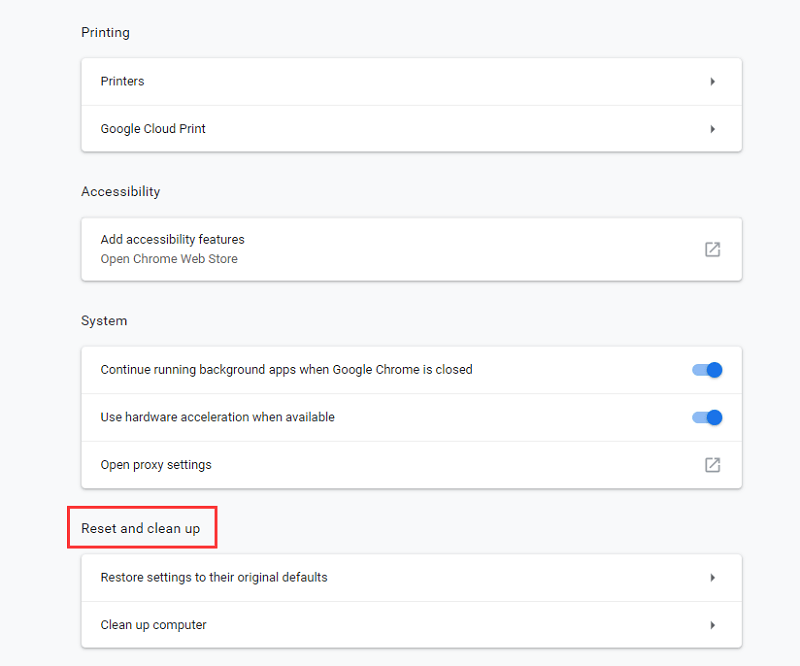
Step 4. Remove Incompatible Apps
Scroll down the page until you get to the Reset and clean up area. There you can either restore settings to their original defaults or clean up your computer.
Option #6. Run Anti-Virus Software
Even if you’re on a Mac, it’s a good habit to install anti-virus software. Run it to see if your Mac is infected.
Step 1. Click on the Anti-Virus Software
Look for your anti-virus software and launch it. If you have not scanned your Mac with your anti-virus, maybe it’s time that you do so.
Step 2. Run a Scan
Run a scan. Most anti-virus software has a quick scan button that you can just click on it.
Step 3. Check Files
After the files, you can check the diagnosis. From there, you will know if your Mac has been infected.
Part 3. Conclusion
The next time you have problems with Chrome, do not panic. There are ways to fix a problematic Chrome. However, if you want to avoid any problems with Chrome, it’s best to use the iMyMac PowerMyMac. With this amazing program, you’re keeping your Mac in good running condition so that it always works well with Chrome.
Have you ever had any problems with Chrome? If yes, how did you solve it? Feel free to share your experience with us.

