


If you use the Android emulator Bluestacks to access mobile apps or games on a Mac or Windows computer, BlueStacks requires a lot of storage space when you install several games and programs, which might affect how quickly and efficiently your computer operates. To gain more storage, you must clear BlueStacks cache.
Similar to all other Android emulators, BlueStacks uses a significant amount of data, as well as the emulator, keeps the cached files long after you've stopped using Android applications. We must clear caches to free up disk space to maintain computer performance
Contents: Part 1. Why Is It Important to Clear BlueStacks Cache?Part 2. The Easiest Tool to Delete BlueStacks Cache on MacPart 3. Manually Clean BlueStacks Cache on Windows/MacPart 4. Conclusion
Part 1. Why Is It Important to Clear BlueStacks Cache?
If you use an application often, its app cache will use more storage space over time, which might result in the program's performance being impaired or in the appearance of an error. It is for this reason that you will have to delete the BlueStacks cache.
It is highly recommended that you clear BlueStacks cache if the performance begins to visibly slow down or whenever there is an issue on any of the applications that you have loaded. You must delete the cached files and data stored in BlueStacks once you have completed utilizing the emulator. By using this method, you will be capable of releasing some of the storage space that is now being used on your machine.
Part 2. The Easiest Tool to Delete BlueStacks Cache on Mac
By using iMyMac PowerMyMac, you will have the ability to remove any Mac or Windows items or apps from your computer that haven't been used for a certain period. Using PowerMyMac Junk Cleaner, users can quickly and efficiently clear BlueStacks cache, hence making more storage space available.
Any part of the situation that can be gotten rid of should be, and it should be done as soon as possible. It is possible to quickly and easily clear BlueStacks cache from your Mac or Windows desktops with the help of the PowerMyMac Junk Cleaner, which is available to customers, including both Mac and Windows desktops.
The steps are broken down into their respective sections below for your reading.
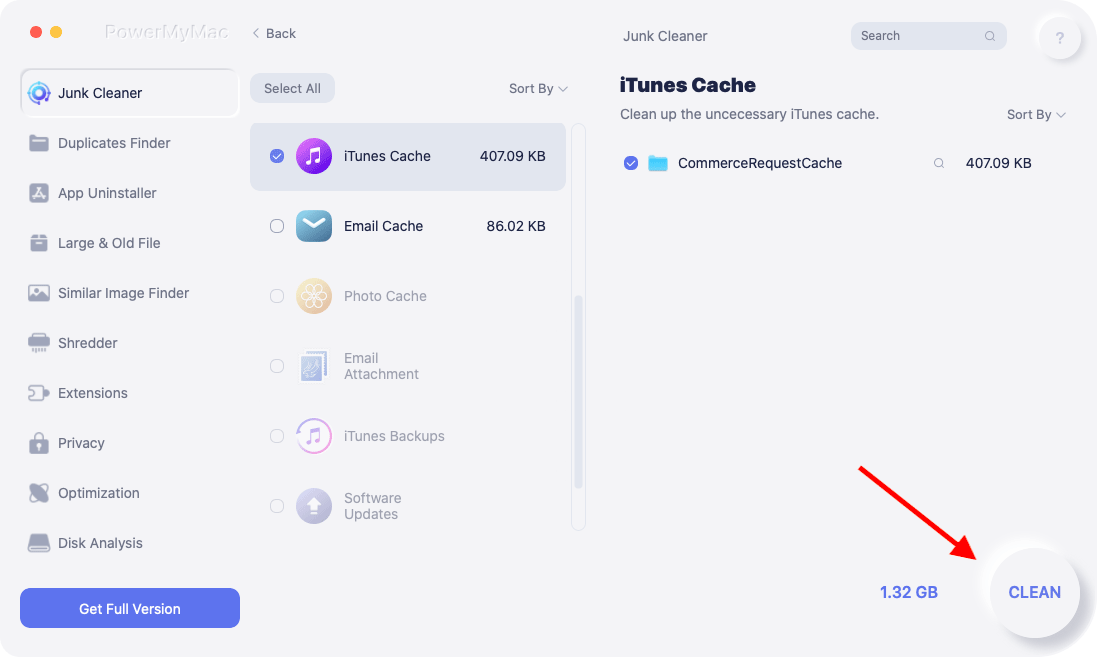
- From the menu of choices inside the Junk Cleaner tool, choose SCAN to begin the process of looking for items that just do not have enough space on your Mac or Windows computer. After then, the process of looking for undesirable files will start.
- After the scan is complete, compile and arrange all of the unwanted files that were found on your computer, and then delete
- Choose the objects that you wish to discard; selecting all will result in discarding all of the items to clear BlueStacks cache.
- If "CLEAN" is selected from the menu, the unneeded data will be removed immediately after the selection is made. A notice pop-up with the title "Cleaned Completed" will display on the screen after the cleaning process has been finished.
- The memory capacity that is now being used, together with the total memory capacity that is available, will both be shown on the screen at the same time simultaneously. You may delete more files by going to the Displays menu, choosing the Review option, and then clicking "Yes" to confirm the deletion.
Part 3. Manually Clean BlueStacks Cache on Windows/Mac
In this section, we'll guide you through the process of how to clear BlueStacks cache and data for Windows and Mac. Let's have a look.
Clear Google Play Services Cache
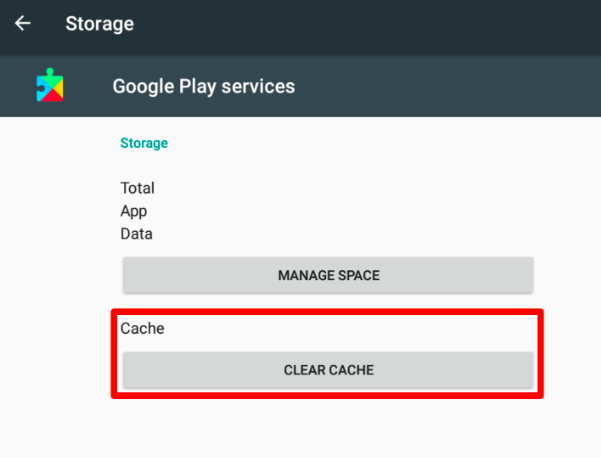
Users should first clean the Google Play Services cache since BlueStacks downloads applications and games from the Play Store. Here is how you clean the cache for Google Play Services.
- Open BlueStacks on the computer and go to the System Apps directory first. Choose Settings next.
- Choose the Apps option within App settings.
- After that, find and choose Google Play Services. Choose the Storage choice.
- On your Google Play store, select on Manage Space button.
- Click the Clear all info choice on the following window.
Clear BlueStacks Cache Data Android
This is another method that works well for clearing BlueStacks' cache. Your BlueStacks Preferences app's data and cached files will be cleared by doing this. Here are a few easy steps you need to do.
- Open BlueStacks on your computer and go to its System Apps folder next. Select Settings next.
- Choose the option for Storage in the application settings.
- On the Storage window, scroll to the bottom towards the Cache Data choice.
- At the confirmation window, press the OK option.
Open the Disk Cleanup Tool in Bluestacks
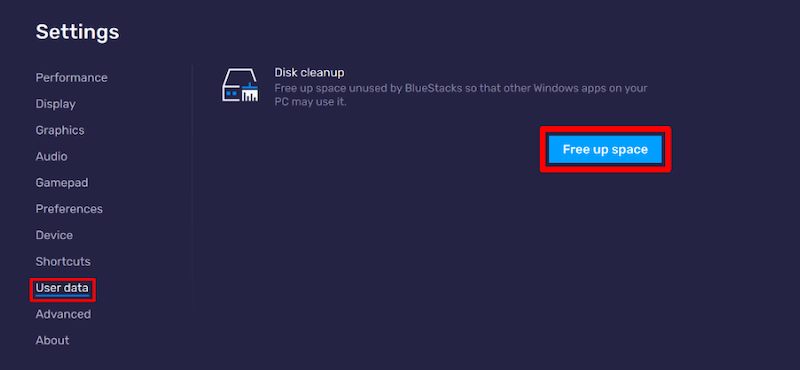
Additionally, BlueStacks comes with the Disk Cleanup tool that clear BlueStacks cache and data. Your gadget will have some more space as a result. Using BlueStacks' Disk Cleanup is explained here.
- Start by selecting the little gear icon in the BlueStacks emulation application on your computer.
- Select the User information option on your Settings page.
- Select Free Up Space next to Disk Cleanup on the right-hand side of your screen.
- On such a confirmation window, choose the Continue option.
Cache Removal Instructions for BlueStacks for Mac
- On your Mac, go to the Preferences page for the application.
- After opening the app, choose Bluestacks in the upper left corner of your screen.
- Choose like, and after that, click user data in the pop-up which opens at the upper part.
- Choose the option to save space and simply Click continue to verify your choice.
- Bluestacks will stop working while it searches and organizes your data. Any unused space will be cleared off when you restart the program.
Part 4. Conclusion
It's easy to clear BlueStacks cache for Windows or Mac computers. Using any of the aforementioned methods will allow you to save up disk space for your Mac or Windows computer. Besides BlueStacks cache, you can also try to remove Steam cache, and use and try to know about the PowerMyMac Junk cleaner.

