It’s convenient to have fraps for Mac. You will never know when you need it. It’s just good to have it in your computer. For gamers, it’s critical to have it. Teachers and students can also benefit from using fraps. It’s a superb teaching and learning tool. Unfortunately, fraps are only available on Windows.
Now, that doesn’t mean that Mac owners cannot record videos on their computers and laptop. While fraps are only available on Windows, there are options for Mac owners. Yes, the good news is that there are fraps for Mac.
Read on to learn about the 8 legitimate options to fraps for Mac.
Article GuidePart 1. Top Fraps for Mac UsersPart 2. A Powerful Tool Help Keep Your Mac in Top ConditionPart 3. In Conclusion
People Also Read:How to Edit Videos on Mac with iMovie

Part 1. Top Fraps for Mac Users
Option #1: Quick Time Player
All mac owners can find Quick Time Player in their laptop and computer since it is an Apple software. It’s very easy to use Quick Time Player. Just follow the steps below.
- Go to Finder.
- Type in Quick Time Player in Finder.
- Click on “This Mac.”
- Drag the Quick Time Player to your Dock.
- Click on it and you will see in the left-hand corner of your Mac screen.
- Go to File to start recording.

Option #2: Apowersoft Mac Screen Recorder
This is another good option for fraps for Mac. It is a free software. Best of all, it’s easy to use. Once you master this software, you can create vivid videos with it.
- Download the software.
- Make some changes to the settings by clicking on Options. From the Options, you can set the appearance of the curser and make adjustments to the video, frame rate, and quality. You can also set the hotkeys and the audio input.
- Open the video that you want to record.
- Choose a recording mode from the list. The three choices on the list are full screen, region, and web camera.
- Set the capture frame on the video.
- Click OK to start recording.
- Click the Stop button to stop the recording. The video you recorded will pop up on your Mac screen.
- Convert the video using the built-in tool Video Converter.
- Choose the format.
- Click Start.
- Click OK once you see a popup.
The Apowersoft Mac Screen Recorder also boasts of a Task Scheduler that allows you to record your screen activity in your absence. You just have to create a task by filling out the time and duration of the recording.

Option #3: Screenflick
This is a superb screen capture for Mac gamers. It’s loaded with options so that you have the freedom to explore your creativity in recording a video. It’s also very affordable.
- Download the application.
- Open the application to see Video Options.
- Set your options for video, audio, and camera.
- Click the red record button at the bottom.
- Fill up the Movie Info by naming your recorded video.
- Export your recorded video.

Option #4: Filmora for Mac
The latest version of Filmora has a lot of new features like video stabilization, reverse, and screen recording.
- Download the latest version.
- Open Filmora.
- Open Media Library.
- Click Record at the top.
- Select PC Screen in the drop-down menu.
- Select your settings on the Wondershare Screen Recorder pop up.
- Press F9 or click the stop button when you’re done recording.
Your recording will automatically be saved in Filmora

Option #5: Monosnap
This is a neat Mac application and it’s free. It’s more than just a screen shot app since it comes with a variety of features. It’s a very simple app. You’re guaranteed ease-of-use.
- Download and install the software.
- Open Monosnap. You’ll find it on the top part of your Mac screen.
- Choose and click Record Video.
- Click on settings on the top left -hand side of your Mac screen.
- Choose your settings.
- Fit whatever it is you’re recoding in the window.
- Click record to start recording
- Click on record again to stop recording.
- Save your video to your desktop. You can also upload it to a storage service.

Option #6: OBS Studio
OBS is a free and open source screen recorder. You can make stunning videos with it.
- Download and install OBS Studio for macOS 10.10+
- Open up OBS Studio.
- Set up Sources. You will see a box on the lower left side of the screen that’s labeled Sources.
- Select the plus sign and choose from the list of options. if you want to record your screen and save the video to your computer for editing purposes, you can select Display Capture from the list of the options.
- Create a new name on the Create/Select Source pop up screen.
- Click OK.
- Click on the Display button.
- Select the monitor that you want to record but if you’re working with just one monitor, you will only have one option on the list.
- Check Capture Cursor if you want your cursor included in the recording. If not, leave the box empty.
- Click OK.
If you want to record the video games that you play, you can do so by following the steps below.
- Go back to the Sources box.
- Select the plus sign again.
- Select Game Capture.
- Create a new name on the Create/Select Source pop up box.
- Check the box to make the source visible.
- Click OK.
- Select OK again when you get to the next screen. You don’t have to change anything there. If you want to change the settings on the Sources, click on the settings button. You can also delete a source by simply selecting the source and clicking on the minus sign below. Select Yes on the pop-up screen to delete the source.
- Make sure the source you want to use is at the top of the list.
OBS Studio also has the capability to record your desktop audio from websites, games, and other software on your computer. It also has the capability to record the audio from your mic.
- Go to the Mixer section. This is the box you will see on the right-hand side of the Source.
- Click on the settings on the Desktop Audio.
- Select Properties from the list that you will see on the drop-down menu.
- Select Default on the next screen.
- Click OK.
- Select the settings icon on Mic/Aux.
- Click on Properties.
- Choose the mic that you want to use.
- Click OK.
Option #7: Jing
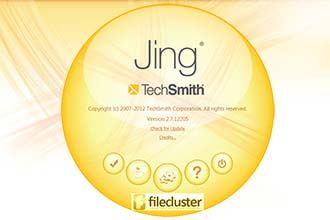
Jing is very easy to use and it’s free. Once it’s downloaded and installed in your computer, it’s comes out as a sun-shaped icon with buttons for your options. These options are More, History, and Capture.
- Download and install Jing.
- You can drag and move the sun-shaped icon anywhere on your screen.
- Click on the More option to check preferences. You can change video format and audio input here.
- Click the Finish button.
- Click the Capture option to drag and select the region of the screen you want to capture.
- Click on Video to record.
- Click the Finish button when you’re done.
- Name your video and save it.

Option #8: Snagit
Like Jing, Snagit is also very easy to use. They’re both created by the same company. So, if you’re used to using Jing, you won’t have a hard time Snagit.
Although the features are limited, you can get more if you pay for it. All your captured videos are stored in one location, which makes it easy for you to edit them.
- Download and install Snagit.
- Click on the Snagit icon to open it.
- Click on the Video option
- Mark out the area that you want to record on your screen.
- Click on the record button. That is the red box with a white circle in the middle. Take note that Snagit can also record your voice, which makes it a very good teaching tool.
- Click the black box with a white square in the middle to stop recording.
Part 2. A Powerful Tool Help Keep Your Mac in Top Condition
Adding fraps for Mac is a huge advantage for you. You will be able to do a lot of important task from your Mac.
If you’re a teacher, you will definitely need fraps for Mac. If you’re a hardcore gamer, fraps for Mac is something you need as well.
It’s definitely beneficial to add a screen capture and recording software to your Mac. However, it also wouldn’t hurt to install software that can help optimize the performance of your Mac. Such software like the PowerMyMac from iMyMac can help keep your Mac in top condition.
Chances are, you will end up with multiple copies of the same recorded video. You will only be needing one. The other copies will just take up some space on your Mac.
PowerMyMac can do find duplicate files and clean them up for you. You wouldn’t have to do anything to clean up you Mac. Learn more about PowerMyMac here.
Part 3. In Conclusion
The various recording software are all easy to use. Most importantly, they are safe to use on your Mac. These are, no doubt, good options to fraps for Mac.


moira2021-07-26 03:42:57
thank you for posting this Pamela! I appreciate you reviewed amazing software. The tools that you mentioned are really amazing and I know that they are really high-quality. I hope you can review online tools too just like record-screen.com, loom, and Vimeo record so that we can have lots of options. Other users don't have a budget to purchase software, so I guess it would be a big help If you have a list of online tools too. Thank you, and I am looking forward to it!
Katniss Lawrence2020-05-09 06:56:07
I have used one of the tools mentioned here. But AceThinker Screen Grabber Pro is the best recorder for me. It can record any videos on several streaming sites or video calls without any recording time limit. Also, it supports 4K resolution for cinematic viewing experience. Apart from that, it can record audio in system sound, microphone, or both to record.