


There are a number of reasons why you might want to allow pop-ups on your Mac device. For instance, you might want to ensure that certain functions operate properly (e.g., school and professional services). Or, you might wish to see everything a website offers to its audience.
It’s annoying when you realize that a pop-up window doesn’t show up when it’s needed. Your browser might have blocked it quietly. Now, we will discuss the various ways you can enable pop-ups on your Mac device using the most popular browsers. Hop in!
Article GuideHow To Enable Pop-Ups On Your Safari BrowserHow To Enable Pop-Ups On Your Firefox BrowserHow To Enable Pop-Ups On Your Chrome BrowserBig Tip: Speed Up Your Browsers And Your Entire Mac DevicePutting It All Together
People Also Read:How to Remove Ads on Mac?How to Turn off iMessage on Mac?
How To Enable Pop-Ups On Your Safari Browser
Safari is the default browser within Mac devices. It still allows you to manage pop-ups easily. You can do it by following the simple steps below:
Step 01: Open an active Safari window and click Safari. This is located at the upper left side of your Mac device.
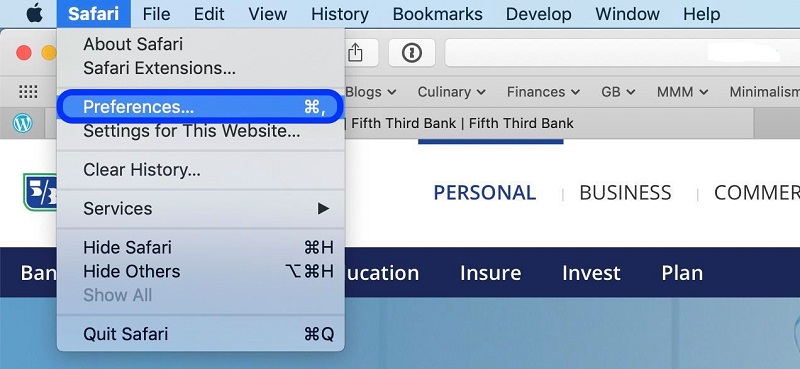
Step 02: Select Preferences. It will open up a new window with various icons for settings.
Step 03: Click the icon at the top that says Security.
Step 04: Now, look for the section that says Web Content. Several checkboxes will be placed beside it. Look for the checkbox labeled as Block Pop-Up Windows. Uncheck this box.
Now! It’s as simple as 1-2-3. In this case, 1-2-3-4. You can simply exit to go back to the previous active Safari window. After which, you can restart Safari to make sure your changes have taken place.
If a pop-up is bound to appear, Safari will block it and send a notification located in the address bar. It will tell you that it has blocked a pop-up. You can open this pop-up easily especially if you want a particular feature to be used in the browser.
What you can do is to click the notification in the address bar and Safari will give you a choice to view the actual pop-up. You might notice that this can be quite a hassle. It’s not one of the best ways a browser can manage pop-ups. However, it’s still useful if you only view pop-ups occasionally and you don’t want to permanently modify your settings.
How To Enable Pop-Ups On Your Firefox Browser
Firefox is still a popular choice when it comes to browsers especially since it launched Quantum. Thus, if you use Firefox, you can follow the steps below to enable pop-ups:
Step 01: Open a Firefox window.
Step 02: Click the menu button that appears as three lines.
Step 03: Choose Preferences.
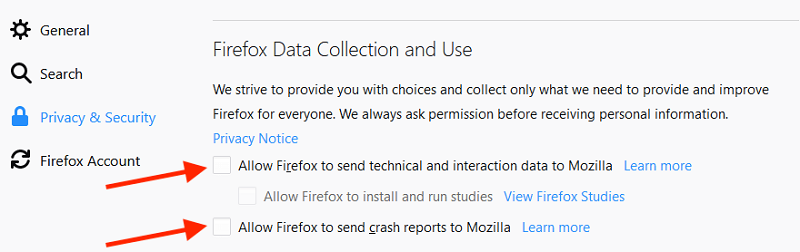
Step 04: Find the panel labeled Privacy or Security. This will depend on your browser version. Go to this panel. After which, locate a section named Permissions.
Step 05: One of the checkboxes is labeled “Block Pop-Up Windows.” As usual, you have to uncheck this box.
Step 06 (Optional): You might want to click “Exceptions” located on the right-hand side of the box labeled “Block Pop-Up Windows.” In this window that will appear, you can input addresses of websites where pop-ups are allowed. Click Allow adding the website to the list. You can add multiple websites if you wish. And if you want to remove this website from the list, you can do so as well.
How To Enable Pop-Ups On Your Chrome Browser
Chrome is a very popular browser especially for those who love to surf on Google. Now, let’s take a peek onto how Chrome handles pop-ups and what you can do about it.
Step 01: Launch the Chrome browser. Press the menu which looks like three dots. This is located in the top-right part of the screen.
Step 02: Choose Settings. A new tab will now open with the settings within it.
Step 03: Scroll down to the bottom part of the window that popped up. Choose Advanced.
Step 04: A section labeled Privacy And Security should open up. You should notice this instantly. In this part, look at the tabs and find the one labeled Content Settings. Select this tab.
Step 05: Another section will open up. Find the entry labeled Pop-ups. Select this entry and a new window will open up. You will see one option that allows you to switch between choices labeled Blocked and Allowed.
Step 06: Switch the option to Allowed. This will now allow “all” pop-ups.
Step 07: This section of Chrome settings has an option called Allow. In this section, you can place specific sites where you want to allow pop-ups to appear.
An option that enables the browser to automatically allow pop-ups on any site is also available. When Chrome blocks a page from opening a pop-up, a small icon will appear in the address bar. This icon says “Pop Up Blocked.” It appears like a small window with the character X on it. Simply click this icon in order to allow that specific pop-up. Or, you can choose to allow all pop-ups that come from that specific site.
Big Tip: Speed Up Your Browsers And Your Entire Mac Device
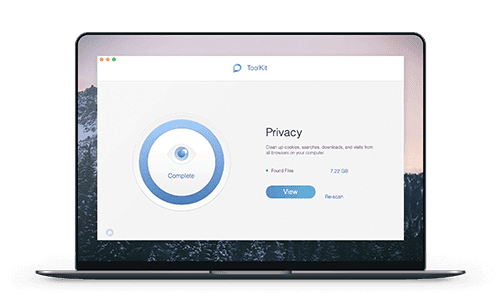
But if you want to take your game to another level, you can use iMyMac’s most powerful tool, iMyMac PowerMyMac. This tool allows you to check the status of your Mac device, clean up unnecessary junk files and provides a multifunction toolkit. You can easily manage files and uninstall applications without leaving junk residual files.
A very slow browser can be very annoying. Forget about having web pages that load too slow, you can speed up your browsers through PowerMyMac’s Privacy Tool. It helps improve your online browsing experience by cleaning up cookies, history, and junk files. Plus, it helps to protect sensitive information by clearing privacy traces. PowerMyMac can be used on macOS and macOS X.
Putting It All Together
Allowing pop-ups on your Mac device can be very useful especially if you want to take advantage of various functions within a website. There are different steps you can follow to enable pop-ups on popular browsers such as Chrome, Firefox, and Safari. But all of these browsers allow you to manage pop-ups with a few simple clicks. Finally, if you wish to speed up your browser experience and entire Mac device, you can use PowerMyMac’s Privacy tool and Master Scan Tool, respectively.

