


Information is now ubiquitous in your tiny, little devices. However, the limited screen space on your Mac prevents you from grasping every bit of information you need. That shouldn’t hinder your productivity. Instead, you should learn how to split screen on Mac to get more work done.
In fairness to you, you probably know how to split screen on Mac by now. The question is how are you doing it? Are you even aware of the various methods of how to split screen Mac?
If you’re aware of how to split screen Mac, good for you. Now, if you want to learn more about the latest methods of how to split screen Mac, then read on.
Article Guide3 Methods to Split Screen on MacBonus Tip: Considering the Health of Your Mac
3 Methods to Split Screen on Mac
Method #1: Maximize Screen
This first method doesn’t exactly split the screen but it is a good way to keep all the tools visible. Don’t you just hate it when all the tools are gone because you went full screen? You would have to exit full screen to go back the Menu or to the Dock.
Spare yourself the unnecessary clicks by maximizing your screen instead. This way, you get a view of the app in a bigger screen without losing the Menu and the Dock. You can use the Option key to maximize the screen without going full screen. Here are the two easy steps to do it.
- Hold down on the Option key. The full screen icon, which is the green button (with two little arrows pointing to the bottom left and top right) on the left-hand side of the top screen will turn into a plus button.
- Wait until the button turns into a plus sign. It will only take a second for the program to turn into a bigger screen. It won’t exactly turn into a full screen. It will just be big enough on the screen so that you could still see everything. The good thing about this feature is that you retain your menu bar and dock.
With the Option key, the program takes up all the space on your screen. However, your Menu and your Dock remain. That’s going to save you a lot of time since you wouldn’t have to end up searching and opening for the tools that you need.
Method #2: Mission Control
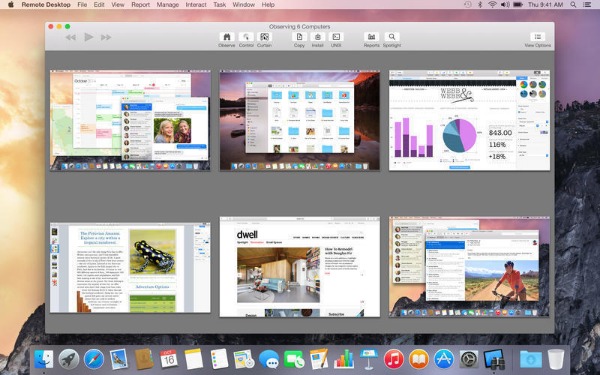
The Mission Control is a wonderful tool that can help you get things done in shorter span of time. It’s great for multitasking. You can see exactly where your programs are and you can switch from program to another effortlessly.
Mission Control helps you create spaces so that you can assign different programs. So even with your limited screen size, you get to see multiple programs all at the same time. That’s pretty neat, don’t you think?
Here’s a good example of how Mission Control works. If you want multiple screens assigned to multiple apps all at the same time, you can use the Mission Control to do just that. As a matter of fact, the Mission Control can help you create up to 26 different spaces on your screen. This is the most extensive way as to how to split screen Mac.
If you have a lot of apps running, they can all be opened at the same time. However, it’s still tough to be productive with the apps on top of each other. That can get too overwhelming for you, don’t you think?
With the apps on top of each other, your screen is just going to look too messy. This is where Mission Control can help you. You can use this awesome feature to switch between apps and bring the window you want upfront. Just imagine the time you can save when you have to switch between apps?
Needless to say, the best way as to how to split screen Mac is with Mission Control. Now, there are two ways to launch Mission Control.
1) Press on the F3 key. You might need to use to press on the fn key as well. You can also press on the Control and Up arrow.
2) Use your trackpad. This is another way to launch Mission Control. On your trackpad, use three or four fingers to swipe up. This simple gesture will launch Mission Control.
If you have been using Mission Control, you will notice a few changes. For example, you will see the word Desktop at the top of the screen. That takes the place of the miniature representation of the actual screen that you used to see before. Nonetheless, that is still the same place where you can create virtual desktops. Another addition is the + button on the top right-hand of the screen.
Another awesome feature of Mission Control is that it allows you to create multiple virtual desktops. Now, don’t get too excited about creating too many virtual desktops because that could confuse you as well. if you’re not used to it yet, just go with one virtual desktop first.
Follow the steps below to create your virtual desktop on Mission Control.
- Click on the + button on the top right-hand of the screen.
- Move your cursor to see how your virtual desktop looks like.
- Click on the + button again to add another virtual desktop.
- Drag the programs you want on each virtual desktop.
- Click on the virtual desktop that you want to work on.
Take note. You can also use the handy shortcuts like the Control key and the right and the left arrow keys. Those keys can also take you between multiple virtual desktops in a shorter amount of time.
It’s easy to move the apps around inside the Mission Control. You can use the Control and the right and left arrows to move between the desktops. There’s no need for you go to the top of the screen. You can also drag the apps into the virtual desktops.
If you want to have a full screen of one of the apps, just use the green button you see on the top left-hand side to go full screen. Then when you get into Mission Control, you will see that particular app appearing as a desktop. The good thing is that you will see your virtual desktops in the proper order. If you go to the full screen app and use the keys, Control and left arrow, you will be able to navigate to each of the virtual desktop on your main screen.
- Click on the X mark to get rid of any of the virtual desktops.
Method #3: Split Screen Mode
The Split Screen mode is very similar to full screen mode but it allows you to have two apps instead of one. That way, you can see both programs at the same time.
This feature is pretty neat. It comes in handy especially when we want to use two different programs at the same time and you want to save time moving from one program to another.
Here are the steps to activate the Split Screen mode.
- Go to the green button. Hold it, don’t just click on it. You will see some blue shading on the screen.
- Drop the app that you’re using anywhere on the screen. You will get a Mission Control view on the other side.
- Select an app on the Mission Control view to get a Split Screen mode.
- Go back to Mission Control to see your Split Screen mode as one of the virtual desktops.
- Drag the lines or the edges of your preferred app to make it bigger or smaller on your Spit Screen view. You don’t have to split your screen 50/50. Since it very easy to resize the apps, you can split your screen any way you want it.
- Move cursor to the top and click one of the green buttons on either one of the apps. This will get one of the apps to appear back on a regular window. That particular app will take over the entire desktop while you are simultaneously exiting the other app.
Another way to do that is by going to Mission Control. You will see the Split Screen mode as one of your virtual desktops. Just click on the exit button on the top left-hand side of the Split Screen mode desktop to exit both apps. Once that’s done, both of the apps are back to the desktop where they belong.
The simple navigation of the Split Screen Mode can help you work a lot faster. Imagine how efficient and productive you could be once you learn how to split screen Mac with the Split View mode.
Bonus Tip: Considering the Health of Your Mac
The fact that you want to split your Mac screen into several spaces simply means that you’ll be running multiple apps all at the same time. There’s nothing wrong with that. After all, that could make you work a lot faster and that’s good for your productivity.
There’s really no downside to running multiple apps all at the same time. However, you would need to consider the health of your Mac. Running multiple apps at the same time could take a toll on your Mac. If you don’t take care of it, it could eventually perform a lot slower. When it does, you’re going to have a hard time running multiple apps all at the same time.
So, what’s the point here? Well, the point is simple. You need some tools to keep your Mac running at its top speed. If you’re looking for a tool that does that, then hover over to iMyMac's website.
On iMyMac's website, you will find a powerful tool that’s called PowerMyMac. This is an awesome tool that can help your Mac run smoothly at all times.
The PowerMyMac helps you monitor the performance of your Mac. It comes with a dashboard where you can view the performance of your CPU anytime. This functionality will also help you see how much RAM your Mac is taking up. It will also keep you informed as to how much disk space you still have on your Mac. There’s no doubt that this powerful tool is very important to your Mac especially if you’re always running multiple programs at once.
The good thing about PowerMyMac is that it does more than just optimize your Mac. The PowerMyMac tool can do so much more than that. To start with, it cleans up your Mac so that you could have more space. It works quietly in the background to do such task. You don’t have to worry about deleting unneeded files apps since PowerMyMac can do that for you instead. Imagine all the time you can save with this particular software?
Another good thing about PowerMyMac is that it can uninstall unneeded apps on your Mac. Now, take note. It doesn’t just delete the icon from your desktop. It completely removes the unneeded apps from the system. It wipes out every bit of the uninstalled app. There’s no need for you to check if there are any plugins or extensions left. You can have some peace of mind that they are all gone.
Now, of course, you would have to pay for this software. A software that does all these critical tasks comes at a cost. You can’t expect it to be free.
It’s understandable if you’re not too crazy about spending money on it but here’s the thing. You have to admit that the PowerMyMac is one powerful tool that can keep your Mac in tip-top share for a very long time. Would you compromise the health of your Mac for just a couple of bucks?
If you don’t avail of the PowerMyMac tool now, you would have to pay a higher price in the future.
Conclusion
Now, that you know how to split screen Mac, you can work a lot smarter and faster. Considering how many apps you can run all at the same time, installing the PowerMyMac can keep your Mac in tip top shape.


Victor RICHARD2020-11-09 21:48:41
Bonjour, la méthode 3 ne marche plus sur mon mac, comment faire pour arranger ça et pouvoir scinder l'écran en 2 ?
iMyMac2020-11-10 04:25:42
Bonjour, veuillez essayer la méthode de ce blog: https://osxdaily.com/2015/10/08/fix-split-view-not-working-mac-os-x/