


There are instances in which you are faced with the “Mac webcam not working” issue. Your camera abruptly ceases to function during a video call or if a notice states that “No camera connected” or “No camera available” error arises when you launch an app that requires the camera.
Don't panic, because you're right here! Now let's move on to see why is your Mac camera not working and simply follow the solutions we provide in this post to find out where is wrong and fix this annoying issue.
Contents: Part 1. Why is My Camera Not Working on My Mac?Part 2. How to Fix Mac Webcam Not Working?Part 3. Conclusion
People Also Read:How to Speed Up MacHow to Fix MacBook Running Slow
Part 1. Why is My Camera Not Working on My Mac?
Why is there no camera available on your Mac? Generally, camera issues on your Mac are typically minor and can be remedied by simply restarting your device.
In some instances, there are mechanical and hardware issues that cannot be fixed with software tweaks.
- macOS does not have a camera settings application. Most applications that use a Mac camera have their own configuration options, so there are no switches, whether physical devices or software.
- If your camera sustained physical damage, it requires a replacement. You can try the solutions below to get your Mac webcam working again.
Part 2. How to Fix Mac Webcam Not Working?
Once you start to notice issues with the built-in camera of your Mac, you can try out one of these solutions to get it working again.
#1. Check for Applications that Utilize Your Camera
Generally, only a single Mac application can use the camera at a time. You must make sure that the application you are attempting to use is not denied access to the camera since something else is using it at the current moment.
You can try to fix this issue by closing all open applications that might be using the camera. Some of these applications include Skype, FaceTime, and Photo Booth.

How to Turn on Your Camera for FaceTime
How do I turn on the camera on my Mac? Generally, the camera on your Mac is automatically activated. Nevertheless, this automatic activation process oftentimes fails to work. This leaves you without any other option on how to turn on the camera manually.
You can turn on your camera for FaceTime by following these steps.
- Open the Terminal app that you can find under Utilities in Applications
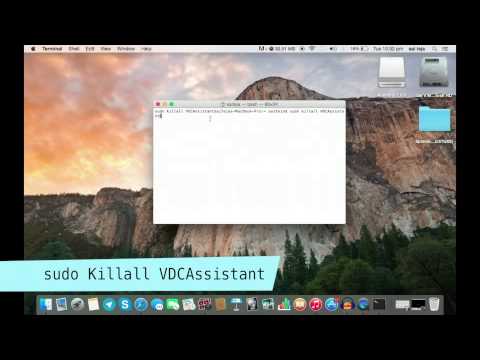
- Tap on the Terminal window and key in “sudo killall VDCAssistant”. Do not include quotation marks.
- Tap on “Enter”. At this point, you might be encouraged to enter your admin password. If the process flows smoothly, you will not see any confirmation message. In case an error arises, an error message will pop up in the terminal window.
- Open any application that utilizes the camera such as Photo Booth to check if the method worked.
Built-in Mac Camera Not Working on Skype
In case the camera on your Mac is not functional when making calls through Skype, there is a possibility that Skype is responsible. An initial move is to ensure that you are using the latest version. If you have the latest version but it still does not work, you must reinstall it.
But before reinstallation, you have to uninstall Skype from your Mac first, if you have trouble doing this, you can turn to this link to completely remove it with a powerful Mac Cleaner to uninstall it.
If this “Mac webcam not working” issue persists, there is a need to restart your Mac and test the application again.
#2. Force Close VDCAssistant and AppleCameraAssistant
For those who need to utilize the camera urgently or cannot spend time in troubleshooting the “Mac webcam not working” issue, you can try restarting the camera-related processes such as “VDCAssistant” and “AppleCameraAssistant” using the Terminal app.
Both VDCAssistant and AppleCameraAssistant are programs that operate in the background every time you utilize the built-in camera of Mac. There is a likelihood for complications to arise with these processes that can affect several applications that has access to the camera such as iMovie, FaceTime, Skype, and Messages.
A method to force close VDCAssistant and AppleCameraAssistant involves these steps:
- Close any application that can access your camera.
- Tap on the Spotlight Search icon. Look for the Terminal and tap on “Enter” to open it.
- Key in “
sudo killall VDCAssistant” and tap on “Enter”. If required, you must key in your password and tap on “Enter”. - Next, key in “
sudo killall AppleCameraAssistant” and tap on “Enter”. When both processes are stopped, open an application that utilizes the built-in camera. Check to ensure that the issue is fixed.
#3. Adjusting the Camera Settings
With this approach, you must change the settings on your camera directly since there is no camera section in the System Preferences.
Nevertheless, most applications that utilize the in-built camera of Mac have adjustable camera settings. Skype and FaceTime will allow you to designate which camera to be used for video calls. Check if the built-in camera is chosen.
#4. Reset the System Controller of Your Mac
Although most find this task overwhelming, it is easy to handle. Once the camera of your Mac starts to malfunction, you have the option to reset the System Management Controller (SMC). It is important to note that the SMC is responsible for controlling most of the hardware functions on your Mac. Once it is rebooted, it might be a solution to the “Mac webcam not working” issue.
How to reset a MacBook SMC
For those who have a MacBook, simply follow these steps on resetting the SMC.
- Turn off your MacBook by proceeding to the Apple Menu in the left upper section of the screen and tap on the Shut Down option.
- Check if the power adapter of your MacBook is securely attached to the computer.
- On your MacBook, press down on
Shift+Control+Optionskeys simultaneously and switch the power on to start your device. - Wait for 30 seconds before releasing the keys. This allows your Mac enough time to boot as usual.
- When your computer starts up, check if you can access the camera.
#5. Reboot Your Mac to Fix Mac Webcam Not Working
Another alternative method to deal with the “Mac webcam not working” issue is to reboot your device. You must ensure that you completely shut down your device instead of the Restart option.
If your computer was restarted, it will only close your session and briefly shut off your Mac but the RAM is left untouched. When you shut down your computer, it will clear the RAM and end all running processes, including those that might be disrupting your camera.
Here is a reference link on how to reboot your Mac in Safe Mode.
#6. Update Your Software
In case your camera fails to function while using a specific photo-editing or video-conference app, it might be incompatible with them.
As an example, you cannot perform video calls with Skype in case you or the person you are getting in touch with has an out-of-date version. If you want to successfully make video calls, both parties should update the app to its latest version.
Remember that this same principle is also applicable to your operating system. If you are facing issues with your built-in camera, your initial move is to check if there is an available security update for your Mac.
Generally, Apple includes essential bug fixes in every build release, thus it is vital to update your software to the latest version available. There is a likelihood that they have identified the camera bug and remedied it in the latest update.
Tip: Some of your Mac problems may due to a slow Mac, which is occupied a lots of space by system junks. You can try iMyMac PowerMyMac to do a junks deep scan and removal and optimize your Mac performance by just a few clicks.
Part 3. Conclusion
There are times when it is not an easy task to pinpoint the root cause of the “Mac webcam not working” issue. Luckily, troubleshooting this issue is not a difficult task.
Most of the camera-related issues and errors on your Mac are relatively minor. They can be readily solved by following a few steps.
Nevertheless, if you have tried these methods and still cannot fix the camera issue, it is best to get in touch with Apple for further assistance.


marco2021-01-20 11:45:20
grazie mille,avevo provato di tutto poi entrando nel terminale e digitando quella frase e la pass magicamente è tornata a funzionare..non so perchè ma va bene cosi
FR2020-05-14 21:02:54
Merci
florencia2020-05-13 19:43:57
Hola! mi cámara de la MacBook Pro de repente dejó de funcionar, aunque La Luz verde sigue activa. Qué puedo hacer? los demás no me ven, quedó la pantalla negra... te agradezco la ayuda!
alejandro sanchez2020-05-12 06:51:36
buenas noches, trate de hacer el proceso de Sudo killall VDCAssistant pero al poner mi clave y dar enter me sale, "No matching processes were found" y pues sigo sin poder activar la cámara, ya hice el proceso de revisión de hardware y me dice que todo esta correcto, ya reinstale el sistema operativo y aun no detecta la cámara, que tan seguro es hacer, Cómo reiniciar un MacBook SMC Para aquellos que tienen un MacBook, simplemente siga estos pasos para reiniciar el SMC. Apague su MacBook accediendo al menú Apple en la sección superior izquierda de la pantalla y toque la opción Apagar. Compruebe si el adaptador de corriente de su MacBook está bien conectado a la computadora. En su MacBook, presione hacia abajo Mayús + Control + Opciones simultáneamente y encienda la alimentación para iniciar su dispositivo. Espere 30 segundos antes de soltar las teclas. Esto le da a tu Mac el tiempo suficiente para arrancar como de costumbre. Cuando se inicie la computadora, verifique si puede acceder a la cámara. espero me puedan ayudar, gracias
christian2020-03-28 15:51:53
Bonjour Avez vous une solution pour utiliser QT (QuickTime Player) sur MacBook pro (10.13.6) SANS utiliser la caméra incorporée (isight). Dans QT je n'ai pas le choix (choisir isight ou la webCam USB)... (je veux utiliser ma webCam lol) cordialement Christian sur FaceTime et PhotoBooth c'est OK - Merci de répondre directement sur mon eMail - cela serait sympa
bloou_2020-03-28 13:23:03
Bonjour, j'ai eu le soucis d'être sur Skype avec un ami, cela fonctionnait correctement et puis d'un coup plus rien, mon écran de mac est devenu tout noir puis s'est verrouillé. En le re-déverrouillant, plus de micro ni de caméra. Le seul problème c'est qu'il est sous windows et pas sous mac. Je m'y connais absolument pas en ordinnateur et un ami qu'y s'y connait un peu plus à essayer de m'aider en me guidant à travers messenger via mon téléphone mais nous ne trouvons pas le problème. Je vous remercie d'avance si vous avez la solution pour réparer et trouver mon problème. Bon après midi.
iMyMac2020-03-30 09:06:16
Utilisez-vous Windows 10 ou une autre version?
Chilonda2020-02-26 15:03:16
Amazing! It works again, thanks for your useful tips!
Suzette2019-08-23 10:11:05
I have tried the solution 2 to see if it will reconnect my camera; but after I type in “sudo killall VDCAssistant.”, I can’t enter my password. My Mac won’t recognize any of the keystrokes that I type. Can you help me?
hbich2020-06-26 13:37:08
je rencontre le même problème , je n arrive plus a entrer le mot de passe dans le terminale svp aidez moi
iMyMac2019-08-23 11:19:20
Hi, if you failed to type in your password at the Terminal, you can turn to this link to look for the answer: https://osxdaily.com/2015/02/04/terminal-wont-show-password-when-typed/