


If you’ve ever watched a YouTube video and noticed black bars, stretched visuals, or awkward fitting on your screen, you’re not alone. Knowing how to adjust YouTube video size is essential. Adjusting video size not only improves viewing comfort but also ensures a professional appearance across different devices and platforms. In this comprehensive guide, we’ll explore easy methods to change playback size, optimize for embedding, and even resize videos before uploading.
Contents: Part 1: Why Adjusting YouTube Video Size MattersPart 2: How to Adjust the Size of YouTube Video in the PlayerPart 3: How to Adjust the Size of YouTube Video for EmbeddingPart 4: How to Adjust the Size of YouTube Video for Social Media SharingPart 5: iMyMac Video Converter – Your All-in-One SolutionPart 6: Conclusion
Part 1: Why Adjusting YouTube Video Size Matters
Understanding why video size adjustment is important will help you choose the right method. Here’s why it matters:
- Better viewing experience – Fullscreen mode, theater mode, or custom sizes can make a big difference in comfort.
- Responsive design compatibility – If you embed videos on your site, properly sizing them ensures mobile and desktop compatibility.
- Social media optimization – Platforms like Instagram or TikTok require specific aspect ratios.
- Professional appearance – Avoids black bars, cropped edges, or pixelated visuals.
Whether you’re a casual viewer or a content creator, knowing how to adjust YouTube video size puts you in control of the final presentation.
Part 2: How to Adjust the Size of YouTube Video in the Player
How to adjust YouTube video size? When watching directly on YouTube:
1. Change the resolution
- Click the gear icon at the bottom right.
- Select a resolution that suits your internet speed and display — e.g., 1080p for crisp HD, 480p for slower connections.
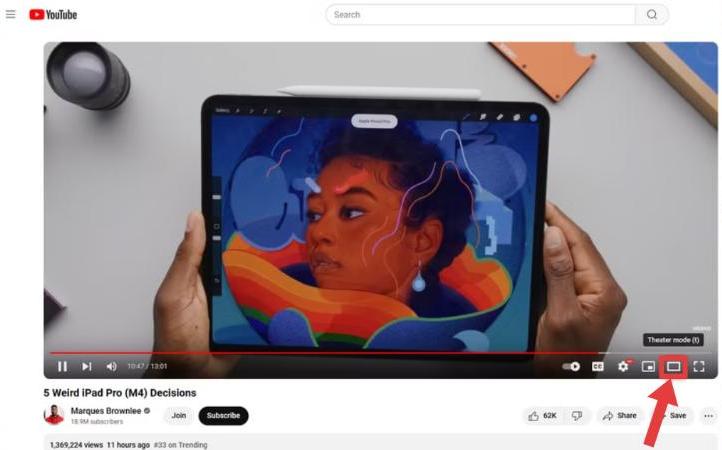
2. Use viewing modes
- Theater mode widens the player without going fullscreen.
- Fullscreen eliminates distractions.
3. Adjust zoom in browser
- Use
Ctrl +orCmd +to zoom in on desktop browsers.
These quick tweaks are the easiest way to learn how to adjust YouTube video size without downloading extra tools.
Part 3: How to Adjust the Size of YouTube Video for Embedding
If you’re adding a YouTube video to a blog, presentation, or webpage, you control size through the embed code.
- Click “Share” under the video, then “Embed.”
- Copy the
<iframe>code. - Modify the
widthandheightvalues. Example: <iframe width="800" height="450" src="https://www.youtube.com/embed/example"></iframe>
For mobile-friendly designs, use responsive embedding with CSS: iframe {
width: 100%;
height: auto;
}
Responsive embeds ensure your content scales automatically, a critical part of how to adjust YouTube video size for modern audiences.
Part 4: How to Adjust the Size of YouTube Video for Social Media Sharing
YouTube videos often need resizing for Instagram, Facebook, TikTok, and other platforms.
- Instagram feed: 1:1 square format.
- Instagram Reels / TikTok: Vertical 9:16.
- Facebook feed: Landscape 16:9 or square.
Use tools like Canva, Kapwing, or EZGIF to crop and resize without losing quality. Always maintain the correct aspect ratio to avoid stretching.
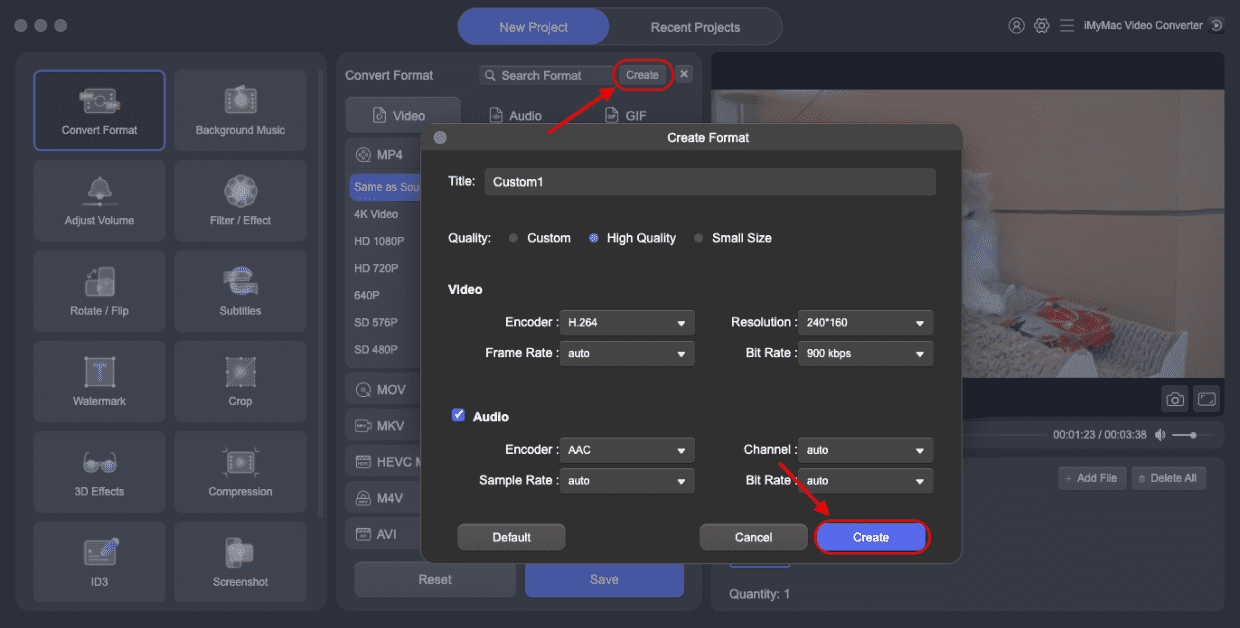
Part 5: iMyMac Video Converter – Your All-in-One Solution
If you need a quick, high-quality way to resize, crop, or reformat YouTube videos, iMyMac Video Converter is a powerful option.
Key Features:
- Custom resizing – Adjust exact width, height, or aspect ratio.
- Batch processing – Resize multiple videos at once.
- Format conversion – Make YouTube videos compatible with any device or platform.
- Built-in editing tools – Crop, trim, and compress without losing quality.
Part 6: Conclusion
Learning how to adjust YouTube video size is about more than just aesthetics — it’s about control, compatibility, and user experience. Whether you’re watching, embedding, or creating videos, the right adjustments make your content shine. And with tools like iMyMac Video Converter, you can ensure every video fits perfectly on any screen, every time.
