


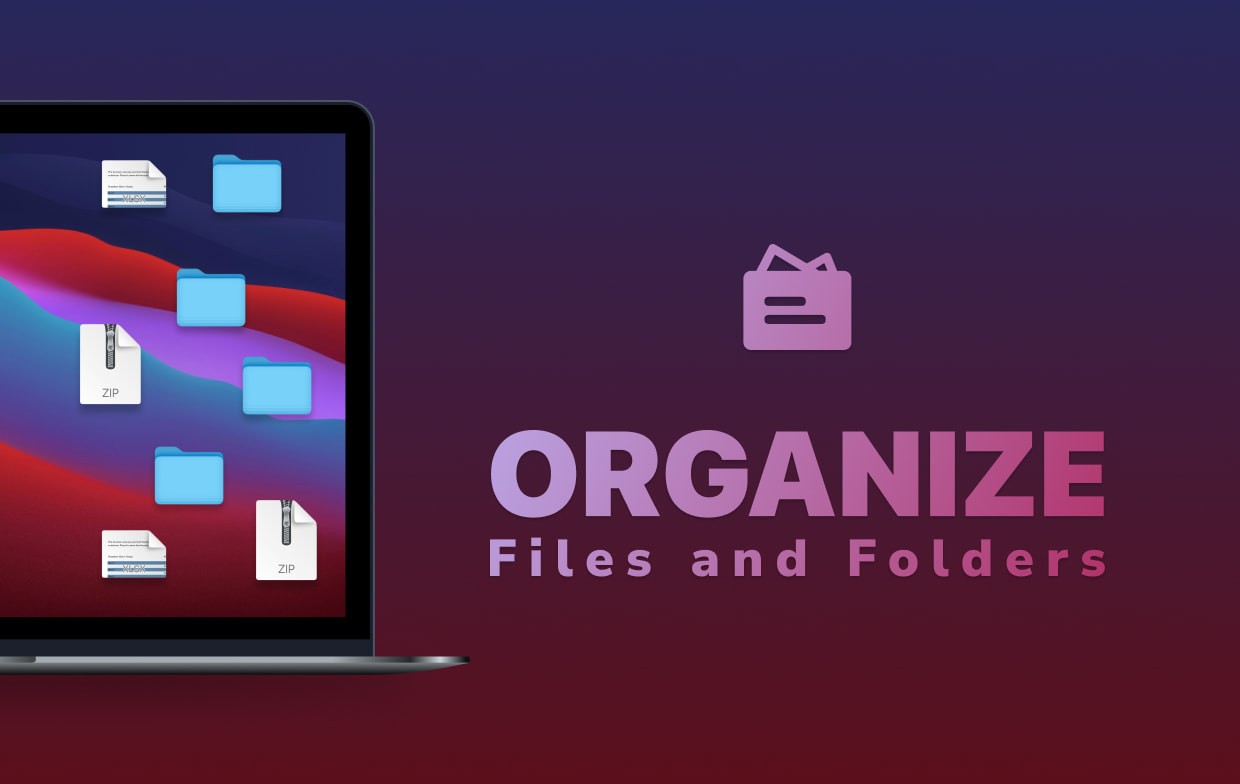
For Mac users with loads of files, using a dedicated tool to arrange and organize Mac files into shipshape little piles eliminates clutter. Having your files strewn across separate locations can lead to needle-in-a-haystack scenario or accidental loss of data.
Knowing the ins and outs of how to arrange and sift through files quickly steers clear of the stresses of a manual process. The Finder inbuilt option allows you to organize files neatly. This guide discusses efficient, proven ways to save time, extra effort and eliminate stress.
We have gathered essential tips and tricks to leverage organizational tools that cut like a knife through butter to declutter your Mac.
Contents: Part 1. Clutter Control, Smart Cleanup & Organizational Plan Part 2. Tips to Arrange and Organize Mac FilesPart 3. Merging Folders on Your Mac Device without Losing any DataPart 4. Conclusion
People Also Read:How Do You Organize Files and Folders on Your Mac DeviceHow to Remove iTunes’ Duplicates: Deleting Duplicate Albums and Songs
Part 1. Clutter Control, Smart Cleanup & Organizational Plan
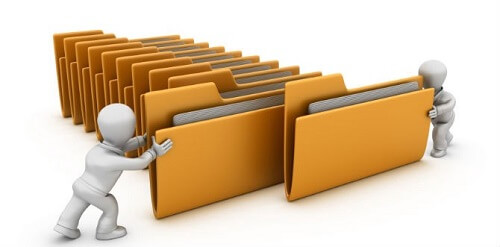
If you want to organize your Mac device you have to go through the different folders. Check out which folders have to be moved to the main folder. You also have to check out which folders have to be consolidated or merged.
When people are focused on work, they usually create new folders where they want to put it, name it something that comes to mind, and forget it days after it was made. This can lead to a disorganized device with multiple folders that might have the same name or with multiple similar files that have the same names.
Once you have found the folders that you want to merge, then you have to compare their contents to make sure there are no duplicate data. You can actually manually compare the folders. Your OS X or macOS allows you to compare two different folders easily.
You can do this by following the steps below:
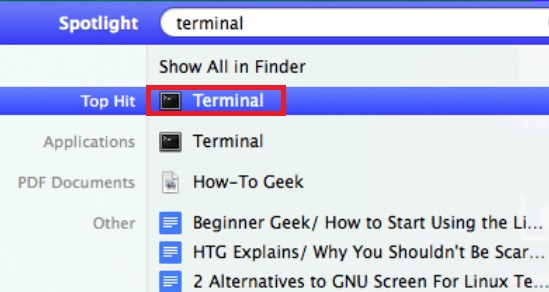
- Launch the Terminal.
- Type in the following:
diff -rq folder-1 folder-2(In step 2, you have to type in the two different names of the two folders you want to compare. Just change “folder-1” and “folder-2” into the two folder names.) - The difference between the two different folders will be displayed to you.
Best Practices for Maintaining Neat, Easily Accessible and Retrievable Files
You have to implement the best standards for managing files and folders into a file organization system. At the outset, create an easy-to-file system that makes it straightforward to trace items. You may want to utilize recyclable templates or naming conventions.
1. Tidy Up Your Desktop
Your desktop should be neat for quick navigation to any destination. It should contain only essential apps and trash bin. If necessary, you can relocate one or a few files on your desktop for smooth workflows.
2. Minimize Folder Generation
When it comes to folders, you have to put space at a premium. Avoid new folders that amount to a vast pool of multi-layered files. Restructure everything into a simple and organized nomenclature.
3. Name your Files or Folders Strategically
An easy-to-find files organization system will get the stresses and strains off your chest. You can name items based on date, type, company, and size to narrow down your target in a bunch of folders. It makes it a breeze at the click of a button.
Use PowerMyMac to Declutter Junk Files
Everything from soups to nuts, the Mac world crawls with many tools to cast off duplicate files, litter and fine-tune your Mac. iMyMac PowerMyMac removes junk and cleans up your system to free up memory and RAM so you won't be troubled by how to arrange and organize Mac files.
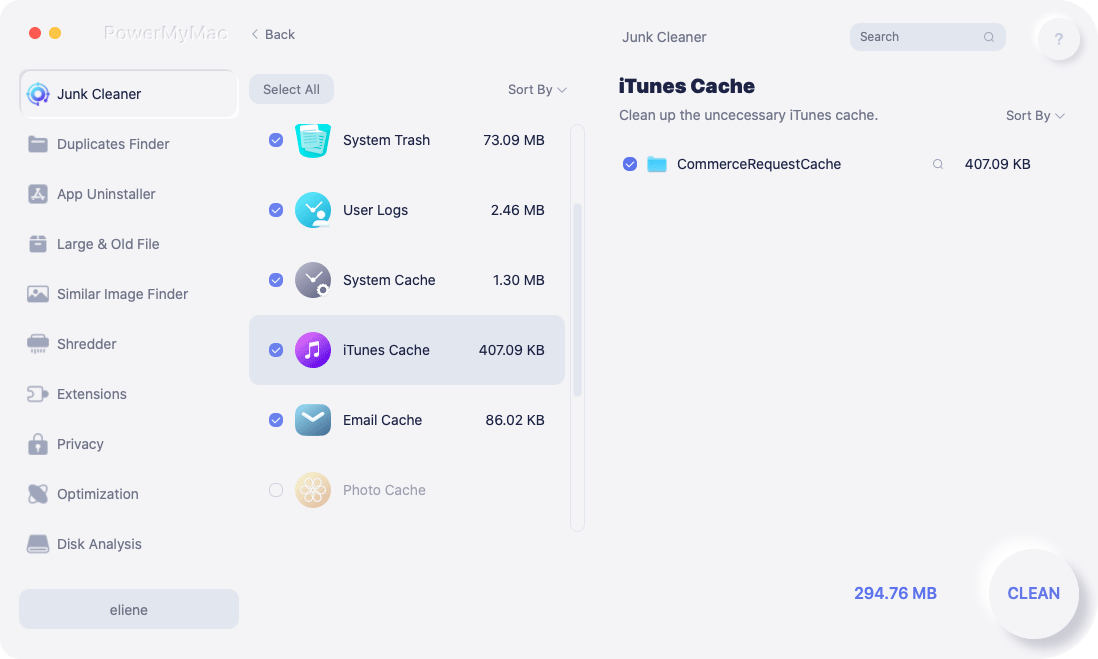
Since Apple runs a tight ship with the system’s file structure, macOS imposes minimal maintenance demands to run efficiently. That’s where PowerMyMac kicks in as a multi-tool for maintenance and optimization. This powerful cleaning software not only erases litter but also acts as a performance monitor for Mac, improves speed and eliminates all traces of unnecessary data.
It integrates a feature which automatically and intelligently runs cleanup, and maintenance, and boosts the speed of your machine. If you have run out of space, PowerMyMac allows you to detect and remove massive or unused old files that gobble up a huge chunk of gigabytes. It also tools up your Mac with superb optimization algorithms to make it work like a stink.
Part 2. Tips to Arrange and Organize Mac Files
Arrange Your Finder View to Enhance Access to Files in Mac
The Finder incorporates ways to restructure your Mac’s files. The ‘Arrange By’ option packs enormous potential. Besides allowing you to organize the Finder view under multiple categories, you can classify all the other in-built types. Item Arrangement supports all the standard Finder views for better control over the sequence in which files display within a Finder view.
Solution #1 ‘Arrange By’
Before OS X Lion, a vast majority of Mac owners preferred changing the default Finder view to List view. This gave them the power to manipulate the view’s layout with multiple ways to arrange the view by name, size, kind, and date.
The ‘Arrange By’ option revolutionizes the List view’s capability to determine how items appear, adds new features, and offers the option to manipulate how items in one of the Finder views. Arrange By allows scouring through items in a Finder view by name, kind, application, date last opened, and more.
Based on which Arrange By option you choose, the Finder will show the sorted output by categories. Categories resemble horizontal bands in Icon view and labeled areas in any of the alternative Finder views. Each nomenclature has a title like Folders, Spreadsheets, PDF Documents and Images.
Solution #2 Icon View
With the Icon view, every category occupies one horizontal line. When the number of files surpasses what appears in the window, a cover flow view links to the individual category, allowing you to scour through the collection fast without interfering with other displayed piles then you can arrange and organize Mac files accoding to your desire.
Solution #3 Alternative Finder Views
In the other finder views, the Arrange By feature only produces categories with labeled sections. While the Arrange By feature lacks the ability to select up or down, the List view allows you to sift through the direction by tapping the column header. The Arrange By application utilizes the default app associated with a file to develop the sort sequence and the category names.
Solution #4 Find Files Faster, Use Shortcuts and Tags
Searching for files with folder titles means you can find anything on the go. Save files based on date, company and type of document with a noticeable name so you can view items without opening.
Dedicated Mac organizers promote and simplify the art of multitasking. You can add new resources with a one-click system developed for efficient, fluid productivity in your workspaces. With all the essential files at hand, you save time and effort navigating different browsers.
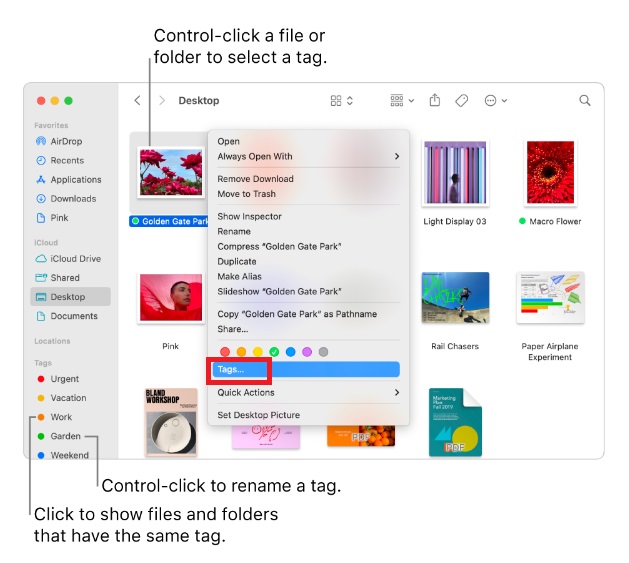
Mac comes with an inbuilt tagging feature that allows you to mark files or folders with color codes. It comes in handy to classify items and steer clear of a commingled mass. To tag an opened application, drag the pointer to the right of the name and click the arrow together with the Tags field. Select a tag from the group or enter a fresh tag to arrange and organize Mac files.
Part 3. Merging Folders on Your Mac Device without Losing any Data
After you have compared folders and you have found out that there are files with identical names, you have to merge the content of these folders. Merging folders refers to the process of copying a folder to another folder (or location) that has an identical name. However, doing this process in mac OS X is kind of sneaky.
If you don’t know what you are doing, you will end up overwriting files and losing data you might really need. But we’re going to tell you how to properly arrange and organize Mac files.
Merging Folders with the Use of Finder
If you are merging folders by dropping one folder into another that has an identical name, a message will ask you to confirm if you really want to replace another folder or if you want to stop the process. If these folders contain different files with identical names, you should select Stop to avoid overwriting files.
In order to disclose the hidden merge option, you should follow the steps below:
- Drag the folder to another folder while holding the
Optionkey down before you release it. - An option they call Merge will now appear. Press this option.
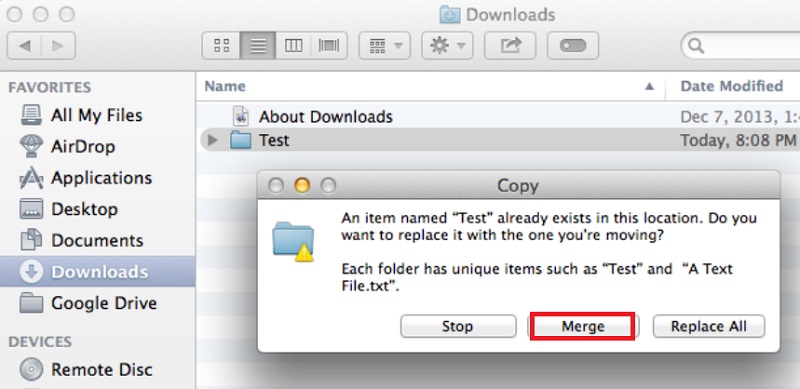
Files that have the same name will now be automatically added the number 2 in its file name. The original file and the new one will still be kept and no file will be deleted.
Merging Folders with the Use of the Terminal
This is an alternative method--to use Terminal plus the ditto command. This process results in the merging of two folders’ contents and the subfolders located within it. Here’s how to do it:
- Launch the Terminal Window.
- Type in the following:
ditto ~/source_folder ~/target_folder
Make sure you replace source_folder with the name of the first folder. And then, replace target_folder with the name of the second folder you are putting the first folder into.
Part 4. Conclusion
It is easier to arrange and organize Mac files with in-built features and implementation of the best practices. We hope you have acquired a deep understanding of how to tidy up your Mac and improve performance.
For in-depth acquaintance with file organization and file retrieval, experiment with the available tools. With PowerMyMac, you can de-clutter your hard disk, optimize performance and avoid confusion associated with file location. Get your free trial with PowerMyMac today.

