


When you try to work on a certain spreadsheet using Microsoft Excel, there are instances that you might copy some rows and encounter some duplicate rows so you may need to remove duplicates in Excel for Mac or delete all duplicate files on your Mac. This situation can be a bit difficult to work with especially if you are not familiar with the tool.
In this article, we are going to show you the method to remove duplicates in Excel and a certain tool that you can use to remove duplicate files quickly.
Contents: Part 1. Where Is the Remove Duplicate Button in Excel?Part 2. How to Remove Duplicates in Excel for Mac with Advanced FilterPart 3. How to Remove Duplicate Content in Excel by Replacing ThemPart 4. How Do I Find and Delete Duplicate Excel Files on Mac?Part 5. Conclusion
Part 1. Where Is the Remove Duplicate Button in Excel?
If in case that you are actually using a Microsoft Office Suite on your Mac, then that would be a great advantage for you. This is because the program had actually a built-in feature that can help you in looking for any duplicates.
Here are the things that you should do for you to remove duplicates in Excel for Mac that you have (Shortcut to remove duplicates in Excel):
- Choose all the cells that you want to search for any duplicates.
- Choose "Data" located at the top of your screen. Then choose “Remove Duplicates”.
- Press the OK button to remove duplicates in Excel for Mac.
Here we'll show you the detailed steps:
Step 01. Choose All the cells in Excel
Choose all the cells that you want to search for any duplicates. You can do this by choosing “Select All” for you to select the whole cells.
Step 02. Click on Data and Find Remove Duplicates Feature
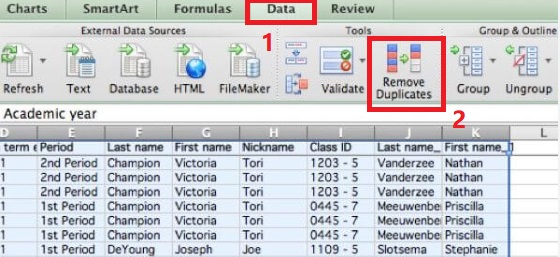
To remove duplicates in Excel for Mac, choose "Data" located at the top of your screen. Then after that, choose “Remove Duplicates”. A dialogue box will then appear on your screen. As you can see on your screen, the first row of the sheet was deselected. This is because the option “My data has headers” box has a checkmark beside it.
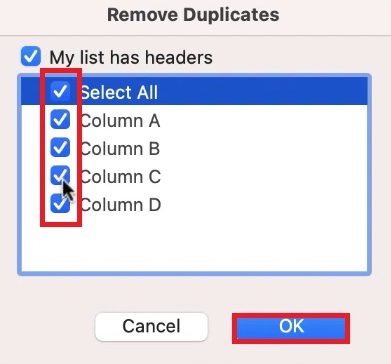
In this situation, all you have to do is to unmark the 'My data has headers'. Once done, you will then see that everything has been highlighted.
Step 03. Confirm and Remove Duplicate Contents in Excel
Since the whole table was selected again, all you have to do is to press the OK button for you to remove duplicates in Excel for Mac. Once done, then all the rows that have duplicates will then be removed aside from the one that has been deleted. The details about the changes that happened will be shown on a pop-up box that will appear on your screen.
Tip: If you are wondering the Excel remove duplicates formula, check the guide about formula to automatically remove duplicates in Excel.
Part 2. How to Remove Duplicates in Excel for Mac with Advanced Filter
There is also another tool that you can use in your Excel to know and remove all the duplicate data. This is by using the “Advanced Filter”. This tool can be used if you are actually using Excel 2003 on your Mac. Here is how you can use Advanced Filter.
- Launch Excel on your Mac.
- Choose “Select All” for you to highlight your spreadsheet.
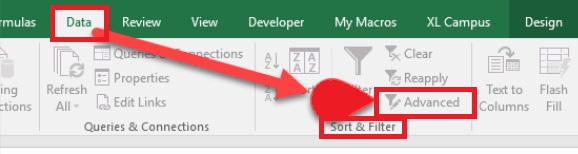
- Once you have selected a table, click on “Data” and then choose “Sort and Filter”.
- Choose the “Advanced” option. And in case you are using Excel 2003, just simply click on “Data” then click on “Filters” from the drop-down menu and then choose “Advanced Filters”.
- From there, choose “Unique records only”. And then click on the “OK” button
- Once you have confirmed the action, all the duplicates that you have on your spreadsheet will be removed.
Part 3. How to Remove Duplicate Content in Excel by Replacing Them
The method that we are going to show you here is actually good enough for those smaller spreadsheets. This is another way for you to locate and remove any duplicates that you have. In this method, we will remove all the duplicateusing the “replace” feature which is a built-in function for every Microsoft Office product.
Here are the steps to remove duplicates in Excel for Mac using Offlice's built-in replace feature.
- Launch the spreadsheet that you want to work on.
- Choose the cell which contains the content that you would want to look for and replace and then have it copied.
- Press Ctrl + H. This function will then show you the replacement feature of Excel.
- Paste the data that you copied earlier. Do this in the “Find What” section.
- Press on the “Options” button. And choose the “Match entire cell content" option.
- Input a certain value on the “replace with” field, then click on the “Replace All” button.
- You will notice that all the data you found are duplicates and will be replaced with the value you entered earlier. So you can know which cells contain duplicates.
- Retain one copy of the duplicate by pasting the original content you have replaced.
- Click on the Ctrl button while you are clicking on the cells that contain your duplicate.
- Highlight all the rows that you would want to remove, right-click on one of the highlighted and then choose the “Delete” button.
Once that you are done with the process to remove duplicates in Excel for Mac, you will then see that all the rows that remained on your spreadsheet will then have a unique value.
People Also Read:How to Completely Uninstall Microsoft Office on MacHow to Speed up Mac? 11 Tricks to Make Your Mac Run Faster

Part 4. How Do I Find and Delete Duplicate Excel Files on Mac?
Now, aside from the methods that we have shown you above to remove duplicates in Excel for Mac, there is the best alternative cleaner for you to remove all of your duplicate files - iMyMac PowerMyMac's Duplicate Finder.
PowerMyMac will help you in locating all the duplicate files that you have such as videos, music, documents, photos, and more in the easiest way. This way, you will be able to find all of them accurately and have them deleted.
Just like the duplicates that you have on your Excel, PowerMyMac can locate all the duplicate Excel files or other Office files on your Mac’s hard drive. This tool is very essential for every Mac users. The reason for this is that the duplicate files that you have stored on your Mac unknowingly actually eats up a lot of storage space that can also cause your Mac to run slow.
PowerMyMac will be able to scan and look for the files that actually have the same size. It will then compare it and the Duplicate Finder will be able to know if they are identical or not.
For you to know how easy and fast the PowerMyMac is, just follow the step-by-step method to remove duplicates in Excel for Mac.
Step 01. Download and Install PowerMyMac
The first thing that you need to do is to download the PowerMyMac from the official website. Once you have successfully downloaded the program, install it. Launch the PowerMyMac later. Then on the main interface of the program, you will be able to see the system status of your Mac.
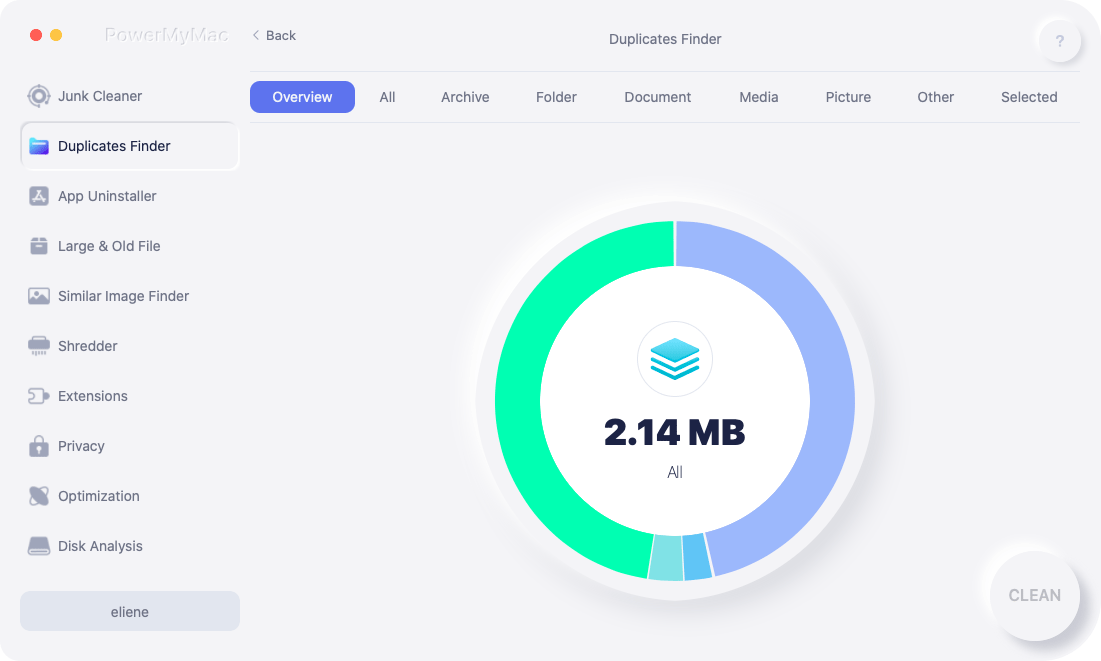
Step 2. Scan Your Mac for Duplicates
Click on the “Duplicate Finder”. And then click on the “SCAN” button, PowerMyMac will then scan your Mac to find all the duplicate files. Once the scanning process is done, it will then display all the duplicates. It can also count all the duplicate files and delete them such as removing your iPhoto duplicates permanently.
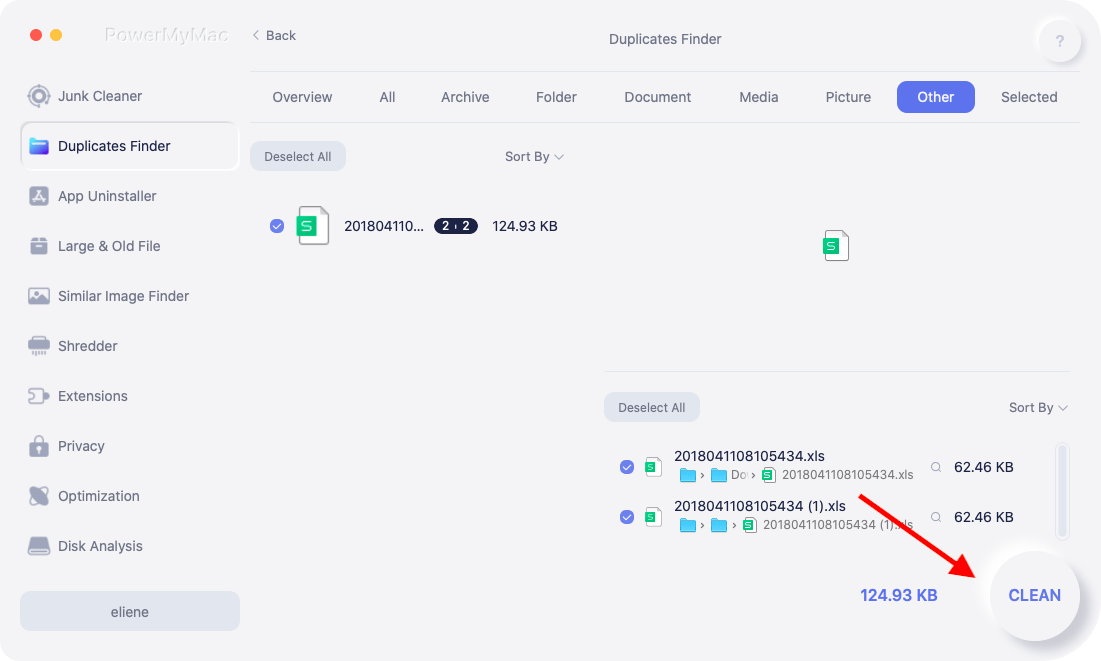
Step 3. Choose and Remove Duplicates in Excel for Mac
From here, all you have to do is to choose all the items that you want to remove. Simply click on the “CLEAN” button. PowerMyMac will then start to remove all the duplicate files that you selected earlier to remove.
Part 5. Conclusion
As you can see, it is very easy to remove duplicates in Excel for Mac. We know how irritating it is to have more than one data that you need. Just like the duplicate contents that you have on your Excel, there are also many other duplicates on your Mac such as photos and videos.
This is because sometimes we tend to download a single file several times. It may take up a lot of storage space and slow your Mac down, which is the reason why you need to clear duplicate files regularly.
we have the perfect tool that you can use which is the PowerMyMac's Duplicate Finder. This program is one great tool that you can use to fins and remove all the duplicate files stored on your Mac.

