


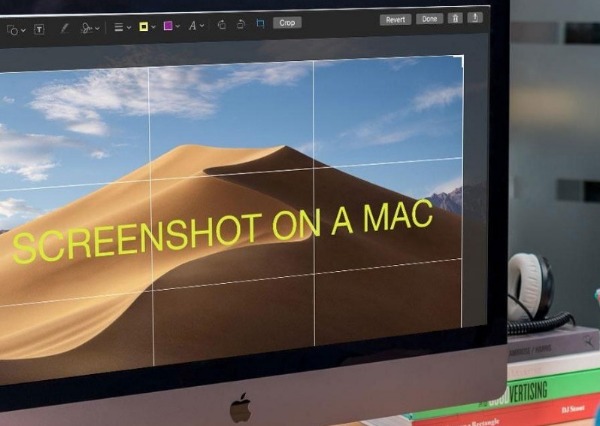
Screenshots are great. They’re used a lot to make communication clear. It definitely helps to take a screenshot especially if you don’t have the time to explain things. Screenshots help the communicator get right to the point. Needless to say, you’ve probably taken a ton of screenshots already. The question is this. Where do screenshots go on Mac after you have taken and used them?
Well, if you’ve already taken a lot of screenshots, you probably know where they go on your Mac by now. Just take a good look at your desktop. If it’s cluttered with screenshots then you pretty much know the answer to the question, where do screenshots go on Mac?
Contents: Part 1. Avoid Cluttering up Your Desktop with Duplicate ScreenshotsPart 2. Changing The Default Settings to Find out Where Do Screenshots GoPart 3. 2 Steps to Grab and to Save All Your Old Screenshots in One FolderPart 4: A Powerful Tool Help You Clean up All Unneeded Screenshots on Your Mac
Part 1. Avoid Cluttering up Your Desktop with Duplicate Screenshots
If you haven’t been saving your screenshots in a folder, then your desktop is, most likely, cluttered with screenshots. It’s quite chaotic to have a desktop full of screenshots. Unfortunately, it’s inevitable at times.
When you take a screenshot, you use it right away. Either you send it off to someone or upload it somewhere. More often than not, that same screenshot is passed around and downloaded more than once. This is a common practice especially when there’s a need to make something clear.
Chances are you not only have a ton of screenshots on your desktop but a dozen duplicate screenshots as well. Once you’re done with all those screenshots, they just stay on your desktop. They take up so much space.
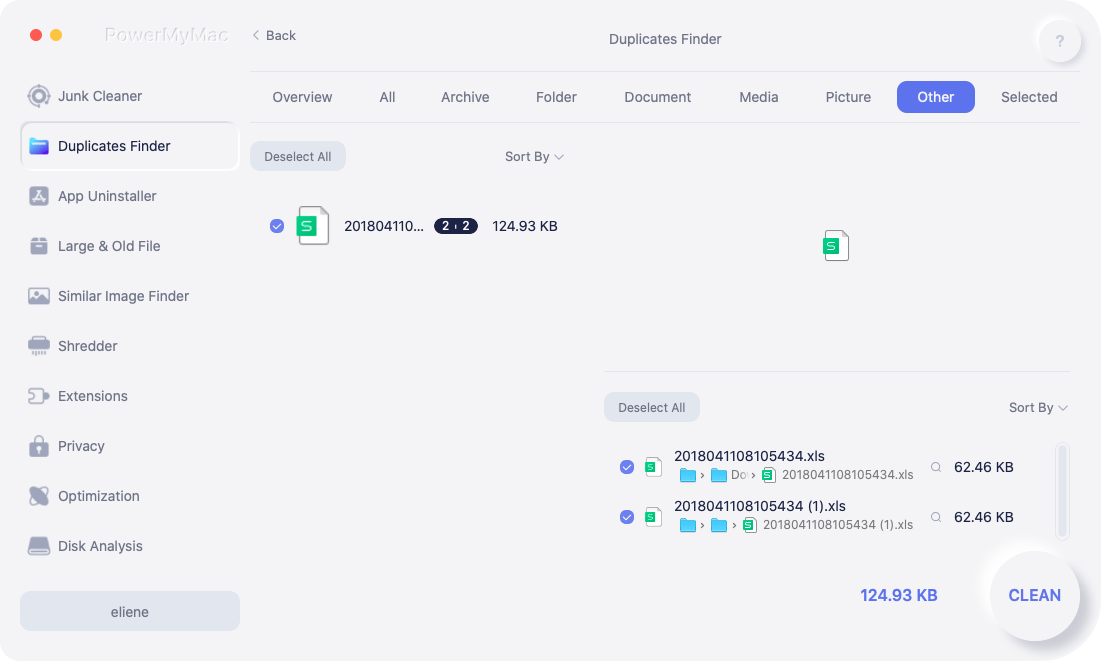
So, then you want to know where do screenshots go on Mac and what can you possibly do to avoid cluttering your desktop with duplicate screenshots that become useless after some time? You can consider using software called Duplicate Finder.
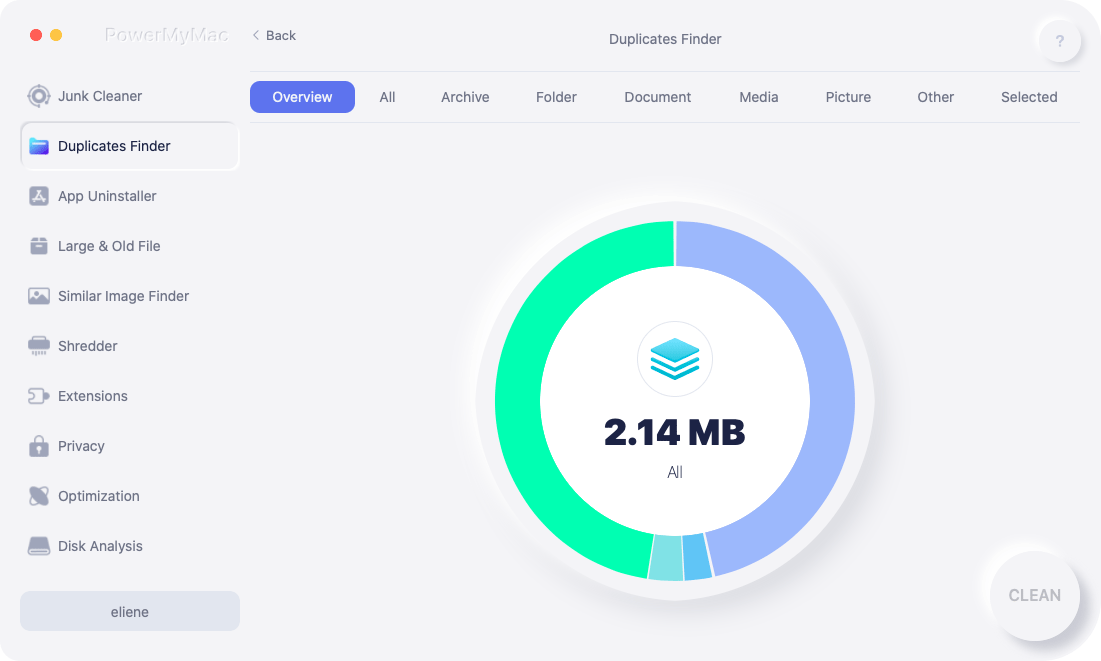
What Is Duplicate Finder?
The Duplicate Finder does exactly what it’s called; it finds duplicate files, which comes from iMyMac PowerMyMac. You might can't see the screenshots on Mac.
So, if you have a lot of screenshots saved on your desktop, the Duplicate Finder can help you clean up by finding redundant screenshots and deleting them for you. That is going to save you a lot of time and space on your Mac.
It doesn’t matter if you’re using, MacBook, iMac, MacBook Pro, or MacBook Air. The Duplicate Finder is compatible with those Mac devices.
The Duplicates Finder is definitely a good option for you look into especially if you want to get rid of those unneeded screenshots in your Mac.
Now, if you want to deal with the issue of where do screenshots go on Mac, you would have to consider changing some settings on your Mac. Don’t be scared about changing some settings on your Mac. Even if you haven’t done it before, you can do it.
Part 2. Changing The Default Settings to Find out Where Do Screenshots Go
The answer to where do screenshots goes on Mac is the very reason why your desktop looks cluttered and chaotic. The default settings for your screenshots on your Mac is your desktop. So, if you don’t change the default settings of the destination of your screenshots, you’re definitely going to have a chaotic and cluttered desktop.
Of course, you can always save all your screenshots manually. The thing is, do you actually have the time to do that? It takes some time to save a screenshot to a folder. This is especially true if you have to do it manually.
So now that you know the answer to where do screenshots go on Mac, you can finally do something about it. Aside from using Duplicate Finder, you can change the default settings of the destination of your screenshot. That way, all your future screenshots will be saved in just one folder. The best part of it, all of them will be saved automatically.
9 Steps to Change The Default Settings of Your Screenshots
Knowing where do screenshots go on Mac, gives you a better understanding as to why your desktop is cluttered. Yes, every single screenshot you have taken is automatically saved on your desktop. If that is already driving you crazy, it’s time to change the destination of your screenshots. That way, all the screenshots you take in the future will automatically be saved in a particular folder. You wouldn’t have to end up with a messy desktop.
Before you change the default settings of your screenshots, you would have to create a folder first. Don’t worry, this is the first and the last time you would have to do this since this is the only folder where all your screenshots will go.
Go right ahead and create a new folder. You can label it screenshots, if you want. Now, that you have a folder for all your screenshots, it’s time to change the default settings of your screenshots on your Mac.
Here are the 4 steps to change the default settings of your screenshots.
- 1. Search for the application on your Mac called Terminal.
- 2. Open up Terminal. The Terminal will allow you to run the right commands so that you could update the default configuration. If this is the first time you’re doing this, don’t worry. You can just copy and paste the commands given here. You see, the commands have to be put in exactly the way they’re written here. If you miss out space or a letter, you could screw up the command and you wouldn’t be able to change the default settings of your screenshots.
- 3. Enter or simply copy and paste this command on your Terminal:
defaults write com.apple.screencapture location ~/Desktop/screenshots
As you have known where do screenshots go on Mac. Then, at the end of the command, you would need to put the right location as to where you want your screenshots to be saved in. That would be the folder that you have just created. Adding that folder at the end of the command, will save all your screenshots in just one location. That way, all your screenshots won’t end going to where they used to go, which was your desktop.
Keep in mind that the location will depend on the name of the folder you created for all your screenshots. If you didn’t name it screenshots, it will definitely be a different name on the command.
There is also another way for you to add the folder you created for all your screenshots on the Terminal. Aside from just typing in the name of your folder at the end of the command, you can also drag the folder you have just created to line one on the Terminal. By dragging the folder, you have created for all your screenshots, you’re also completing the first command that you need to type into the Terminal.
- 4. Hit enter to run the command. While the default configuration is now updated, it probably hasn’t taken into effect yet. To make sure that it has, you need to reload the current settings.
- 5. Run another this command on line 2 of your Terminal:
killall SystemUIServer
That command will reload the current settings.
- 6. Hit enter.
- 7. Take a screenshot now. That way, you can check if all your screenshots will automatically be saved on the folder you’ve just created.
- 8. Go to the folder that you have created for all your screenshots.
- 9. Check if the screenshot you took shows up in that particular folder. If the answer is yes, congratulations. You were able to change the default settings of the destination of your screenshots. You can even check your desktop to make sure that your screenshot did not end up there.
So now, if you have to answer the question, where do screenshots go on Mac, you can safely say that they are all saved in just one folder. They won’t be messing up your desktop anymore.
Part 3. 2 Steps to Grab and to Save All Your Old Screenshots in One Folder
Congratulations! You have just known where do screenshots go on Mac and changed the default settings of your screenshot destination. All your future screenshots will now be automatically saved to that particular folder.
How about the old screenshots that are messing up your desktop right now? How can you clean them all up? As previously mentioned, you can use the Duplicate Finder to help you clean up your desktop. That’s one option you can look into. It can help search, scan, and delete duplicate screenshots.
Wouldn’t it also be great if you could just take all the screenshots on your desktop and move them to your new folder? Of course, you could always do that manually. Unfortunately, you would have to drag or to cut and paste each and every single screenshot to the new folder. That is going to take a lot of time.
The good thing is that you can grab all the screenshots on your desktop with just one command. Again, you can just copy the command here and paste it onto your Terminal. That way you’ll have the right command to grab all your screenshots from your desktop.
Follow these 2 steps so that you can grab and save all your old screenshots in one folder.
- Run the command:
mv ~/Desktop/Screen\ Shot* ~/Desktop/screenshots
That command will tell your Mac to grab anything starting with “screen.” Since the file names of all your screenshots start with “screenshot” you will be able to grab all of them at once. You wouldn’t have to worry about dragging each and every single screenshot from your desktop to the folder.
The asterisk you see on the command will grab all those files and move them to the screenshots folder. Chances are, the path or location is pretty much the same as the path you used to save your new screenshots.
- Hit enter to run the command. If you will notice, all of your screenshots on your desktop disappear right away. They have all been moved to the screenshots folder. You didn’t even have to do much to move all of them. With just one command, all your screenshots were moved.
So, where do screenshots go on Mac now? They all go to that particular folder. That’s awesome! You would no longer have to deal with a messy and chaotic desktop.
Part 4: A Powerful Tool Help You Clean up All Unneeded Screenshots on Your Mac
With just three commands, you can easily manipulate where do screenshots go on Mac. The thing is, the commands just pretty much save and transfer the screenshots in one folder. What that means is that you still have all those screenshots saved in your Mac. That could take up a lot of space, right?
There’s no doubt that you would need to clean up your Mac at one point. You just can’t keep on saving unneeded screenshots on your Mac. If you do, it could affect the performance of your Mac. That’s something you wouldn’t happen.
You’re now familiar with the Duplicate Finder. This is something you can use if you don’t want your desktop cluttered with a ton of screenshots. The Duplicates Finder is just one of the features of a powerful tool called iMyMac PowerMyMac.
So, if you’re looking for a software that can help you clean up all your duplicate files, the Duplicates Finder from PowerMyMac will provide you more than what you’re looking for.
The PowerMyMac comes with many functions. Each of these functions can do different things for your Mac. The Duplicates Finder is bundled into these functions so you get more than what you’re looking for. So aside from the Duplicates Finder, you get other functions that can help you clean out junk files in your Mac.
Conclusion
There’s no need to mess up your desktop now that you know where do screenshots go. With the three commands, you can easily organize all your screenshots.
With an app like the PowerMyMac, you get the Duplicate Finder that can help find duplicate screenshots and delete unneeded screenshots. At the same time, it can also help speed up your Mac.


Paul Brown2022-03-02 20:03:46
I have a NEW Mac and have been trying to find a way to find and then store my screenshots in a folder. I have to pull them into the desktop space (quickly) or lose them in never-never land. Instructions here refer to a Terminal ... but that is nowhere to be found on my Mac. Still looking for a way to re-channel those screenshots into a designated folder... Please feel free to email me with revised directions. PKB
iMyMac2022-03-03 06:49:40
Hi, what's the version of your new Mac?