


Having your MacBook Pro being format will actually require you to reinstall OS X on your Mac and can be very helpful especially if your MacBook is running slow or having some malfunctions because of an installation of am adware or a non-working software that you installed.
Another reason why formatting is helpful is if you have accidentally installed an OS X version that is outdated or if it is not compatible with our Mac. Also, formatting your Mac us necessary if you have deleted your startup disk. Because of all the sad situation that you have to format your MacBook Pro, we have gathered three ways on how to format MacBook Pro.
Contents: Part 1. Why format your MacBook Pro?Part 2. Alternative Way Aside from Formatting MacBook ProPart 3. How to Format Your MacBook Pro in 3 Ways?Part 4. Conclusion
People Also Read:How to Defrag A MacHow to Speed Up Mac
Part 1. Why format your MacBook Pro?
Aside from what was mentioned above, there are also several reasons why you would need to format your MacBook Pro and here are some of them.
1. Your MacBook Pro is Slow
Once that your Mac is running slow, then you would feel that your Mac is sluggish. This is one reason why you would need to format your Mac. Formatting your Mac will help you speed it up.
2. Upgrade Your System
Once that you feel like upgrading your system, then having your MacBook Pro formatted is one of your options. You might want to buy an upgrade version for your operating system.
3. You Are Experiencing Many Errors
If you are experiencing many errors on your Mac and some virus issues, then it is a great idea for you to format your MacBook Pro. This is for you to prevent more damage that can be done on your Mac.
4. Your MacBook Pro Hard Drive is Full
Once that your hard drive is getting full, then formatting your Mac is the easiest way for you to delete all unnecessary files. It can also remove all the files that you do not even know.
5. Your MacBook Pro Does Not Start
It is also a good reason for you to format your MacBook Pro if you are experiencing that your Mac won’t start because of some registry error.
Part 2. Alternative Way Aside from Formatting MacBook Pro
Now, there are other reasons as to why you would need to format your MacBook Pro. And one of those reasons is that you may be experiencing lags on your Mac or it is already running very slow. If this is your case, then there is no need for you to format your MacBook Pro. All you have to do is to clean your Mac and make sure to remove all unnecessary things in it. Another way is by making sure that you have cleaned up all the junk and useless files stored on your Mac. And for you to do this, you will be needing a Mac cleaner.
For the best Mac cleaner that we recommend you to use is the iMyMac PowerMyMac. This software is very safe and easy to use. Having this installed on your Mac will help you speed up its performance and will give you more space for your new files. It will remove all the junk files that you have on your MacBook safely and quickly. It can also help you locate and delete all the email attachments, iTunes backup, and multi-language that you no longer need. It can also help you scan and delete all your large and old files. Here is how to use the PowerMyMac.
Step 1. Download and Install PowerMyMac
Download the PowerMyMac from the website at www.imymac.com. After that, install it on your MacBook Pro and launch it. You will see your Mac system status on the main interface of the software.
Step 2. Scanning System Junk
On the left side of the program, you will see different modules under PowerMyMac like Junk Cleaner, Duplicate Finder, and Large and Old Files. Choose from those modules and continue.
Once that you have selected the Junk Cleaner module, click on the “SCAN” button and wait for it to finish. The program will then show you all the junk files that you have on your Mac.

Step 3. Choose the System Junk and Preview
The System Junk that you will see on your screen will be categorized by the program. You will see there categories like Application Cache, Photo Junks, Mail Junks, System Logs, and more.
Choose all the categories that you wish to remove from your Mac. After that, preview all the items that it contains for you to ensure that you will not lose any files that you still need.

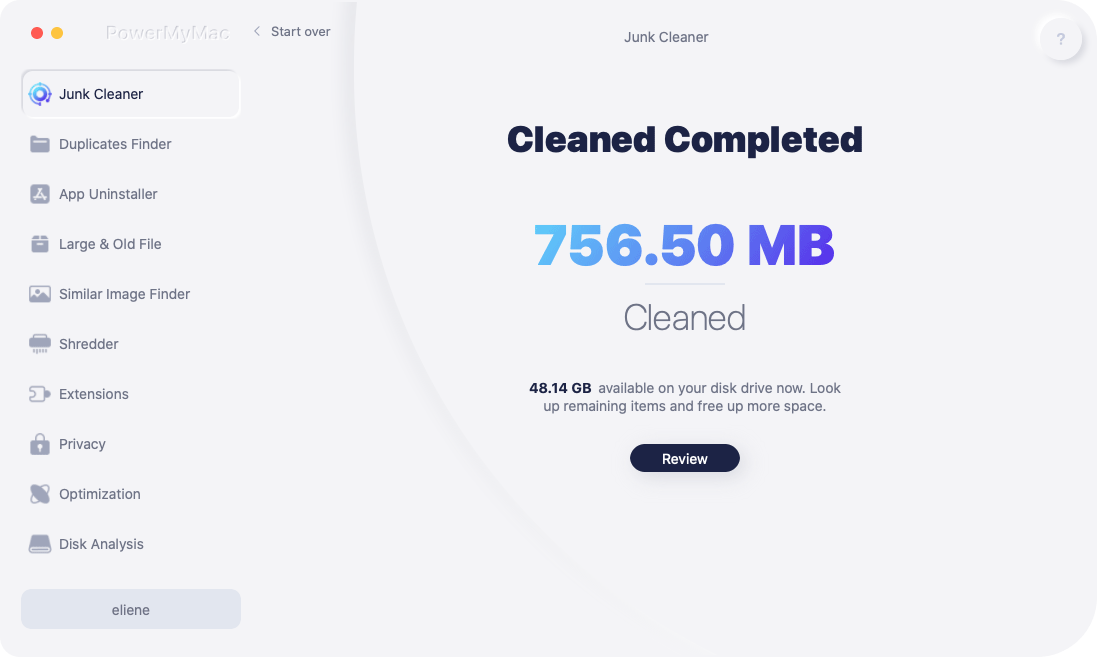
Step 4. Clean up System Junk
Once that you are sure that you want to delete all the junk files on your Mac, click on the CLEAN button. PowerMyMac will start cleaning up all the junks on your Mac.
Part 3. How to Format Your MacBook Pro in 3 Ways?
1. Reinstalling OS X from Recovery
Step 1. Turn on your MacBook Pro and listen to the startup sound.
Step 2. After that, press the Command + R key on your keyboard at the same time after hearing the startup sound. This way, you will reinstall the version of your OS X that was installed before on your MacBook Pro.
For you to install the version of the OS X that was installed originally on your MacBook Pro, press and hold the following keys: Command + Option + R.
Step 3. Once that you see the Apple logo on your screen, release the keys. Your MacBook Pro will then ask you to connect to a secure and stable internet connection.
Step 4. After that, connect your MacBook Pro to the available internet connection. Connecting to the internet is necessary for you to reinstall OS X using Recovery.
Step 5. Then, choose “Reinstall OS X” from the Recovery menu screen. After that, click on the “Continue” button.
Step 6. Then, follow all the instruction shown on your screen for you to reinstall OS X. Your MacBook will guide you and will let you choose on the hard disk wherein you are going to install your OS X.
Once that the process is complete, your MacBook Pro will then be formatted. It means that it will be back to the way bought it.

2. Restoring Your MacBook Pro Using Time Machine Backup
In doing this method, you have to make sure that you were able to make a backup using your Time Machine. However, if you were not able to make a backup using Time Machine, then do the other two methods.
Step 1. Turn on your MacBook Pro and then listen to the startup sound.
Step 2. Press and hold the following keys right after you hear the startup sound: Command + R.
Step 3. Release both keys once that you saw the Apple logo appear on your MacBook Pro screen. It will also ask you to connect to an internet connection.
Step 4. Choose the option for you to connect your MacBook Pro to either a Wi-Fi or Ethernet connection. This is a must for you to restore OS X through Time Machine. After that, the Recovery menu will then be displayed on your screen.
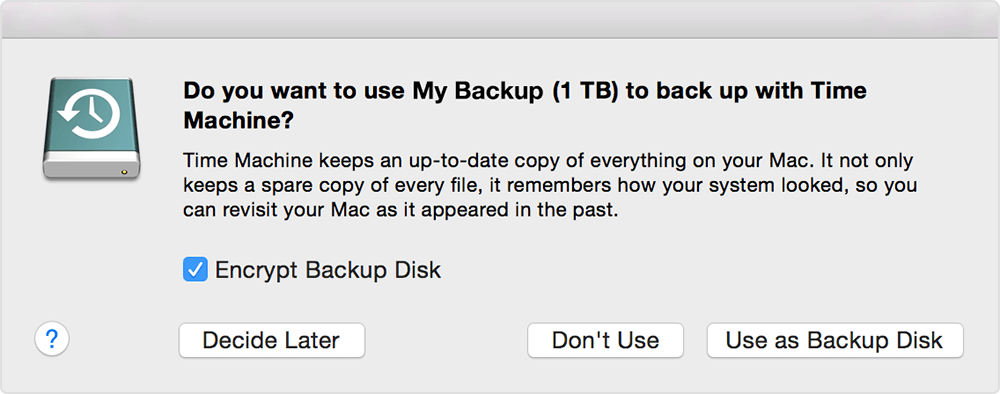
Step 5. Choose "Restore from Time Machine Backup" and then click on the "Continue" button.
Step 6. Choose your Time Machine backup disk and then choose the Time Machine backup that you wish to restore. Keep in mind that when you format your MacBook Pro using this step will reinstall your OS X and your personal files on your Mac.
Step 7. Click on the "Continue" button and then follow the on-screen instruction for you to reinstall OS X and also your personal files. Once that the process is complete, your MacBook Pro will be formatted together with your personal files.
3. Deleting Your Drive and Installing OS X On MacBook Pro
Step 1. Power on your MacBook Pro and then listen to the startup sound.
Step 2. Press and hold the Command + R key at the same time right after hearing the startup sound.
Step 3. Release both the keys once you see the Apple logo on your screen. Then, you will be asked to connect your MacBook Pro to an internet connection.
Step 4. Choose the internet connection that is available. Doing this will let you reinstall your OS X on your MacBook Pro. Then a Recovery menu will appear on your screen.
Step 5. Choose on the "Disk Utility" from the Recovery menu that appeared on your screen and then click on the Continue button. This will then launch your Disk Utility menu.
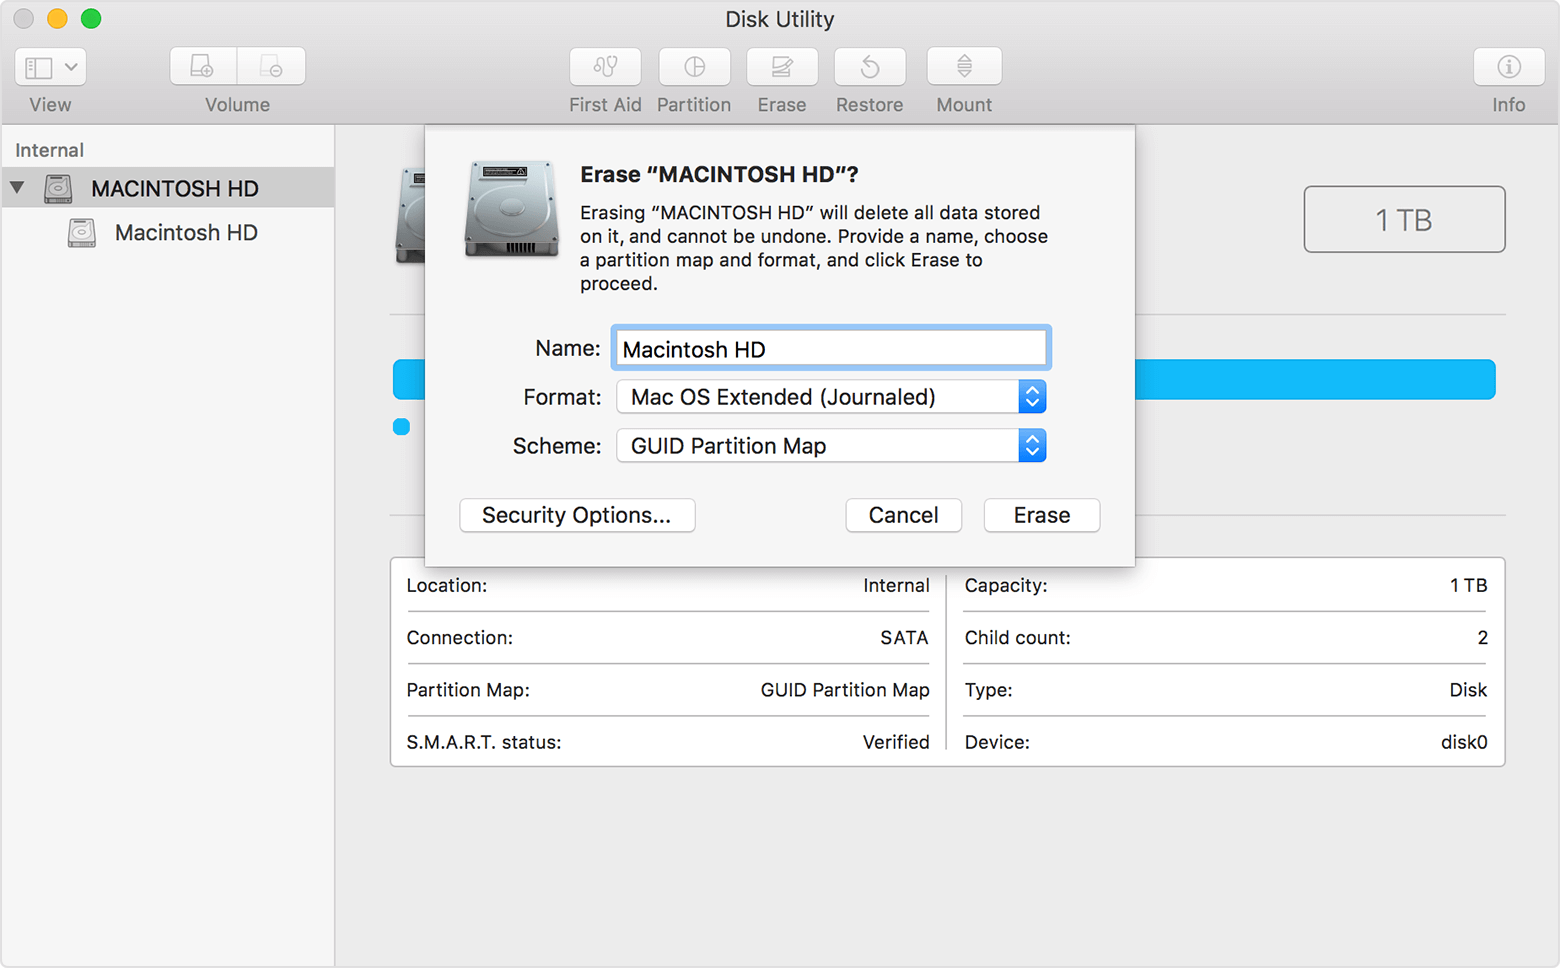
Step 6. From the Disk Utility menu, choose the name of the startup disk located at the left side of your screen. After that, click on the "Erase" tab. For most MacBook Pro users, the default name of the startup disk is "Macintosh HD OS X".
Step 7. Choose "Mac OS Extended"(Journaled) from the list on the Format drop-down menu.
Step 8. Enter the name of your disk and then click on the "Erase" button. Your MacBook Pro will then start deleting your startup disk.
Step 9. Close the Disk Utility window and then choose "Reinstall OS X" on the Recovery menu.
Step 10. Click on the "Continue" button and then follow the on-screen instructions on your MacBook Pro. Once that the process is complete, your MacBook Pro will be formatted and your OS X will then be installed as a new one.
Part 4. Conclusion
Formatting your MacBook Pro is not a hard thing to do. You can choose from the methods that were mentioned above. Formatting is a must if you are experiencing any complications happening on your MacBook Pro. Formatting it is the easiest things that you can do to solve the problem. However, if you are just experiencing some minor things on your MacBook Pro like your hard drive is getting full or your Mac is getting slow, then formatting it won’t be necessary. All you have to do is to get your Mac cleaned.
For you to clean up your MacBook, you need a trusty and safe software. What we highly recommend you to have is the PowerMyMac. It will safely remove all the unnecessary files that you have on your Mac which will give you more space on your hard disk and will also help you to speed up your MacBook Pro. You can regularly clean your Mac. Doing this helps you improve the speed performance of your Mac.

