


I love my MacBook Pro. I bought it for both personal and work purposes. I use it for my web design work and it’s seriously very handy.
However, I need to partition my hard disk on Mac for several reasons. How do I do this on my Mac device?
 Look here! You will find several powerful solutions to partition a Mac hard drive. Read Along!
So, let’s get started…
Contents: Part 1. Why Partition A Hard Drive Mac?Part 2. The Benefits Of Partitioning Your Mac Hard Drive.Part 3. What to Do Before Doing The Partition?Part 4. How To Partition Mac Hard Drives or SSDs?Part 5. Conclusion
Part 1. Why Partition A Hard Drive Mac?
Every type of computer, whether it be a Windows PC or a Macintosh, have a limited amount of storage. How you use your device will lead to your storage being quickly filled up or not.
You can opt to add more space to it by upgrading to a solid state drive (SSD), for example, or by connecting to various externals hard drives.
Actually, Mac’s boot drive is partitioned by default. In recent models of the Mac, a secret partition is included within the boot drive.
This secret partition contains the macOS Recovery System, some important first aid tools for Mac, and an installer. This is an important part of the Mac as it can be used in case your macOS fails to reboot or install.
Before we delve into partitioning a Mac SSD or hard drive, let’s go into the benefits of doing so.
Part 2. The Benefits Of Partitioning Your Mac Hard Drive.
One reason you might have when you want to partition your hard drive is to be able to run multiple operating systems. For example, you have a macOS on one partition and a Windows operating system on another.
Or, possibly, you can operate two different versions of one operating system on both partition’s sides, all done on a single disk.
Each disk drive has its own volume. However, these disk drives are found separately by the Finder and are also treated separately.
When you have partitioned Mac’s hard drive or when you have partitioned a specific external hard drive using your Mac, you are able to manage and format the two partitions separately.
This is similar to having two different computers in one device. However, if you want to utilize the other partition to operate on an earlier version of your current Mac device, the volume necessary for it has to be 2x of that of the required space.
Part 3. What to Do Before Doing The Partition?
Before you partition your Mac, it’s always best to clean it up first. Mac users usually have a lot of junk files such as unnecessary videos, old documents, and email attachment downloads, among others.
We recommend that you use iMyMac PowerMyMac to clean up your Mac. Here’s a step-by-step guide on using this software:
Step 1. Download and Launch PowerMyMac on Your Mac
Download PowerMyMac. Launch the software. Once you do so, you will see the main interface with your Mac’s system status.
Click the module entitled “Junk Cleaner”. This can be seen on the left-hand side of the window.
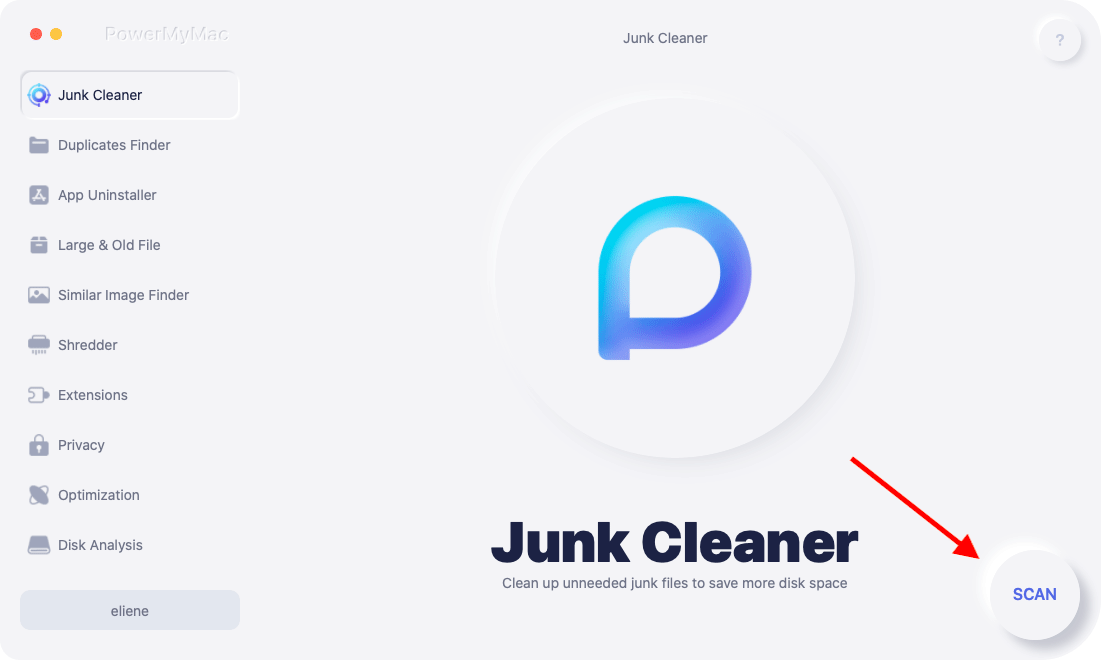
Step 2. Scanning System Junk
Click the “SCAN” button. The software will now scan your Mac for junk files.
Step 3. Review and Select Items to Clean Up
PowerMyMac will now show all junk files into various classifications including Application Cache, Mail Junk, Photo Junks, and Trash Bin, among others. Click a particular category to show details for that classification. Select the data or files you want to remove. Click the button named “CLEAN”.

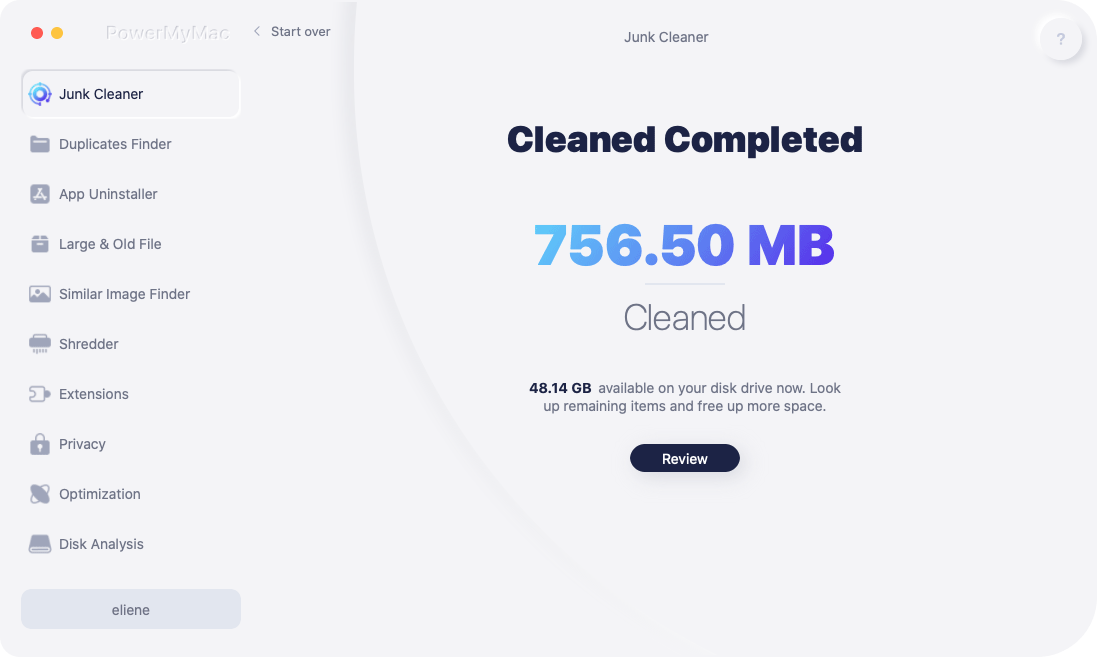
Step 4. Clean Up Mac System Junk is Done
Once the process is complete, the software will mark the folders as Zero KB. Sometimes, other folders will not be regarded as Zero KB. This is because these are auto-recreated folders.
People Also Read:4 Options to Fix Mac White Screen.How to Update Mac
Part 4. How To Partition Mac Hard Drives or SSDs?
Partitioning your Mac hard drive or solid state drive can be done in multiple ways. We will explain these below:
Method 1. Utilizing Boot Camp.
If you want to operate the Windows operating system on your Mac, Boot Camp will be of use to you. The said software also comes with the so-called Boot Camp Assistant.
This application can be used to partition your hard drive. With this, you can run macOS on one partition and Windows on the other.
You can simply follow the instructions of the Boot Camp Assistant to partition your SSD or hard drive space. This will allow you to run Windows on a Mac device smoothly.
With this app, you will have Windows on your Mac almost as if you were using it on a traditional Windows PC.
Method 2. Using Disk Utility.
Disk Utility is used to repair or partition Mac disk drives. The Disk Utility app can be found inside the Applications folder under the Utilities subfolder.
However, before you start the partition, you should backup the folder you want to be copied. For this, you can use tools that provide a bootable replica of the drive you want to partition. If something goes wrong, you might lose everything you have on the drive that’s why you have to do this first
Do this before the partitioning process:
- Clone the drive you want to partition.
- Ensure that the clone is without errors.
- Plug the clone.
- Visit System Preferences.
- Go to Startup Disk.
- Check if the drive that has been cloned works.
Now, here are the steps to partition your Mac’s hard drive:
- Go To Application Folder and then Utilities.
- Open the Disk Utility app.
- In the Disk Utility application, choose your Mac’s internal drive (or you can choose an internal SSD).
- It will display two options, Partition, AND First Aid. Select Partition.
- Click “+.” This can be seen under Partition Layout.
- A new partition will be displayed. Modify the size according to your requirements.
- Provide a new name for this new drive. If what you wish doesn’t happen, you can opt to “revert to unpartition hard drive on Mac”.
- Once you are okay with the size, select “Apply”. If a lock symbol appears in the bottom left-hand corner of the screen, click it to confirm the process.
Once the partitioning process is done, you will now have a new internal SSD or hard drive. This will be identical to the original one. However, there won’t be anything in it.
Part 5. Conclusion
Partitioning your hard drive has its benefits. One amazing benefit of this process is being able to run Windows on one partition and macOS on other; this is all within the same device. It’s like having two computers in one.
However, make sure that before you make the partition, you have to clean up all the junk files within your Mac. You can use PowerMyMac to do this.
Also, you can use various tools to partition your hard drive. Just select the one that’s best for you using our guide above.

