


If you're working with sensitive documents on your Mac, learning how to redact in Preview is essential. Whether it's hiding confidential client info, personal data, or financial details, proper redaction ensures your content stays private, even after sharing.
In this guide, we’ll walk you through how can redact in Preview step by step. You’ll also learn redaction best practices, common mistakes to avoid, and how to ensure your system is optimized for working with sensitive files. We’ll even show you how can clean up temporary files and background processes that might put your redacted documents at risk.
Contents: Part 1: Why Redaction MattersPart 2: How Can We Redact in Preview on Mac?Part 3: Why System Cleanup Supports Redaction Security?Part 4: Common Redaction Mistakes to AvoidPart 5: Conclusion
Part 1: Why Redaction Matters
Before diving into how to redact in Preview, it’s important to understand why redaction is different from just hiding or covering content.
Redaction vs. Hiding
- Redaction permanently removes the content from the file.
- Simply drawing over text or placing a black box isn’t secure; someone can remove the overlay and reveal the underlying information.
Common Use Cases
- Legal and financial documents
- Medical records and personal health information (PHI)
- Contracts and agreements
- Email addresses, SSNs, phone numbers
Proper redaction ensures your shared files are secure, without risking sensitive exposure.
Part 2: How Can We Redact in Preview on Mac?
Let’s get to the main point: how to redact in Preview on macOS.
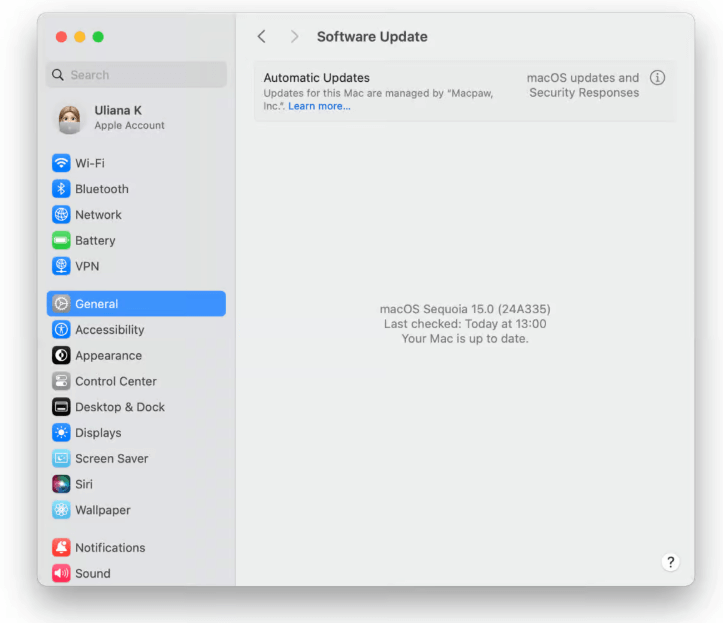
Note: Full redaction in Preview is available on macOS Ventura and later. If you don’t see the redaction tools, make sure your macOS is up to date.
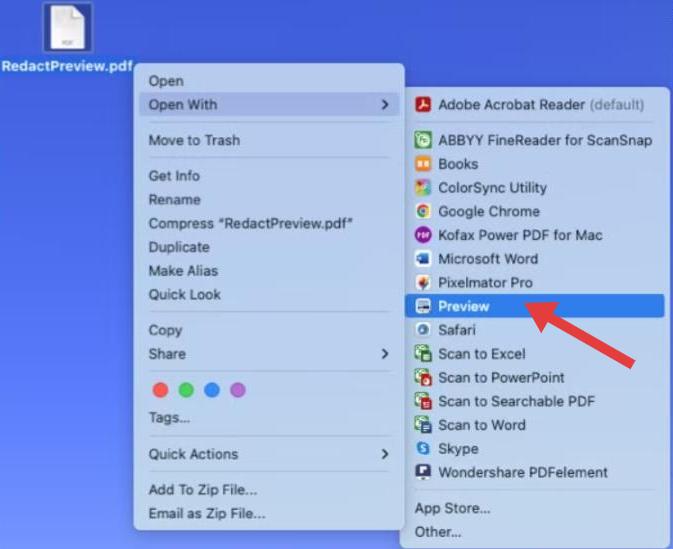
Step 1: Open Your File in Preview
- Right-click your PDF or image file.
- Choose Open With > Preview.
Step 2: Enable the Redaction Tool
- Go to the Tools menu in the top bar.
- Select Redact (you may need to customize the toolbar if it's not visible).
- A prompt will appear warning you that redaction is permanent.
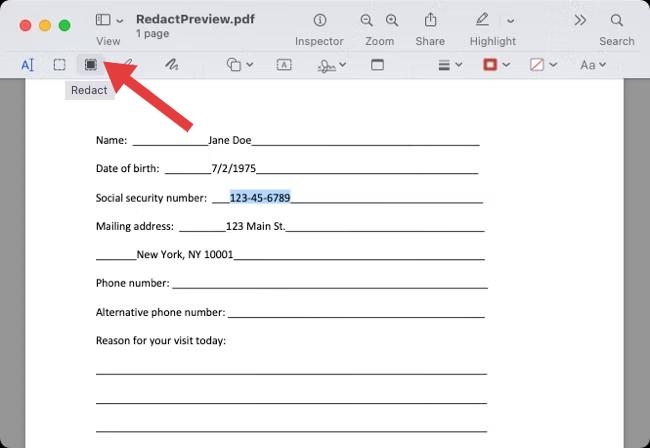
Step 3: Redact Text or Images
- Use your cursor to highlight the text or image area you want to redact.
- The section will turn black, indicating it’s permanently removed.
Step 4: Save the Document
- Use File > Save or Export as PDF.
- Double-check the saved version to ensure nothing is left unredacted.
Tips to Redact Securely
- Always save a copy of your original document first.
- Don’t rely on shapes or black rectangles—they can be deleted.
- Zoom in to double-check redacted areas, especially for multi-page documents.
Now that you know how to redact in Preview, it’s wise to ensure your system isn’t storing leftover cache or autosave versions. This is where a tool like iMyMac PowerMyMac becomes critical.
Part 3: Why System Cleanup Supports Redaction Security?
Even if you learn how to redact in Preview properly, your Mac might retain temporary versions of the file—especially if you're editing or working with large documents. These cache files or background autosaves can store unredacted versions without you realizing it.
iMyMac PowerMyMac: Your Privacy Companion
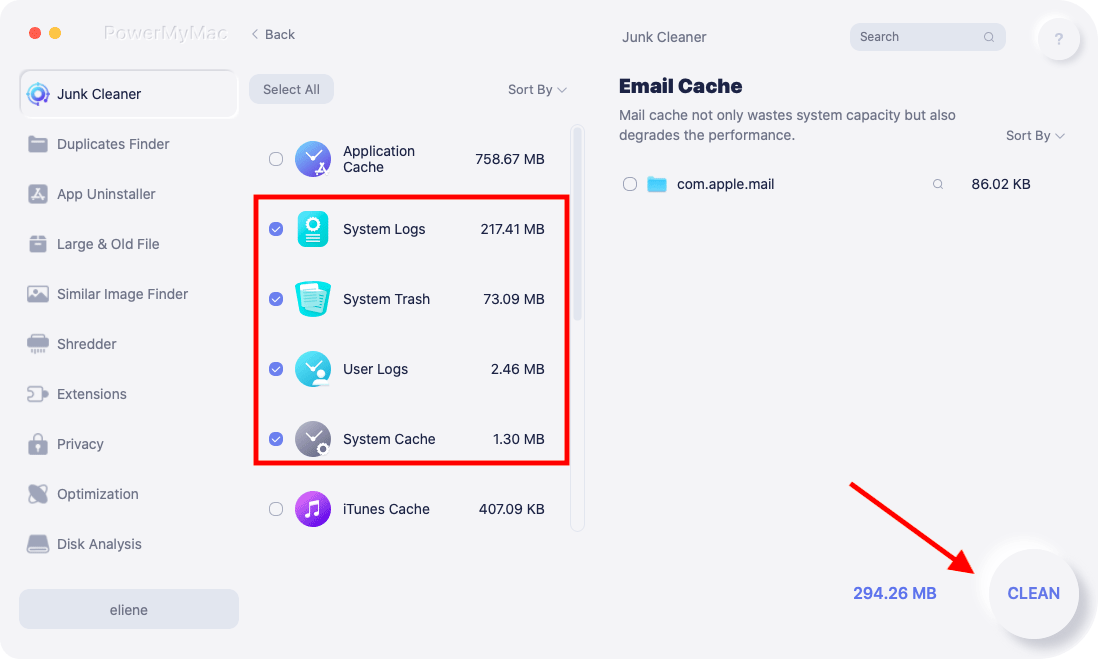
iMyMac PowerMyMac helps you:
- Clear system cache that may store unedited files.
- Remove autosave versions and redundant temp data.
- Monitor CPU and RAM usage to ensure Preview or other apps aren’t lagging or storing excess data.
- Identifies and removes duplicate photos, documents, and downloads that silently eat up storage.
- Disable startup items that could be running in the background and accessing your files.
For anyone handling confidential documents, pairing Preview’s redaction tool with PowerMyMac’s optimization features provides a full circle of protection, redact on the front end, clean up on the back end.
Part 4: Common Redaction Mistakes to Avoid
Even if you know how to redact in Preview, there are mistakes that can compromise your data:
Mistake 1: Using Black Boxes or Markup
You might think drawing a black rectangle over sensitive info is enough. But many programs let users select and copy text underneath those shapes.
Mistake 2: Not Updating macOS
Older versions of Preview may lack full redaction support. Always check your macOS version to access the proper tools.
Mistake 3: Not Cleaning System Cache
Temporary or autosaved files can still contain unredacted content. This is where iMyMac PowerMyMac helps you securely clean leftover data that Preview doesn’t automatically remove.
Mistake 4: Not Verifying Saved Redactions
Before sharing the redacted file, open the final version and try to copy or search for redacted text. This ensures nothing sensitive remains accessible.
Part 5: Conclusion
Mastering how to redact in Preview gives you full control over your privacy when handling sensitive documents on a Mac. With just a few clicks, you can permanently erase personal or confidential information without needing extra software.
But remember: true privacy requires full system awareness. Hidden caches, temp files, or laggy performance can still leave you exposed. Use iMyMac PowerMyMac to clean up clutter, monitor processes, and secure your redacted content.
Whether you're a student, professional, or just someone who values privacy, combining Preview with PowerMyMac keeps your Mac clean, fast, and private.

