


If you are a photography enthusiast, there must be numbers of photos on your phone, computer or iCloud. Working with the photo applications, iCloud Photos can store both your photos and videos in iCloud securely and at the same time sync the data to your phone, Mac and iCloud.com. No matter which device you are using, you can scan through your photos by logging in your iCloud account. Besides, sharing photos with several friends is more convenient and faster. That’s why many people would like to unload their photos and videos on iCloud. So today we are going to talk about how to access iCloud Photos on Mac. But before we do that, let’s see some considerate tips on cleaning the unnecessary and duplicate photos on your Mac.
Article GuidePart 1. Hot Tip-Delete the Unnecessary and Duplicate Photos on Your MacPart 2. How to Access iCloud Photos on MacPart 3. Conclusion
Part 1. Hot Tip-Delete the Unnecessary and Duplicate Photos on Your Mac
Before you access iCloud Photos Library, please note that the iCloud will automatically back up your photos and videos in the background when you are taking pictures or recording videos with your iPhone camera. This will occupy a certain space in your iCloud. Though you store your files in iCloud is for saving storage, gradually you will find that there is only 5GB of free storage in iCloud. For more storage, you need to pay at least $0.99 (USD) a month. When your iCloud on Mac receive those files, your Mac, likewise, backs up another one on its hard disk which will increasingly pile up a great number of files and affects the operation of the device. Thus, you’d better clean out some unnecessary and duplicate images on your Mac.
Here recommends a powerful butler-like software iMyMac PowerMyMac to you, which helps clean up, optimize and maintain your Mac quickly and thoroughly. The specific steps are as follows:
To Clear iPhoto Junk on Your Mac:
- Enter the software and head to Master Scan.
- Press the Scan button and view the results after a while. (If you are the first time to scan photo with this software, allow it to access your data on Mac.)
- Select the photos you’d like to remove and press the Clean and wait for the cleaning process.
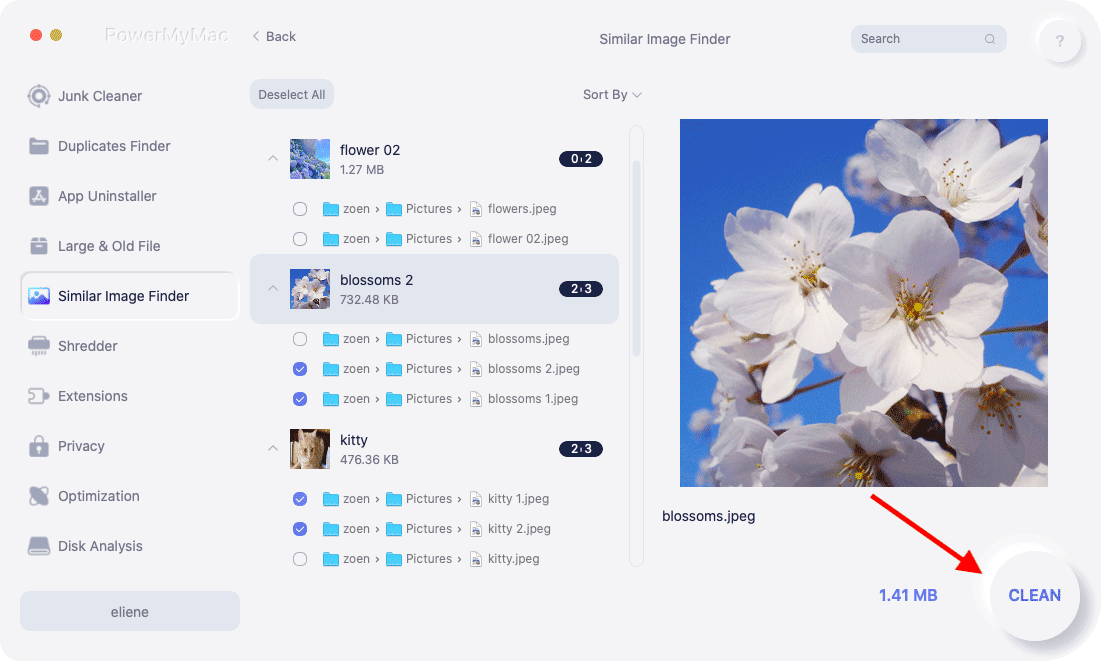
To Clear Similar Photos on Your Mac:
- Launch the software and click Similar Image Finder under the Toolkit module.
- Press the Scan button and view the scanning results.
- Select similar photos to clean and press the Clean and wait for a while.
See! The steps are quite simple and after that, you will be surprised that your Mac is much cleaner than before. More space is released. Your Mac and iCloud will run faster. Now, you can access the iCloud Photos.
Part 2. How to Access iCloud Photos on Mac
Nowadays, there are many methods to access iCloud, especially when it not only has an online version but also an application version. So in this part, we are going to share two methods to enter iCloud Photos.
How to Enter iCloud Photos Online:
If you don’t download an iCloud on your Mac, you can access it and see your photos or upload your photos online by opening iCloud.com. What you should do is:
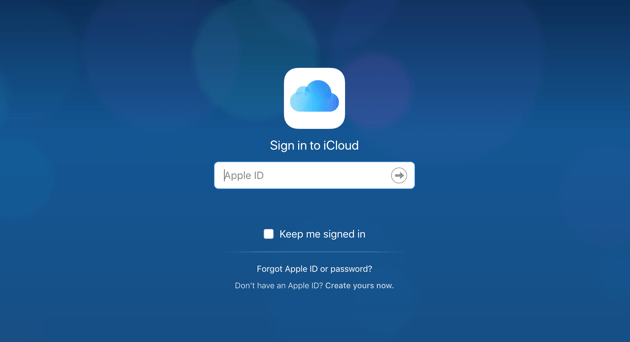
- Search iCloud.com with a browser.
- Log in your Apple ID and enter the iCloud.
- Click Photos in the menu list on the left column, then you will see the photos that you’ve uploaded in iCloud.
How to Enter iCloud Photo Library on Mac:
If you’ve already had download iCloud on your Mac, open it and then follow the steps listed below:
- Go to the Apple Menu and click System Preferences.
- Find the iCloud and select it.
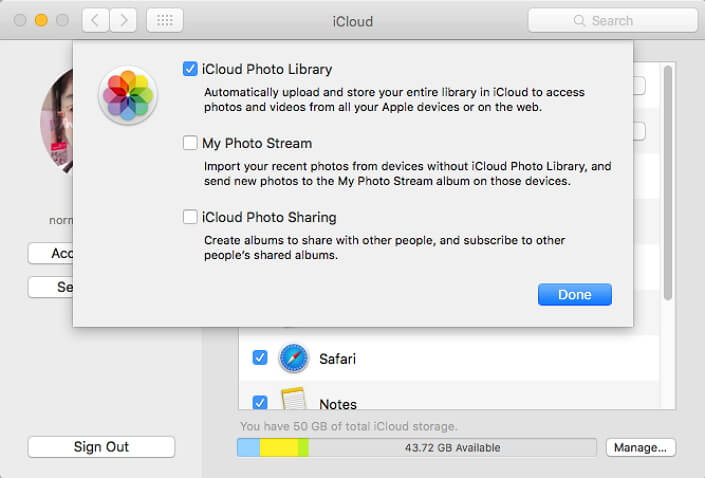
- Tick the checkbox named “Photo”.
- Open the Options and tick the checkboxes named “iCloud Photo Library”. (After you turned on this function, your photos will automatically upload to the iCloud Photo Library. This will take up a certain space in iCloud, that’s why we ask you to clean up your Mac so that you can reduce the waste of storage by photo junk and similar images.)
- Tick the checkboxes named “My Photo Stream” and “iCloud Photo Sharing” if you like. (This step allows you to import, send and share photos.)
All right, now you are already in your iCloud. You can upload the photos that you just took with your phone, scan through the old ones to enjoy your moment or share them with the people you want.
Part 3. Conclusion
Keeping photos in iCloud is safe and convenient. The photos can be permanently stored in iCloud and can not be seen by strangers without permission. People can upload and share their photos very often even if they don’t have an iCloud app on their Mac. Getting into iCloud Photos is very easy. But I still want to remind you to regularly cleaning your Mac so that you can release more space to store the photos that you really want. To clear the photo junk by yourself maybe tiring, halfway and time-consuming, but if you download iMyMac PowerMyMac, you can save your precious time to take more beautiful pictures and back up them to iCloud Photos which is already been cleaned. Always remember that your Mac and the applications installed on it can run faster as long as the system has no more redundant files and has enough storage.

