


A Mac device is well-known because of its awesome performance that it caters to all of its users. Also, it has some features that are clearly not available with other operating systems. But when it comes to recording audio using your Mac, not all Mac users know how to do this.
That is why here, we are going to show you the simple and easiest way on how to record audio on Mac. This way, you will be able to save some recordings or have them sent over to someone that needs it.
Article GuidePart 1: What Are the Types of Audio RecordingPart 2: Easy Ways on How to Record Audio on MacPart 3: Making More Space on Mac For New FilesPart 4: Conclusion
People Also Read:A Guide on the Best MKV Player for Mac in 2021 EditionHow to Make Room on Mac Effectively
Part 1: What Are the Types of Audio Recording
When it comes to recording audio, basically, it is everything that you have recorded using your microphone. However, there are actually two types of audio recording that you can make. One is known as the external voice recording, and the other one is the internal voice recording.
1. External Recording of Audio on Mac
The external audio recording basically refers to the sound that you using your own voice or instruments. In other words, this is a recording processed by using your microphone. External audio recording can be in a form of singing, recording an interview, a conference speech, and news reading and recording it using your Mac.
2. Internal Recording of Audio on Mac
This type of recording is where the sounds come from your very own device screen. Internal recording is where you will be able to save your audio that is playing using your Mac. This type of recording includes the use of iTunes Music, and other websites.
Part 2: Easy Ways on How to Record Audio on Mac
Now, for you to be able to record audio using your Mac, you will be needing to have a recording application first. Just like those smartphones that you have, Mac also has some recording applications that you can use. And we are going to show you some of those applications.
Application #1: How to Record Audio on Mac Using QuickTime
QuickTime application that you have on your Mac is one of the default applications that comes with it. This application can be seen in any Mac version, even those old Mac versions. But when it comes recording audios, the Audio Recording Feature is usually available on those Mac OS with 10.6 and later. So, in case you are using a Mac that has an older version, then you might need to pay for the audio recording services.
So, for you to be able to record audio on Mac using QuickTime, here are the steps that you should follow.
Step 1: Go ahead and launch your Applications folder on your Mac and then choose QuickTime for you to open it.
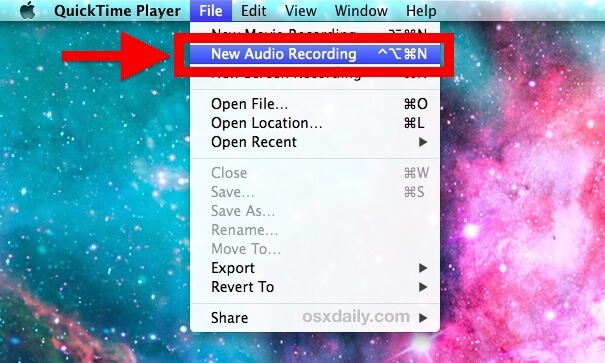
Step 2: Then on the QuickTime page, go ahead and choose the File option from the menu bar at the top of your screen.
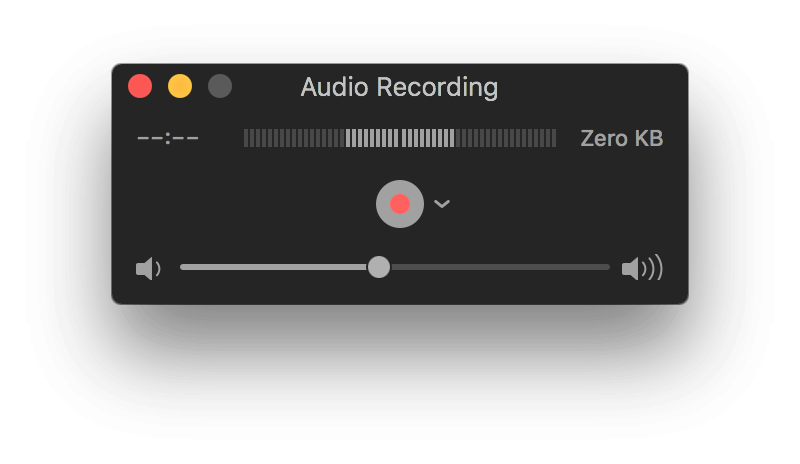
Step 3: Then from the drop-down menu, go ahead and choose “New Audio Recording”. Then this will launch another window for your recording.
Step 4: On that recording window, you will be able to see Microphone that has an option of Built-in Microphone, and a Quality option wherein you can choose on what quality would you like your audio to be recorded.
Step 5: Then you can go ahead and simply choose a specific microphone that you would want to use as a device for recording your audio on your Mac.
Step 6: Once done, go ahead and click on the red button for you to be able to start recording your audio.
Step 7: After clicking on the red button, you can now go ahead and start recording. And once that you are done with your recording, just go ahead and click on the red button again for you to stop the recording process.
Step 8: After recording your audio, go ahead and choose the File option and then select the Save button for you to save your audio recording on your Mac.
Step 9: Then go ahead and simply export on the audio recording that you made on any folder that you want on your Mac.
Step 10: Then go ahead and close the QuickTime Player on Mac.
And once that you are done in recording your audio and saving it, then you can go ahead and choose the folder that you have selected earlier. From there, you will be able to see all of the recordings that you have made will all be there in that folder.
And in case that you would want to check on the recorded audio that you have made, then all you have to do now is access that recorded audio and listens to it. This way, you will be able to know what you have recorded on your Mac and you can listen to them as well.
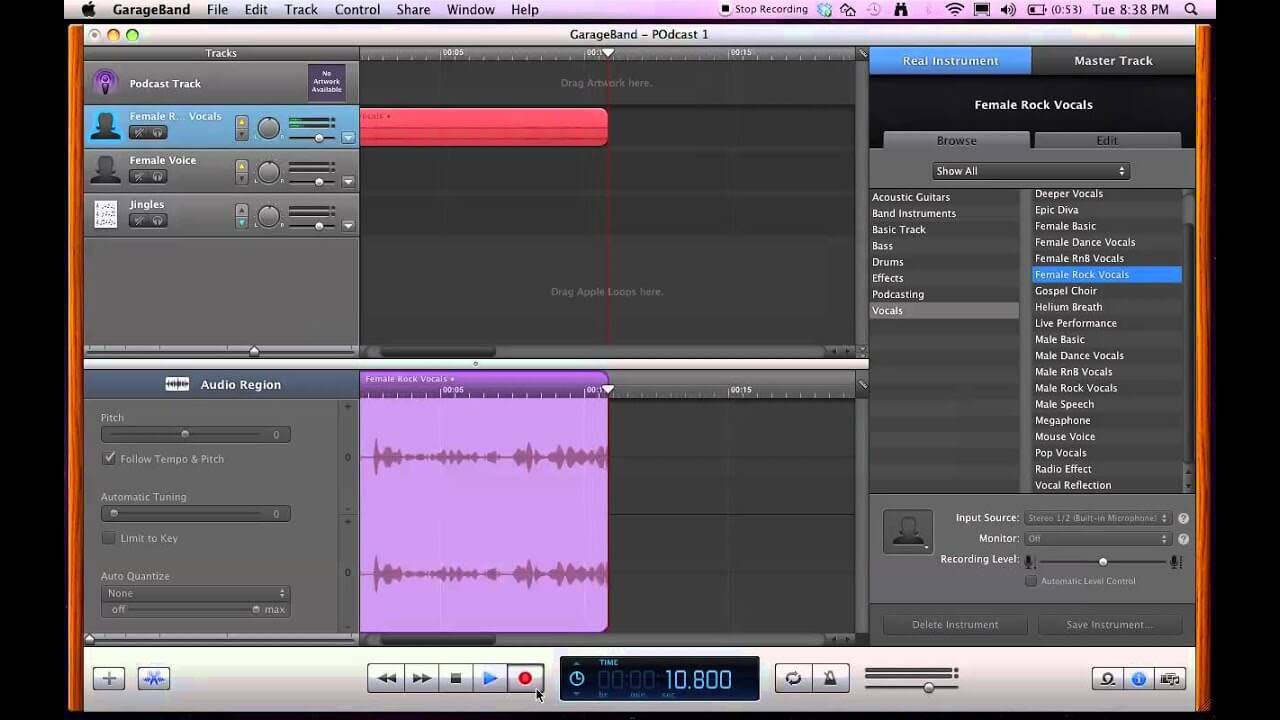
Application #2: How to Record Audio on Mac Using GarageBand
The GarageBand application is also one application that is pre-installed in most Mac devices. But, if your Mac does not have this application, then you can go ahead and have it downloaded from the Mac App Store. This application is considered to be good when it comes to playing audios, recording, and as well as on editing your audio. And the best part is that you can have the application downloaded and be used for free.
Another feature that the GarageBand application has is that once you were able to record your sound, there is also an option for you to add some sound effects. And with all that, here is a step that you can follow for you to be able to record audio on your Mac using the GarageBand application.
Step 1: Go ahead and launch the GarageBand application on your Mac.
Step 2: Then go ahead and click on the red button for you to be able to record your audio.
Step 3: Then you can go ahead and give your voice some background music if necessary.
Step 4: And once that you are done recording your audio, you can go ahead and click on the red button once again for you to stop the recording process.
Step 5: Then, you can go ahead and save the audio file that you have recorded in any folder that you want.
Step 6: Once that you were able to save your audio, you can go ahead and open the audio file for you to listen to the audio that you have recorded. This way, you will be able to know if you needed to edit some parts or add some effects.
Part 3: Making More Space on Mac For New Files
Now that you were able to know how to record audio on your Mac, then this also means that you will be needing to free up space as well. This is for you to be able to save more audio files that you need on your Mac. And in order for you to do so, you will be needing a powerful tool that you can use that will allow you to free up space quickly and effectively. And with that, might as well go with the iMyMac PowerMymac.
This is because the iMyMac PowerMyMac is an all-in-one application that you can use for you to be able to clean up everything that you no longer need on your Mac. And by cleaning up your Mac, you will be able to have more space, which means that you will be able to save more audio files and other important files in the future.
Cleaning up your Mac is also very important for you to avoid having lags, or so that your Mac won’t be able to perform super slow because you are running out memory or space on your Mac storage. So, in order for you to start cleaning up your Mac, we are going to show you here how to clean up all the junks that you have as this is one of the main reason as to why you might run out of space.
Step 1: Get the iMyMac PowerMyMac
First of is that you need to download the iMyMac PowerMyMac from our website and have it installed on your Mac.
Step 2: Run the iMyMac PowerMyMac
After downloading and installing the iMyMac PowerMyMac on your Mac, go ahead and run the program. And as you can see on the main screen of the program, you will be able to see your Mac’s System Status. You will be able to see there the Disk usage, RAM, and as well as your Memory.
Step 3: Select the Appropriate Module and Option
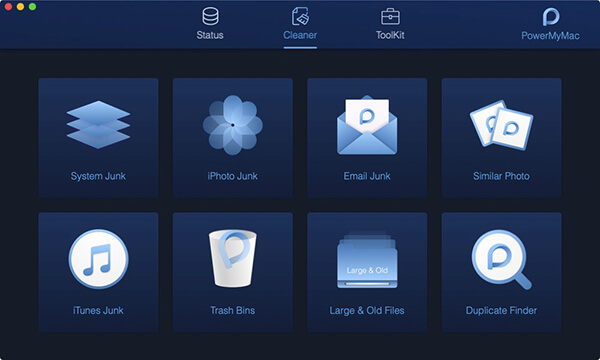
Still, on the main interface of the program, you will also be able to see three different modules wherein the Status module is selected by default which also shows you the status of your Mac. Now from those three modules, just go ahead and select the Cleaner module.
Then once that you have chosen a module, you will then be able to see different options that you can choose from for cleaning up your Mac. Now, to begin with, let us go ahead and choose the System Junk first.
Step 4: Scan Your Mac
Then the iMyMac PowerMyMac will then ask you to make a scan on your Mac so that the program will be able to locate all of the system junks that you have on your Mac. So in order for you to get this done, just go ahead and hit on the Scan button and wait for the scanning method to complete.
Step 5: See the Scanned Junks
And once that the iMyMac PowerMyMac is done with the scanning process, you will then have access to the result. So all you have to do from here is to click on the “View” button.
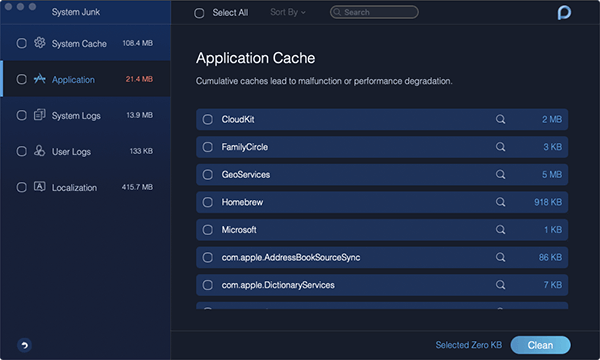
And as you can see on the left side of your screen, there are category folders. You will be able to see System Cache, Application, System Logs, User Logs, and Localization.
Step 6: Remove All Junk Files
Then, If you are going to choose a certain category folder on the left side of your screen, the files that it contains will be shown on the right side of your screen. Those are all the system junks that they contain. So from that list of junk files, go ahead and choose all the files to remove from your Mac.
You can tick on the files one by one, or you can also make use of the “Select All” option at the top of your screen. This way, you will be able to choose all the files at once. So the same thing on the other folders.
Step 7: Clean Up Your System Junks
And after you have selected all of the files that you want to get rid of from your Mac, then you can go ahead and have them deleted them. To do this, just go ahead and click on the “Clean” button which is seen at the lower-right corner of your screen.
Step 8: Confirm the Cleaning Process
After clicking on the Clean button, a confirmation message will then appear on your screen. On that message, all you need to do is to choose “Confirm” so that the cleaning process will proceed. From there, all you have to do now is to wait until the process is all done.
Part 4: Conclusion
Now as you can see, recording audio on your Mac is not an impossible thing to do. All you need to have are the proper tools that you can use for you to record your audio. Also, you can make use of the pre-installed apps that every Mac device has. That way, you will no longer need to download any applications anymore.
Also, cleaning up your Mac is also necessary as you will be needing to have more space for new files to save. That is why you'd better have the iMyMac PowerMyMac for you to be able to free up space in your Mac.

