


Even today, Mac has a limited hard drive that can become full quickly, especially if you have a lot of files. Fortunately, there are simple and quick options on how to make room on Mac to free up space on your hard drive.
Essentially, you can free up space on your Mac by deleting files or other objects that you have downloaded, but it is usually not enough. Most of the wasted space on your Mac is going to be reclaimed by dealing with the deeper elements such as duplicate files, language files, attachments, temporary files, or emptying the Trash. In case you cannot keep the hard drive of your Mac clean, you might end up with the “Your disk is almost full” error. It is recommended to start clearing up some space now.
Contents: Part 1. FAQs about Full Startup Disk on MacPart 2. How Do I Free up Disk Space on My Mac?Part 3. Other Tips on How to Make Room on MacPart 4. Conclusion
Part 1. FAQs about Full Startup Disk on Mac
Before talking about ways on how to make room on Mac, we need to figure out why is your startup disk is full and see what's taking up space below.
1. What is the Meaning of "Your Startup Disk is Full" Error?
The startup disk is a partition or volume of a drive that includes a usable operating system. The hard drive of Mac is comprised of disks or partitions. In every disk or partition, it contains data such as the operating system, applications and many more. Majority of Mac users only have one disk but some might have two or more.
If a Mac contains two disks, storage is separated between them. The Mac drive that contains the OS is the startup disk while the other is utilized as storage for files. Essentially, it is likely to have several startup disks but the majority of Macs only have one.
2. Why Is My Startup Disk Full?
Generally, there is not enough space anymore. The startup disk is near its full capacity and this is detrimental. The hard disk must not go beyond 85% of its capacity, especially the startup disk since it can lead to sluggishness and eventually errors in the long run.
In case the startup disk is jam-packed and you receive a notice from your device, it is a serious sign that you must free up storage space right away.
3. How to Find out What is Taking up All of My Startup Disk Space?
You can check the storage usage by going to the “About This Mac” in the Apple menu and switching to the Storage section. Generally, there are 6 categories of data that are stored on the Startup Disk. If the bar is large, it indicates the amount of space taken up by those types of files, namely – Movies, Apps, Audios, Documents, Backups and Other.
Once the “Startup Disk Full” message flashes on your screen due to limited free disk space, the initial move is to clean up your Mac of any unnecessary files. Once you have determined what is eating up your disk space, you can examine your folders and pick out any unnecessary files to be removed. Pictures, Movies or Backups typically use up most space. In some cases, though, the “Other” files take up the biggest space which includes logs, caches, archives, cookies, plugins, disk images, extensions and more.

Part 2. How Do I Free up Disk Space on My Mac?
An effective way on how to make room on Mac is to use iMyMac PowerMyMac. With this tool, it can effectively clean up and optimize your Mac. The tool can provide you with a variety of functions in a single app. Since you want to clear up space on your Mac, we will focus on the Junk Cleaner module of PowerMyMac. In this module, you can clean out unwanted system files, photo cache, email downloads and attachments, similar photos, iTunes backups, and installation packages as well as outdated or large files. With this selective feature, you no longer need to worry about wrongly deleting other essential files.
You can utilize any of the tools in the Junk Cleaner module by PowerMyMac. Let us take a close look at the steps on how to make room on Mac when using this tool:
- Check the status of your Mac. Open the program and assess the system status on the main interface.
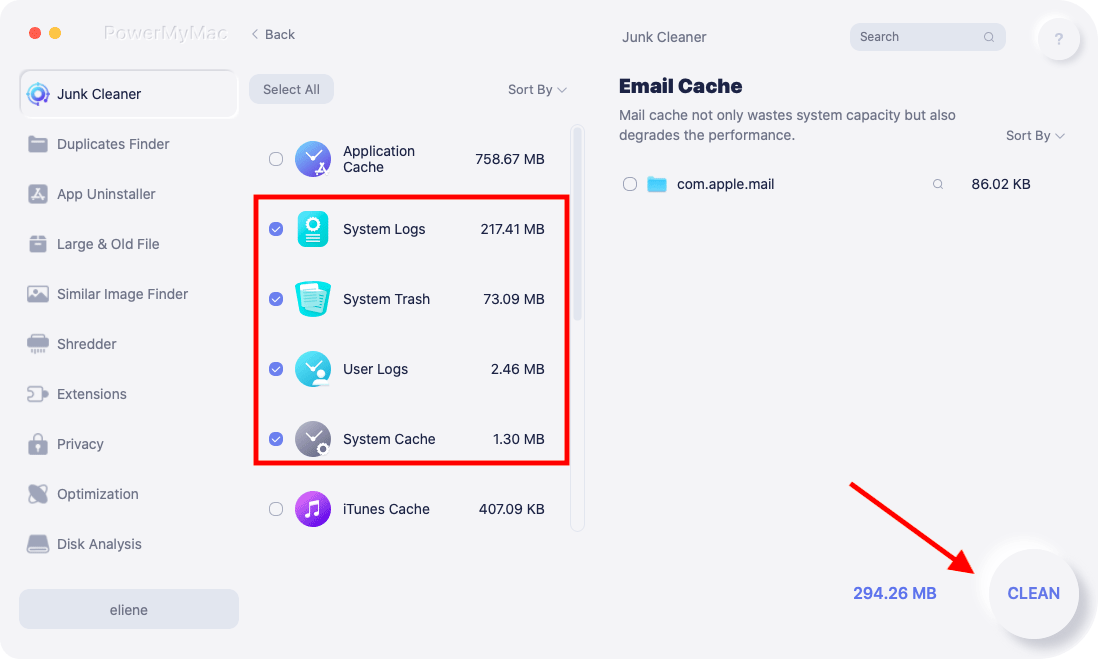
- Click on the “Junk Cleaner” module.
- Tap on “SCAN” button to begin a scan of the System Cache, Application Cache, and other associated junks on your mac.
- Once the scan is completed, you can view the results.
- At this point, choose the system files that you want to remove.
- Tap on the “CLEAN” button to get rid of the system junk files on your Mac. In some cases, it is needed to key in your password. Simply wait for the cleaning process to finish.
It is a quick and simple process to remove any system junk files from your device. Remember that the same steps are applicable to the other tools in the Junk Cleaner module of PowerMyMac. With just a few clicks on your mouse and the straightforward steps, you can free up space on your device in a hassle-free manner.
Part 3. Other Tips on How to Make Room on Mac
Aside from using PowerMyMac to easily to avoid the “Startup Disk Full” message, there are ways on how to make room on Mac that you should be familiar with.
1. Empty the Trash
One simple way on how to make room on Mac is to simply empty the Trash on your device. When you delete files, they are sent to the Trash so you have the option to restore them later in case you changed your mind. You can completely remove these files to free up space by emptying the Trash. In some Macs, they have several trash cans, thus you must empty several of them.
When emptying the main Trash in your account, simply click on CTRL+click or right-click on the Trash icon at the right bottom part of the dock and select the “Empty Trash” option. This will remove all the files that you sent to the trash from the Finder. iMovie, iPhoto, and Mail have their separate trash cans. In case you removed media files from inside these applications, you can empty their trash cans.
2. Remove Unused Applications
The applications present on your Mac are also taking up space. Any applications that you no longer use must be removed to free up space. Simply open a Finder window, choose the applications you want to remove in the sidebar and drag-and-drop the icon of the app to the Trash on the dock. Remember that some unused applications might be eating up a lot of precious space.
If you want to check which applications are taking up most of the space on your Mac, open a Finder window and choose Applications. Tap on the “Show items in a list” icon on the toolbar and click on the Size heading which will sort out the installed applications based on their size.
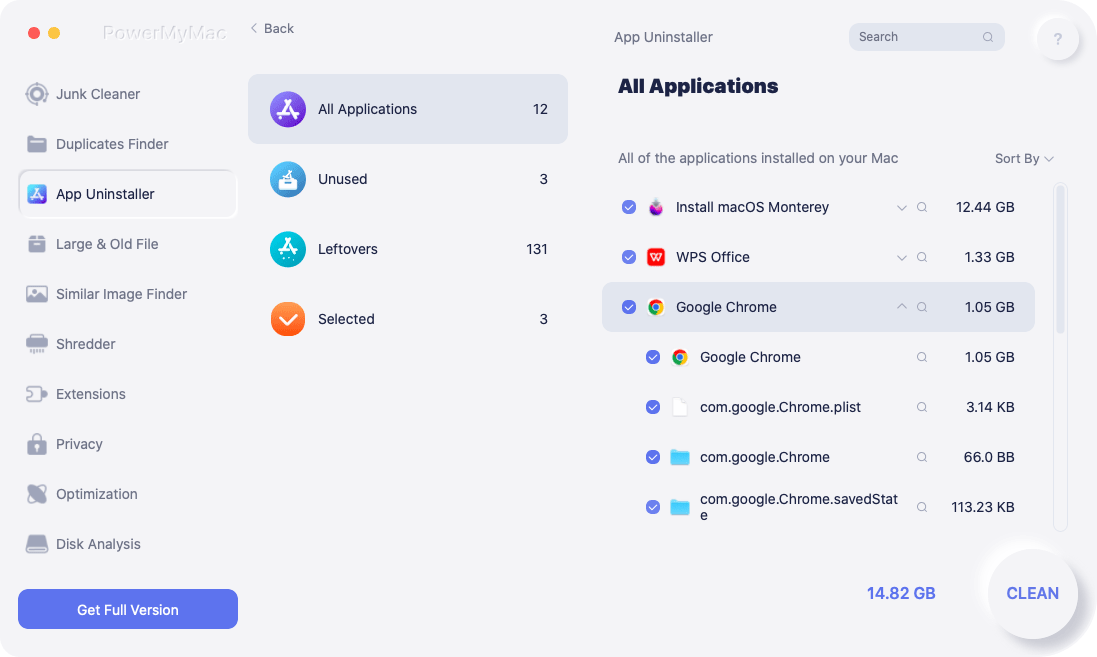
You can also make use of PowerMyMac to completely remove your unused apps and their related files. Just simply choose App Uninstall module, then follow this guide to finish the apps removal process.
3. Get Rid of Old iOS Backups
The backups of your iOS can take up a lot of space. If you want to find and remove them, follow these steps on how to make room on Mac by deleting old iOS backups:
- Open Finder
- Tap on “Go” in the menu and select “Go to Folder…”
- Key in ~/Library/Application Support/MobileSync/Backup/
This will remove all the old, outdated backups on your Mac that has been eating up precious disk space.
4. Remove Old iTunes Library Backups
Every time you update iTunes, the recent versions of the app creates backups of the library. You can remove these old iTunes Library backups with the following steps:
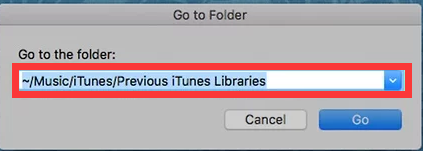
- Open Finder
- Tap on “Go” in the menu at the left upper part of the screen.
- Select “Go to Folder” and key in ~/Music/iTunes/Previous iTunes Libraries
Remember that they are all dated and simply remove the old ones that you no longer need.
5. Clearing up the Cache
A cache file is a temporary data file that has been created by browsers, apps, and other programs to allow your Mac to function faster. When removing cache files, they are recreated the next time the app is used. Nevertheless, some apps that you are no longer using still have leftovers in the Cache folder and takes up a lot of space. It is recommended to clear the cache every now and then.
The cache files are usually stored in the Library folders that you can find in the following locations:
- /Library/Caches
- ~/Library/Caches
In the /Library/Caches, you can find the temporary files that were created by the system. Generally, these files do not use up a lot of space. However, in the ~/Library/Caches folder, there are many junk files that were created when using applications. As a result, this folder will increase in size over time. If you want to access these files, simply open the Finder window. Click on Go > Go to Folder on the menu. Key in ~Library/Cache in the dialog box and click Go.
6. Get Rid of Logs
Once you open the Library folder, you will also find another type of temporary file – Log files. These files are stored in the Logs folder. Just make sure that before removing the logs of the system, mobile devices, and apps, you no longer need them anymore.
7. Remove Mail Downloads
If you are using the standard macOS Mail app, every time you view the email attachments, the system saves them to a separate folder on your hard drive. In the long run, the size of this folder can increase up to several GB.
The simplest way to find this folder is to search for it using Spotlight. Simply key in “Mail Downloads” in the search field. In case this method failed to work, an alternative is to open the Finder > tap on Shift+CMD+G key shortcut and key in ~/Library/Containers/com.apple.mail/Data/Library/Mail in the search field. Once open, check the files and save those that you need or delete them all.
8. Remove Duplicate Files
Over time, you might have created copies of documents or download files twice and forgot about them. Essentially, duplicate files can take up disk space on your Mac. Searching for duplicate files manually can be a long and burdensome process. You can do the following steps on how to make room on Mac by easily find duplicate media files in the iTunes Library:
- Open iTunes
- Tap on File in the menu
- Select Library > Show Duplicate Items
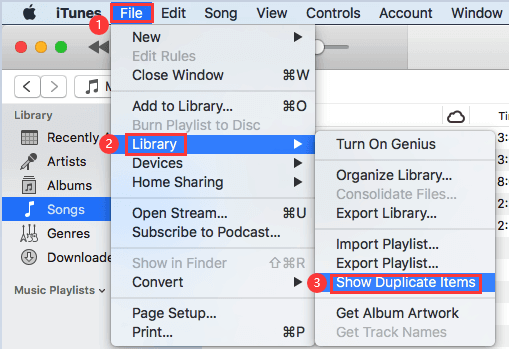
iTunes will provide you with a list of duplicates. You can check the list and get rid of any duplicates. Sadly, for other duplicate files, you are required to check for each folder individually that can take a long time.
9. Turn off Apps Running in the Background
Switching off applications that have been open for several days or longer or restarting your Mac on a regular basis can help free up disk space.
It is important to note that applications create temporary files to store data. If these apps are left to run without closing them, these files will continue to grow. Once you turn off an app, the cache files are removed and the disk space is restored.
10. Cleaning up Your Photo Library
Photos have always been the culprit when it comes to eating up precious disk space. The initial move on how to make room on Mac is to choose only those that you want to eliminate such as duplicates or those that were mistakenly taken.
Once your own files are dealt with, the next step is to remove files that your system created. In Photos for Mac, it is the cache files. The Photos cache files also include the iCloud local copies, Faces cache, and other app-related caches. You might be surprised by the amount of space that these take up especially if you regularly use Photos. If you are using OS versions prior to the macOS Sierra, here are the steps on how to make room on Mac by finding and removing the cache:
- Open Finder and go to the Photos library.
- CTRL+click the Photos library and chose “Show Package Contents” option.
- Access resources and click on model resource.
At this point, you will see several folders in the Finder. The cache of Photos are usually present in these folders but it can be tricky to figure out which ones are safe to remove and what to retain. Remember that if you delete the wrong file, it can disrupt the overall performance of Photos.
Part 4. Conclusion
Now you have gotten useful tips on how to make room on Mac so that you can save your new files. Manual ways will take you much time to finish one by one, so we recommend you use iMyMac PowerMyMac to help you do all the tasks. This all-in-one tool has many functions you can use to clean up your Mac and free up more storage space. Just grab its free trial version below to have a good experience on Mac cleanup now!

