


One problem about Mac is how Mac write to NTFS even if it is easy for it to read from NTFS. That is why in this article, we are going to show you some possible ways on how mac write to NTFS. But with all that being said, in using an external drive, you must be considering using the one that is in exFAT. This is because exFAT drives can easily be read and write by macOS.
Article GuidePart 1: What Is NTFS?Part 2: How Mac Write to NTFSPart 3: The Best Third-Party Driver
People Also Read:How to Use NTFSHow to Format USB on Mac
Part 1: What Is NTFS?
![]()
The NTFS or the New Technology File System is known to be a file system which is normally used by Windows NT operating system to store and at the same retrieve files on a certain hard disk. This is the equivalent of the Windows 95 and the HPFS.
NTFS Features:
- It can support large files.
- It is integrated file compression.
- It can support names that are in Unicode.
- It secures your data for both your removable and your fixed disk.
- It uses a b-tree directory for it to track of those clustered files.
Part 2: How Mac Write to NTFS
If you are going to write NTFS on your Mac, there are actually three ways on how you can do this.
1. Using A Third-Party Drivers Paid
There are actually some third-party drivers that you can install and use on your Mac device. Although these drivers are paid, they are still easy to install and give your Mac a better performance than using a free NTFS driver.
2. Using A Third-Party Drivers for Free
Aside from those paid drivers that you can use, there are those that come up as free ones. With these drivers, you will be able to install it on your Mac and will allow you to write support. However, when it comes to installing these types of drivers, it may seem a bit complicated than those with the paid ones. This goes especially for those Mac devices that has a System Integrity Protection option.
Also, the free third-party drivers are a bit slower when in terms of performance compared to those paid ones. And free third-party drivers automatically mount the NTFS in a read-write which is considered to be as a security risk.
3. Experimental NTFS-Write Support by Apple
Mac comes with experimental support that is used for writing NTFS drives. But the thing is, it has been turned off by default and will require to mess up in your terminal for you to have it enabled. And with this, it has no guarantee that it will work properly on your Mac and at the same time, it can also cause some problems on your NTFS file system.
4. The Best Tool for Mac Write to NTFS
Aside from the ones that were mentioned above, there is another tool that you can use. And this is by using the iMyMac PowerMyMac Toolkit.
The iMyMac PowerMyMac Toolkit actually comes with an NTFS write a tool that you can use for your Mac. The Microsoft NTFS is of this tool is for you to use to read and at the same time write any files that you have on your HDD, flash drive, or from your SDD card that is formatted for Windows. And for you to know how you can use this, all you have to do is to download the iMyMac PowerMyMac and install it on your Mac then follow the steps that we have provided below.
Tip: The current version does not support the following function temporarily, but a special software that supports the following function will be released in the future.
Step 1: Launch iMyMac PowerMyMac and Choose Toolkit
Once that you have installed the iMyMac PowerMyMac on you, Mac, go ahead and open up the program. From there on the main interface, there are three modules you can choose from. So from those three modules, go ahead and hit on “Toolkit.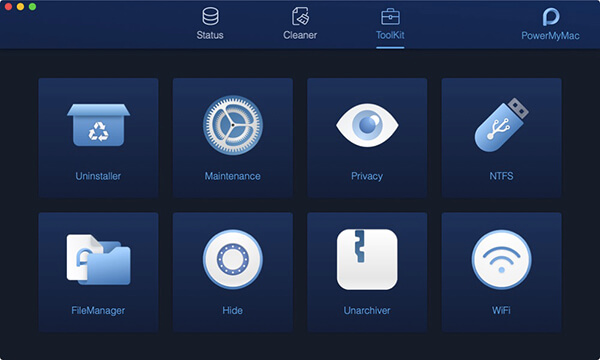
Step 2: Choose NTFS
From there under the Toolkit module, go ahead and simply click on the NTFS option.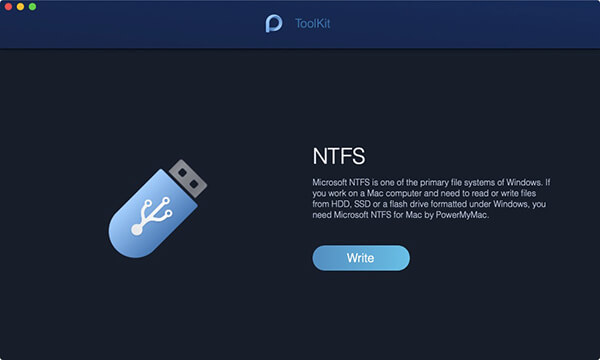
Step 3: Write on Your Files
Once that you are in NTFS of the iMyMac PowerMyMac, go ahead and hit on the “Write” button for you to start copying, editing, or setting up instructions for the files that you have under your HDD, SSD, or from your flash drive.
NOTE: If you happen to see a pop-up message on your screen which is called “Fail”, this only implies that you will be needing to install the NTFS -3G and as well as the Oxfuse. So make sure that you have these tools before you can start on using the NTFS feature of the program.
Step 4: Get Your Files to Write
Once that you have both tools on your Mac, you can then see the information of your USB and as well as the folders and files that you have. From there, go ahead and choose the file that you want to write and have drag over to the upper blank site.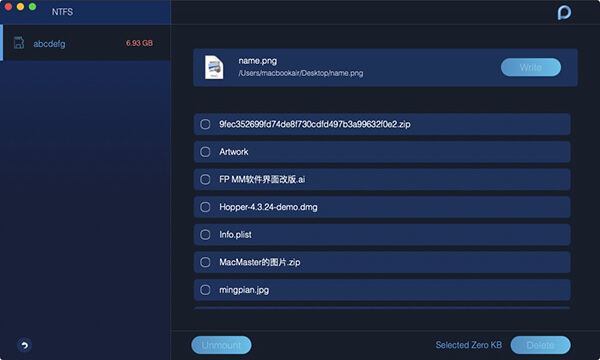
Step 5: Write Files
After that, go ahead and press on the Write button and the file that you have chosen will then start to go to your USB. And once that it completely disappears, then that means that the writing process is done.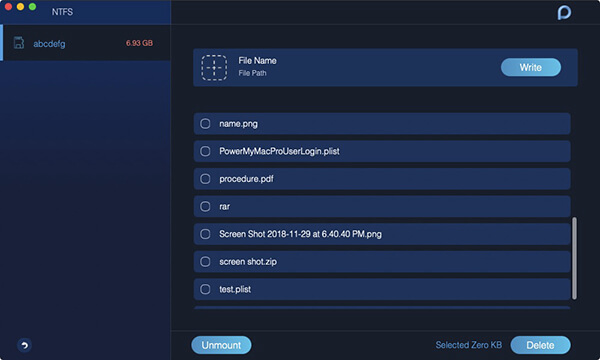
Step 6: Take Out Your USB
And once that the writing is done, go ahead and hit on the Unmount button for you to be able to remove the USB that you connected on your Mac.
Part 3: The Best Third-Party Driver
What Is The Best Third-Party Driver to Pay for
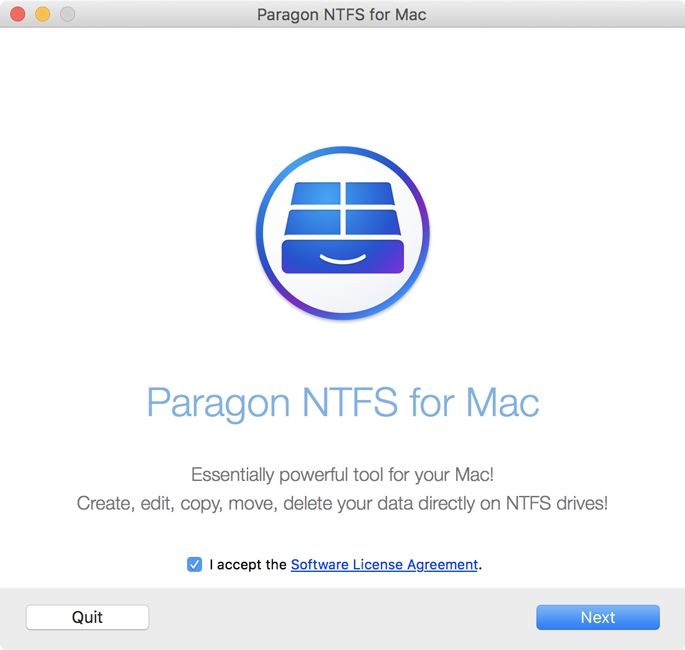
With all of the paid third-party drivers available in the market nowadays, there is this one best driver that you can use. And that is the Paragon NTFS for Mac. This third-party driver has a value of $19.95 and comes with a ten-day free trial that you can use.
The Paragon NTFS for Mac will then be able to be installed on your Mac in a clean way for those that are using the modern version of the macOS. And thus, the Paragon NTFS for Mac is the best option that you can get if you are willing enough to pay for a few bucks.
Using the Paragon NTFS for Mac, you will also experience on not having to face with those terminal commands for you to just manually mount the partition and to be able to deal with potential corruptions that you might get in using those free drivers.
And in the event that you actually have a Seagate drive, just keep in mind that the Seagate drive comes with a free download of the Paragon NTFS for Mac. And because of that, you will no longer need to get anything in extra.
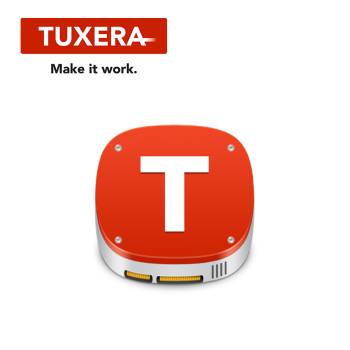
Another one that you can get is the Tuxera NTFS for Mac. This app can be downloaded with a value of $31 that comes with a 14-day free trial that you can enjoy to use. But if you would want to get the cheaper one, then go with the Paragon NTFS for Mac. Aside from the fact that it is cheap, its functionality is also the same as the Tuxara NTFS for Mac.
What Are The Best Third-Party Drivers for Free
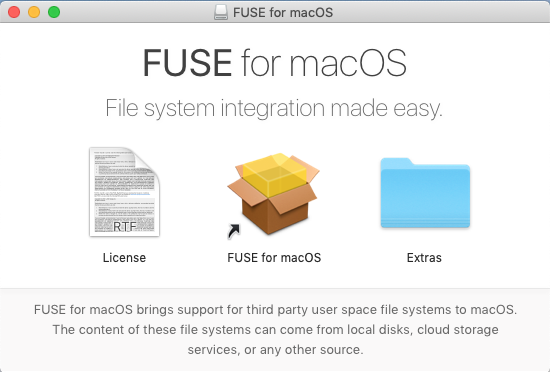
The Fuse for Mac is one of the drivers that you can use which can get for free. However, it actually needs to have it work perfectly and thus it is not that secure. And for you to be able to have your Mac mount an NTFS partition automatically de in a manner of read-write mode, you will be needing to turn off your System Integrity Protection or SIP and have one of the Apple’s tool be replaced with a binary which is known to be more vulnerable of the attack. So, having this will risk the security of your Mac.
But there is another way for you to use the Fuse for Mac for you to be able to mount NTFS partition in a read-write mode. And that is by manually using this driver through the use of your Mac’s Terminal. And with this method, you will be able to secure the safety of your Mac. And here is what you will be needing to do.
First is that you will be needing to download the Fuse for Mac and have it installed on your Mac. Make sure that you make use of the default option when you are installing the program. And with that, you will also be needing to install Apple’s command-line developer tool for you to proceed. If you were not able to have them, just go ahead and follow the steps below.
- On Finder, go ahead and go to Applications.
- Then head to Utilities.
- After that, enter this command path: xcode-select –install
- And lastly, go ahead and hit on the Install button once the program asks you to do so.
Tip: If you want to uninstall Xcode on your Mac, turn to the provided link.
Another thing that you will be needing to do is to download and install homebrew. If you still do not have this on your Mac, then you have to enter the following command path on your Terminal and hit on the Enter button for you to install it on your Mac.
/usr/bin.ruby -e "$(curl -fsSL https://raw.githubusercontent.com/Homebrew/install/master/install)"
After hitting on the Enter button, go ahead and key in the password that is provided once that the program asks you to do so. Then the script that you need will be downloaded and install the Homebrew automatically.
And once that you have successfully installed the whole developer and the Homebrew driver, then go ahead and enter the following command on your Terminal for you to be able to have the NTFS-3g.
brew install ntfs -3g
From there, you can now go ahead and manually mount the NTFS partition in a manner of read-write. Then on the Terminal window of your Mac, go ahead and enter the command below for you to make a mount point at /Volumes/NTFS.
sudo mkdir /Volumes/NTFS
And once that you are connected to an NTFS drive on your Mac, go ahead and have the following command run for you to list down any partition disk.
diskutil list
Then from there, you will be able to identify the name of the device of your NTFS partition. Just simply go ahead and search for the partition that comes with the Window_NTFS file system. And for you to be able to mount your drive, all you have to do is to run on the following command and have the name of your device be replaced for your NTFS partition. Just go ahead and enter this command.
sudo /usr/local/bin/ntfs -3g /dev/disk2s1 /Volumes/NTFS -olocal -oallow_other
Then you will then be able to see the file system that is mounted under /Volumes/NTFS. This will also then show up on your desktop looking just like a regular mounted drive. And with that, you will also be able to have it ejected normally whenever you want to unplug this.
However, if in case you would like to have your Mac to mount your NTFS drives connect to your read-write function. And also, you will be needing to turn off your System Integrity Protection or SIP.
 DISCLAIMER: Please do not do this! This is because this could mean risk on your Mac’s security. Also, because you will be needing to replace the NTFS mount tools that you have on your Mac and make use of the NTFS-3g tools. But, if you still want to take the risk of using this method, then we can still show you how.
- All you need to do first is to have your Mac reboot then hold the keys Command + R while the rebooting of your Mac is still going. This way, you will be able to have it rebooted to recovery mode.
- Then after that, go ahead and open up your Mac’s Terminal and then go to Utilities. From there, you can then go ahead and enter this following command: csrutil disable
- And once that you Mac has been rebooted normally, go to your Desktop and then launch Terminal on your screen.
- And from there, go ahead and enter the following command below.
sudo mv /sbin/mount_ntfs /sbin/mount_ntfs.originalsudo ln -s /usr/local/sbin/mount_ntfs /sbin/mount_ntfs
- After that, go ahead and have your System Integrity Protection turned on. Then reboot your Mac then hold the keys
Command + Rwhile your Mac is still rebooting. And once that your Mac is back on, then that means your NTFS-write will be working then.
So, just in case that you would want to undo everything that you have made on this method, go ahead and turn off your System Integrity Protection and then enter the following command:
sudo rm /sbin/mount_ntfssudo mv /sbin/mount_ntfs.original /sbin/mount_ntfsbrew uninstall ntfs – 3g
Conclusion
As you can see, the process for your Mac write to NTFS may look like its complicated to do but it is actually very easy. You can choose from the different methods that we have shown you or you can comment down below for any drivers that we can possibly use.

