There are huge compatibility issues between Mac computers and Windows PCs. That’s why it can be hard to transfer files from Mac to PC. Both operating systems have their own platforms when it comes to storing files such as music, photos, and documents. However, there are some files that can be more difficult to find compared to other types.
When you have finished moving your files from Mac to PC, Windows will automatically recognize music within its Groove Music app. Plus the Photos application will instantly recognize images too. Other files will be organized according to its file type.
In this article, we’ll give you various methods to help you move your files from Mac to Windows PC. Let’s get started.
Contents: 1. How to Transfer Files from Mac to PC Using An External Hard Drive2. How to Share or Transfer Files between Mac and Windows PC Wirelessly3. How to Transfer Files from Mac to PC Using Google Drive
People Also Read:Four Methods To Help You Transfer Videos From iPhone To MacA Guide On How To Move Files From Android To Mac
1. How to Transfer Files from Mac to PC Using An External Hard Drive
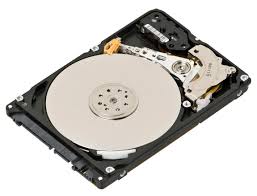
Before you transfer files from one operating system to another, you must have an external hard disk drive that works on both Macs and Windows PCs. This wouldn’t be hard to find as most are formatted in a way that works on both types of OS. However, if you don’t have one, make sure to format it first to ensure that it works on both Mac and Windows.
Here are the steps to help you move your files between these two different types of computers:
Step 01. Plug in your external hard disk drive to the Mac computer. Open this drive and then choose File. Press New Folder. Name your new folder as “Exported Files” and then press Return.
Step 02. If you don’t actually use the Photos app , skip to Step 07.
Step 03. Launch the Photos application and then press the Edit menu. Press Select All. You should press File within the menu after this. Then, move the cursor towards the option that says Export.
Step 04. Choose “Export Unmodified Original for X Items…” You can also select “Export X Items” which will allow you to choose image types and even video quality. But, if you want to make sure the files remain unmodified, you should choose the former option.
Step 05. Press the drop-down button for the option labeled Subfolder Format. Choose Moment Name. Select Export and then press the name of your external HDD. Double click on the former new folder you named as Exported Files.
Step 06. Press New Folder and then name it as Photos and press Create. Finally, press Export Originals. Depending on the number of images you wish to move, transferring might take a lot of time to complete.
Now, you have been able to move your pictures towards the external HDD. The next steps will allow you to move your music to the same external location:
Step 07. Launch iTunes and right-click on any music you like. If you prefer not to use iTunes and if you don’t actually use it for your music files, skip to Step 10.
Step 08. Choose Show in Finder. Then, press Command + UP ARROW in order to move towards the directory for Artists. Press the same keys again to move towards the Music directory. Then, you can press CMD + UP ARROW again to go to the directory for iTunes Music.
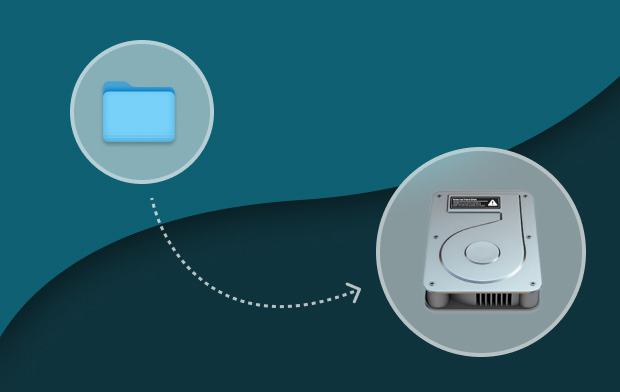
Step 09. Click and then drag the icon for your Music folder towards your external HDD within the side menu. Hold this click until the window displays the actual contents of the HDD. Move your Music folder to the folder you created recently named Exported Files then release your mouse button to. The music files will now be copied.
By this time, you have copied your music files over to your external disk drive. The following steps will show you how to move folders to your external hard disk drive:
Step 10. In the Menu bar, press Go and then click Home. Press down the Command Key while clicking Downloads, Desktop, Documents, and Movies. If you want to choose more folders, you can do so.
Step 11. Again, similar to what you did before drag the said folders to your external HDD until it displays its contents. Move the dragged directories towards folder labeled Exported Files. Release the mouse button to copy them all within the new folder. After this is complete, press the Eject icon located beside the name of the external HDD.
The following steps are still connected. This will allow you to transfer the files from your external HDD to that of your Windows PC. Below are the steps on how to do it:
Step 12. Plug your external disk drive to your Windows PC. Click the icon for File Explorer. Open the external hard disk drive by double-clicking it.
Step 13. Double click the folder labeled Exported Files, then double click the folder labeled Desktop and press Select All. Drag the files of the Desktop towards your desired location in the Windows PC.
Step 14. Repeat Step 13 until you have copied all files from the external HDD to your Windows computer.
2. How to Share or Transfer Files between Mac and Windows PC Wirelessly

Thanks to Apple's AirDrop feature, sharing files between two Mac computers have been very easy. But doing so with Mac and Windows PC is harder. In this section, we will tell you ways on how to share files between Windows PCs and Mac computers without using any third-party applications. The great thing about this method is the tools you use are built-into the two operating systems. Thus, protection of your privacy and sensitive information is ensured. Let’s get started with the first one.
Make sure both devices are within the same network. Simply follow the steps below to share files from Mac To Window PC:
Step 01: On the Mac computer, visit System Preferences. Then, go to Sharing and visit File Sharing. Press Options and choose Share Files And Folders Using SMB. In addition, you should choose the account you wish to share files from.
Step 02: Click Option. And press theWi-Fi icon located within the menu bar. This will show your Mac’s IP Address. Take note of your IP. You can write it down to make sure you remember it.
Step 03: Now, use your Windows PC and press the Windows key + R key in order to open Run. Type out “\\” plus the Mac’s IP Address. Then, press Enter.
Step 04: You will now be prompted to input the credential of the Mac computer account you want to share. Input the credentials and press OK.
Step 05: Go to the files and folders you wish to transfer to your Windows PC. Simply copy and paste from the Mac computer to the Windows PC to complete the process.
3. How to Transfer Files from Mac to PC Using Google Drive
When you set up Google Drive within your Mac, you can instantly access your files from iOS devices, other Macs, Windows PCs, and even Android mobile phones. Google Drive gives you the ability to store your files and share them among different devices. If you wish to share files to friends and colleagues, you can do so with Google Drive.
Once Google Drive is installed on Macs, it appears as another type of folder. Simply organize your folders, place files into it, and delete those that you want to remove. Any file or data you put in Google Drive is synced to Google’s cloud. Thus, you can access files from devices which also support Google Drive.
Before you set up Google Drive within your Mac, you will need a Google account. You can simply create one in Google Drive. When you already have a Google account, you can simply create Google Drive. After which, you download the app allowing you to use its cloud storage.
Part 1: How to Properly Install Google Drive on Your Mac
These said steps below assume that you haven’t installed the said app on your Mac device previously. Simply follow these steps below:
Step 01: Open a web browser and go to the page here. Or, you can visit this page here. Press the Download link located at the top part of the page.
Step 02: For a personal account, press the Download button located below Backup And Sync. Read the terms of service. Click Agree and Download.
Step 03: Now, Google Drive’s installer will be placed within your Downloads folder. Locate the installer when the download process is finished. Then, open the installer. Usually, it is named as InstallBackupAndSync.dmg.
Step 04: Once the installer window is launched, click and then drag the icon labeled Backup And Sync From Google. Drag and release this towards the Applications folder. Now, the Google Drive has been installed within your Mac.

Part 2: Your Guide to Launching Google Drive on Mac for The First Time
When you open Google Drive for the first time on your Mac device, you need to set it up and go through various steps. Once that is complete, it will be easier to access and use Google Drive.
Step 01: Open Backup And Sync From Google OR Google Drive. This is located within your Applications folder. A warning will be displayed. Press Open.
Step 02: Google Drive will display a welcome page. Press the button labeled Get Started. You will be prompted to log into a Google account. If you haven’t created an account yet, you can simply click the text labeled Create Account. Then, follow the instructions prompted on the screen. If you have created a Google account already, input the email address and then press Next.
Step 03: Input the associated password and then press Sign In. The installer of Google Drive will show a variety of information on how to use the application. Click through until you reach the end.
Step 04: The app will now place a folder within your Mac. This will be named as Google Drive. Usually, this will be located within your Home folder. Now, press the Next button.
Step 05: You can also opt to download the app within the mobile device. Press the Next button. You can also choose to share items with others. Press the Next button. Finally, click Done.
The Google Drive installer will be completed after it adds a menu bar item and also make a Google Drive folder within the Home directory. The Finder will also contain a Google Drive sidebar.
Part 3: Using Google Drive within Your Mac Computer
In order to work with Google Drive, you have to use the folder. You simply place the files on the folder and you can organize them accordingly. This will all be synced to Google’s cloud storage. You can even opt to share other files with other accounts if you want to. The Google Drive folder is where much of your time will be spent. However, the menu bar is worth mentioning as well.
The menu bar item within your Mac allows you to quickly access the folder of Google Drive. It also has a link that directly opens Google Drive within a web browser. It displays the documents or sheets you’ve recently placed in the Drive. Or, it can place docs you have recently updated. The menu bar item also displays if syncing to Google’s cloud storage is already complete.
Additional settings can be accessed within Google Drive’s menu bar item. To access these settings, do the following:
Step 01: Press Google Drive menu bar item. It will display a drop-down menu.
Step 02: Press the vertical ellipsis. This is located within the top-right part of the screen.
Step 03: A menu will appear. It includes features such as allowing you to get help, send feedback to the company, and set preferences for your Google Drive account. Click Preferences.
Step 04: Input the settings you wish to apply to your Google Drive account.
Part 4: Accessing Your Mac’s Google Drive on Windows PC
To access the files, you placed into your Mac’s Google Drive folder, simply use your PC and open a web browser. Then visit this page here. Log in to your Google Drive account. This should be the same as the Google Drive account you created with your Mac computer.
Once you access that Google Drive on your PC, right click a file or folder and click Download. Set a desired download location. Now, you have transferred files from Mac to Windows PC using Google Drive. Easy. right?
In Conclusion
In order to transfer files from Mac to PC, you can use Google Drive, an external hard disk drive, and the built-in options of both operating systems. The guide here will help you move your most important files especially if you have migrated from Mac to PC. Hope we’ve helped you out! Happy file transferring!


Алексей2024-01-09 22:12:08
Делал все как написано, вроде как происходит переход по адресу и видна папка, а зайти в нее не могу, винда не хочет подключаться к папке у которой есть общий доступ, пишет нет доступа и возможно у вас нет прав. В чем может быть дело?