


Do you want to make sure your files are kept safe? Then, backing up your data has come across your mind. Apple and other companies are pushing Cloud-based storage to its users. Although you can opt for Cloud storage, you might still want to use the traditional method to back up your Mac data to an external hard drive.
It is recommended that you have multiple backups for your data. For instance, you can use a Cloud-based service AND an external drive (SSD or HDD) to have two different backup locations. One would be online, while the latter is a physical type of storage. External hard drives allow you to store, share, and even protect data without the need to pay for annual cloud-based service fees.
In this article, we’ll show you how to back up your Mac to an external hard drive. We’ll finish the article by rounding up some of the best software to help you back up or clone our data. Let’s get started.
Article GuideHow To Back Up Mac To An External Hard Drive Using Time MachineHow To Selectively Back Up Mac Data Onto An External Hard Drive (Manual Method)Top Software To Help Back Up Your Mac To External Hard DrivesTo Wrap It All Up
People Also Read:How to Fix External Hard Drive Not Showing Up on Mac?Guide on How to Clone Mac Hard Drive to SSD
How To Back Up Mac To An External Hard Drive Using Time Machine
Before you back up your Mac to an external hard drive, you have to make sure your drive is formatted properly. Then, you use Time Machine to back up your data. Below, you will find two parts to backing up your Mac. The first part involves formatting your drive, while the second part involves the actual backing up of data.
Part 01 of 02: How To Format Your Drive For Backup Use Later On
If you’re going to back up your data using an external SSD or external HDD, you must begin by formatting these drives for the macOS. There are a few exceptions though. However, most external drives are not formatted for Mac computers. The good thing is, the process is actually simple. Here’s how to do it step-by-step:
Step 01: Connect the external drive to the Mac computer.
It is best to connect a “new” external hard drive to your computer. If you use an old, used drive, it can be complicated. When you format an old drive, all data contained in it will be erased. Thus, if you have an old hard drive, you might want to move the files to another location first before re-formatting it.
Step 02: Open Disk Utility.
This is located in the Applications > Utilities folder. The Applications folder can be accessed through the Dock.
Step 03: Locate the external drive you wish to reformat.
The Disk Utility will list all volumes and drives in your Mac. Thus, make sure you choose the actual external hard drive or you might end up erasing data on the wrong one.
Step 04: Erase or remove all contents of the drive.
Within the window for Disk Utility, select Erase. Then confirm the process. Rename the external drive afterward. You can name it with “Mac Computer Backup” or anything you’d like. Make sure to use a name which you can use to easily identify the contents of your external drive.
Step 05: Select various settings for your external drive.
Now, the tool will ask you to choose a new format. The options include, but are not limited to the following:
- Extended (Journaled, Encrypted)
- Extended (Journaled)
- Extended (Case Sensitive, Journaled)
The Extended (Journaled, Encrypted) format allows you to add encryption and a password to your external drive. The Extended (Journaled) type utilizes Journaled HFS Plus in order to organize your data. Finally, the Case Sensitive format allows you to differentiate between folders with the different case for letters. For instance, “November” and “november” are two different folders and are kept separated. Choose the best option that suits your needs.
Step 06: Go to Security Options.
Select Security Options. Ensure that the drive will write over previous data for a minimum of three times (3x). This is true for SATA drives and not solid-state drives.
Step 07: Remove data and then confirm the process.
Now, you should erase the data and confirm the process. After the entire activity is complete, your drive will be reformatted in a way that makes it compatible for Mac OS. Now, the next part involves backing up your Mac to an external hard drive using Time Machine. Hop on to the next section.
Part 02 of 02: Back Up Mac To External Hard Drive Using Time Machine
Time Machine is a built-in tool within Mac computers that enables you to back your Mac up. You can have backups that are automatically scheduled. If you wish to back up your Mac continuously to your external hard drive, Time Machine makes it effortless on your part once set up. Here’s how to enable Time Machine in a step-by-step fashion:
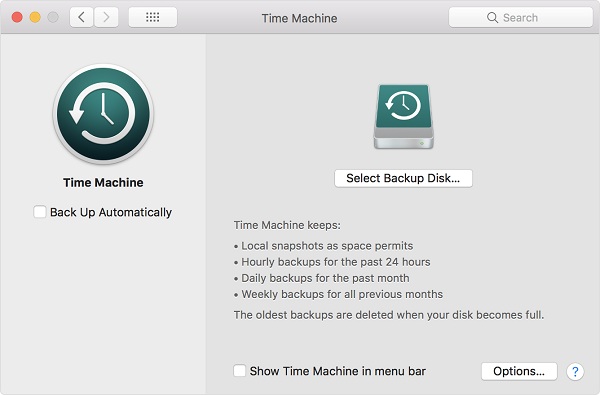
Step 01: Launch Time Machine and ensure it is switched on.
Go to your Dock and then visit System Preferences. After this, open your Time Machine. Within the left-hand side of the Time Machine, you can find a big switch. You can turn this switch on or off. Now, in this step, you have to turn it on.
Step 02: Select your external drive.
Under the label Select Disk, you should choose the external drive where data will be backed up. If you have formatted it according to the steps above, you shouldn’t encounter any problem. Although, if you have encrypted the external drive, simply enter the password you created earlier.
Step 03: Choose your options.
Below the Options button, you can select the volumes (of files or data) you wish to back up. This comes in handy if you wish to save every data you have on the Mac computer. If you think, everything is okay, then, you can go ahead and back up the files.
Time Machine will automatically back your data up. You can even retrieve data from the past 24 hours especially if you encounter an error. You can even restore data from the past week or the past month, depending on where Time Machine started.
How To Selectively Back Up Mac Data Onto An External Hard Drive (Manual Method)
If you wish to back up “certain” files only, you can do so. Here are the steps on selectively backing up data within your Mac computer to an external hard drive:
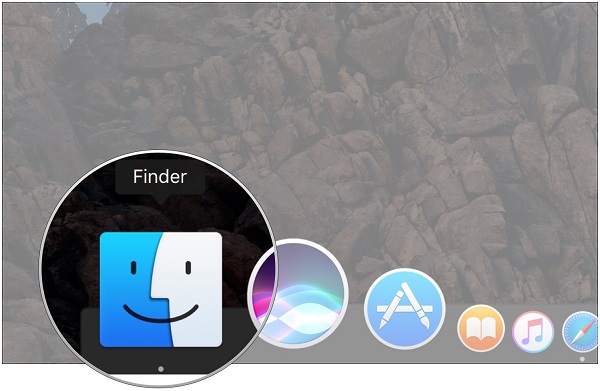
Step 01: Launch Finder.
The Finder window can be found within the Dock. Once open, check the left side of the Finder window. Double check if the external disk drive is actually there. If it is, you should see its name within the sidebar.
Usually, if the external drive is formatted correctly, it will show up within Finder. However, if it isn't displayed within the Finder window, simply go to Preferences and choose Sidebar. In the Sidebar section, you can make adjustments as to what you want to appear within the sidebar. Ensure that your external drive is set up in order to appear within Finder’s sidebar.
Step 02: Make your desired folders.
If your files are already organized in folders, you can just skip this step. But, if they’re scattered all around your Mac, you can go to Finder and create appropriate folders for your files. In this way, they’re organized inside the external drive.
Step 03: Transfer the folders towards the external hard drive.
Drag the folders and then drop them to the external drive located in the sidebar of Finder. They will be copied automatically to your hard drive. If you want to search for a specific file, use Finder’s search function located in the upper-right corner of the interface.
Top Software To Help Back Up Your Mac To External Hard Drives
In this section, we’ve gathered the top software you can use to back up the entire Mac to an external hard drive. We will start off with the obvious winner, Time Machine. Then, we’ll delve into other options later on.
Time Machine (Free)
Time Machine is built-into the operating system of Mac computers and is very easy to organize and use. It works automatically in the background once you set it up and you don’t have to create backups all the time because it does it 24/7.
The said tool is used to back up files to an external drive (or any external storage device) so you can just restore them later when you need them. You can also use Time Machine to see how your files looked like previously.
Since backups are created automatically, you will only lose little data (or even nothing) when a problem occurs. Plus, restoring these data is made easy through the tool as well. Once the tool is set up, it keeps hourly, daily, and even weekly backups. There’s a huge amount of redundancy. But it can come in handy if a disaster happens.

Carbon Copy Cloner (Paid)
It is a great backup tool with a complicated interface. However, it offers a “Simple Mode” for beginners. The simple interface can help you back up your data in three simple clicks. It uses the traditional method of backing files up by making an identical clone of the Mac hard drive.
Carbon Copy Cloner is a great software that creates bootable drives that actually mirrors the internal drive of your Mac. You simply update files that were modified or added. When an error occurs, you can use the Carbon Copy Cleaner back up to start your Mac up and make it work like it normally should. Then, you can simply restore the files onto your newly purchased drive.
The Time Machine is good for restoring data that have been lost or data that have gone wrong. The software Carbon Copy Cloner is a complementary application that can be used to restore “entire” drives. This can be helpful when you have to actually replace your SSD or HDD because of failure. Or, it can come in handy when you’ve purchased a new Mac computer.
Since the backup is actually an identical copy of your Mac’s main drive, you can simply reboot the computer using this backup and it will be up and working afterward. It’s as simple as that. As you can see our top two options are complementary tools that can help you have a complete back up of your data in case trouble happens.
SuperDuper! (Free/ Paid)
This is an alternative to that of the Carbon Copy Cloner. The great thing about it is it’s simpler to use compared to the one on number 2. A lot of SuperDuper! Features are free. However, the full app is paid. It has an interface that is easy to use. Simply select the drive you wish to back up and then choose the external drive where you want to store it too.
After this, you simply choose the backup type. Similar to Carbon Copy Cleaner, SuperDuper! allows you to create a bootable backup. You can also update this backup if you have made modifications or additions to your data.
ChronoSync (Free Trial/ Paid)
ChronoSync is a multifaceted software that can do a lot of things. It can be used to backup data, make bootable clones of your Mac’s hard drive, and sync files among different computers. It’s very easy to restore files that have been backed up through ChronoSync. This is similar to searching for the file within Finder and then copying it.
With ChronoSync, scheduling backups are possible. Or, if you prefer it, you can simply backup files when you plug your hard drive to your Mac. It can update your previous backup with modifications and additions you have made to your entire data too.
To Wrap It All Up
Backing up your Mac to an external hard drive is easy. You can do it with built-in tools or you can pay for third-party applications. We’ll recommend that you do both. You can use Time Machine to have regular, automatic backups in case files get lost. And then, you can use Carbon Copy Cloner for a bootable backup drive in case disaster strikes.
One thing you need to know about creating backups is to make sure you have multiple copies of your data. So, aside from backing up your data using Time Machine to an external hard drive, you can use Cloud-based services to store your data as well. Cloud-based services include Apple’s iCloud, Dropbox, and Google Drive. The choice is up to you. We hope that we’ve helped you back up your data on Mac to an external hard disk drive or solid state drive.

