


YouTube and other video streaming giants have become very popular in the past decade. And, they’re still popular now. We’re not surprised. Everybody is on their phones watching a specific video of some sort -- even kids. As such, if you have your own video, you may want to add watermark to YouTube video lists you own. It just makes sense. When you own something, you want to make sure it’s always attributed to you.
Here, we will discuss how to add watermark to YouTube video lists you own. In this way, you can be sure that the videos will be attributed back to you when it’s watched or used by somebody else. It’s a great way to show that you own a couple of videos too.
Contents: Part 1. Should I Watermark My YouTube Videos?Part 2. How to Add Watermark to YouTube VideoPart 3. To Sum It All Up
Part 1. Should I Watermark My YouTube Videos?
YouTube is a pretty famous streaming platform for music videos and videos. It’s essentially the Netflix of creators. However, you may have your own set of videos that you own. You have created these videos and edited them to perfection. In this case, you may want to add a watermark to YouTube videos you own. Adding a watermark means you’re placing a “logo” or “mark” that showcases that you own the video or videos. It’s similar to spraying your logo on your turf.
Putting a watermark on your video means showing people that you own something, including a video. This can be very advantageous, especially if you want to make sure you get recognized as the owner of some videos.
Part 2. How to Add Watermark to YouTube Video
Here, we will discuss what you have to do in order to do it. To add a watermark to a YouTube video, you should be able to have the video itself. It’s either a video you created or a video from YouTube.
For this, we will use iMyMac Video Converter. This is a great tool that will help you add a watermark to your video. Apart from that, it is used to convert audio files and video files from one file type to another. It allows conversion at fast speeds ensuring playback compatibility. Output formats include SWF, M4A, MOV, MP4, FLAC, WAV, OGG, FLV, and more. Video enhancement is possible with the tool as well. You can fix overexposed, dark, and shaky videos by simply upscaling its resolution from that of standard definition to high definition.
Various editing options are possible as well. For instance, you can add external audio tracks and subtitle tracks, you can combine multiple videos into a single file, or you can rotate your videos to 90 Degrees. All of these are possible in a speedy fashion because iMyMac Video Converter supports NVENC, NVIDIA CUDA, Intel HD Graphics, and AMD, among others. The tool helps to add a watermark to your YouTube video. In addition, it supports resolutions such as 3D conversion. It also supports SD (480p), HD (720p), FHD (1080p), and UHD (4K). You can select the specific resolution that you want. Different device outputs are supported as well.
So, here’s how to add a watermark to a YouTube video with iMyMac Video Converter:
Step 01. Have The Video In Place
The first step, of course, is to make sure you have the video in place. It may be a video you made at home or with your friends. Or, it may be something you got from YouTube. The point is, you need a video you will add a watermark to later.
Step 02. Download, Install, Launch iMyMac Video Converter
The next step is to go to the official website of iMyMac Video Converter. Download and install the tool on your computer. Then, follow the prompts on the screen to start the installation. After it is installed, then you should launch the tool on your Mac computer.
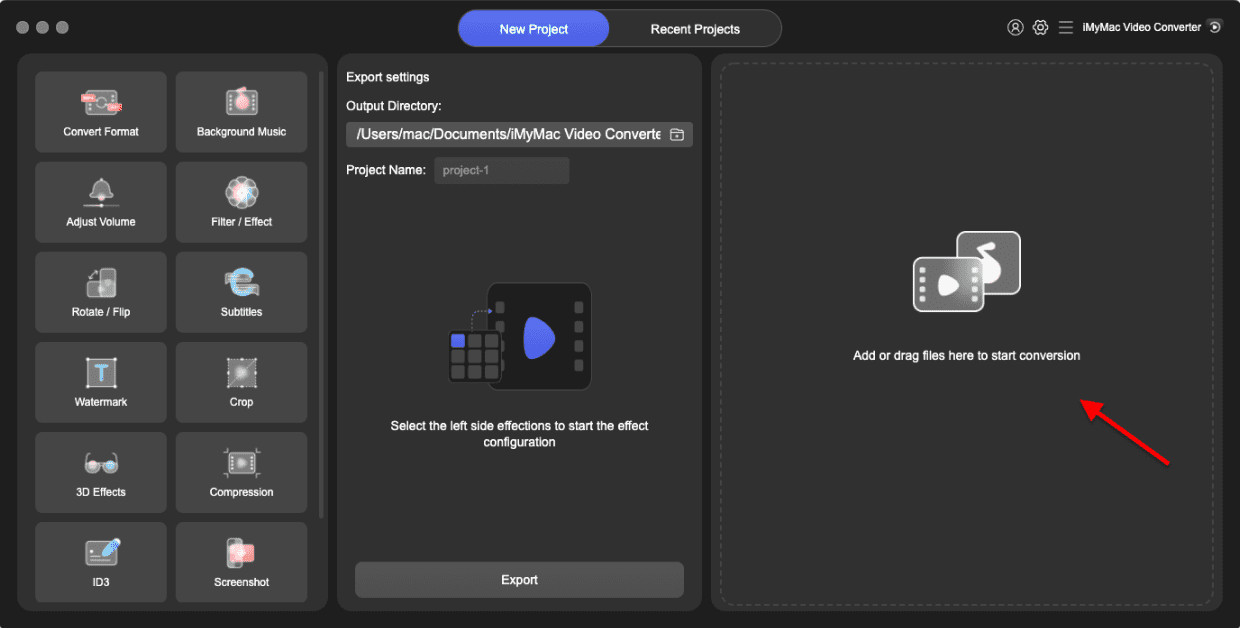
Step 03. Add Files
To add files to the tool, you have to click the “Add Multiple Videos or Audios” button on the interface of iMyMac Video Converter. After that, you have to add all the video files you want to put a watermark to.
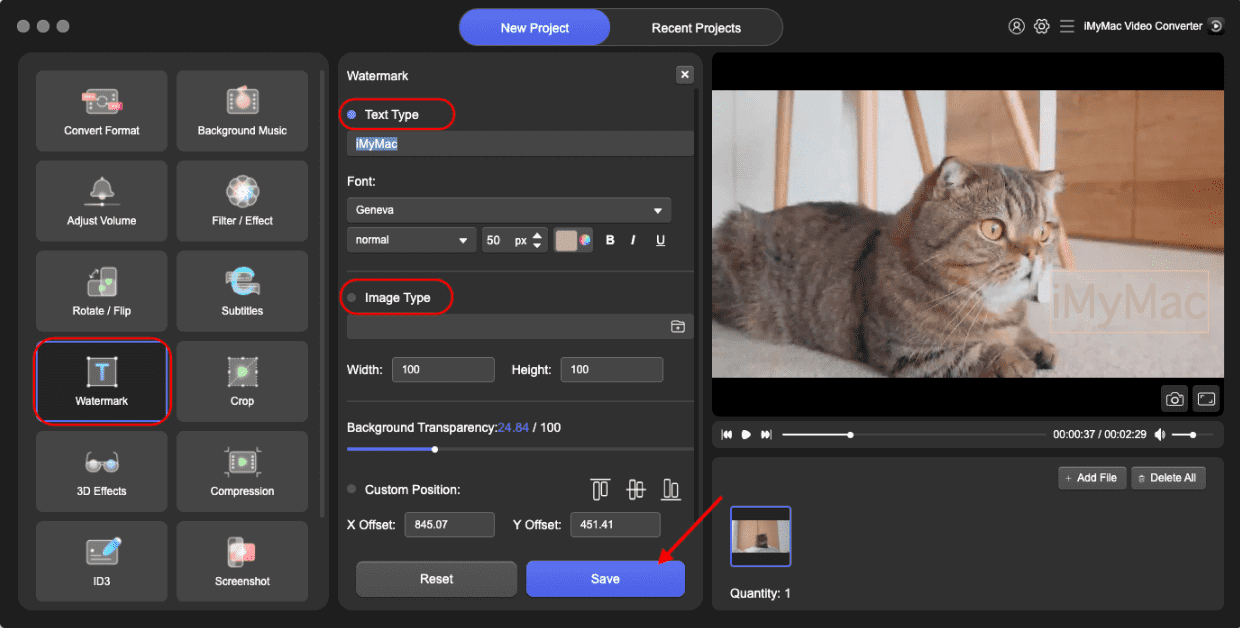
Step 04. Add Watermark
Now, tweak the settings that you want to for the output file. If you want to add a watermark to YouTube Video, Simply click Watermark. Then type in text you that you want to created a text watermark or choose a picture to create an image watermark. After that, click Save.
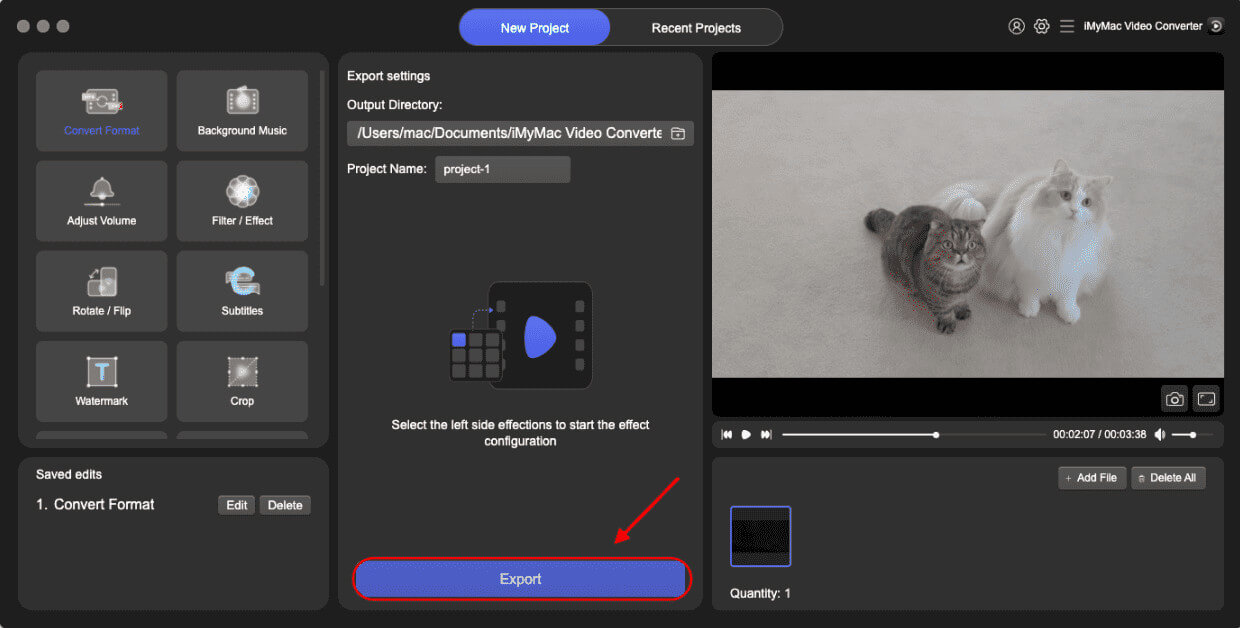
Step 05. Convert Videos
The final step is to convert. Choose the destination folder where the files will be saved and click the Convert button at bottom right corner of the interface. After that, you have finished the process on how to add a watermark to the YouTube video.
Part 3. To Sum It All Up
Here, we have discussed how to add a watermark to YouTube videos you own. We have started with the benefits of using a watermark for your own videos. For instance, you use it to attribute your videos. Or, you add a watermark so you’ll know if you own a specific video being talked about or reviewed.
As such, it is very easy to do that. You will only have to use iMyMac Video Converter. This is a great tool to edit videos, adjust them, and even add a watermark to the video. It’s great for converting videos from one format to another as well. As such, we have shown you the actual steps to add a watermark to a YouTube video. This can be seen in one of our sections of this article. It made use of iMyMac Video Converter, specifically. And, the different steps are about five-fold.
We ended with a conclusion on the process of adding watermark to YouTube videos. As you will notice, the steps are very easy to understand and implement. You just need tools such as iMyMac Video Converter.
