


Mac computers contain powerful hardware that allows you to play videos. This powerful hardware is coupled with a great operating system that allows you to convert videos from one format to another.
If you’re tinkering with media files all the time, then you will benefit from reading this ultimate Mac video converter list. You might need a converter to satisfy your insatiable appetite for high-definition video entertainment. Besides, it makes sense to have a tool in hand when you need to make sure your videos are compatible with different devices.
And because of this, we made this guide to help you out. We’re giving out a list of video converters you can use on Mac computers. Most of our recommendations are free; this means, you don’t have to pay a dime. Although, the best converter we will recommend comes in both free and paid versions. Now, let’s get through with it.
Contents: Part 1: How Do I Convert Videos On Mac?Part 2: What Is The Best Video Converter For Mac?Part 3: What Is the Best Free Video Converter for Mac?Part 4: Conclusion: Wrapping Up Our Mac Video Converter List
Part 1: How Do I Convert Videos On Mac?
To convert videos on Mac computers, you will need either an offline software or an online, web-based tool to work for you. Even though these tools come in different forms, they all work in the same manner – they’re here to help you transform your media files from one format to the next.
Mac computers also come with built-in tools you can use to convert videos on them. For instance, you can use QuickTime for video conversion purposes. Other tools can be downloaded for free (or for a price).
One example would be the VLC Media Player. This popular media playback device can also be used to convert videos using your Mac computer or Windows PC. As you can see, you just have to be creative and have a hunter’s attitude to find the best tool for your needs.
Part 2: What Is The Best Video Converter For Mac?
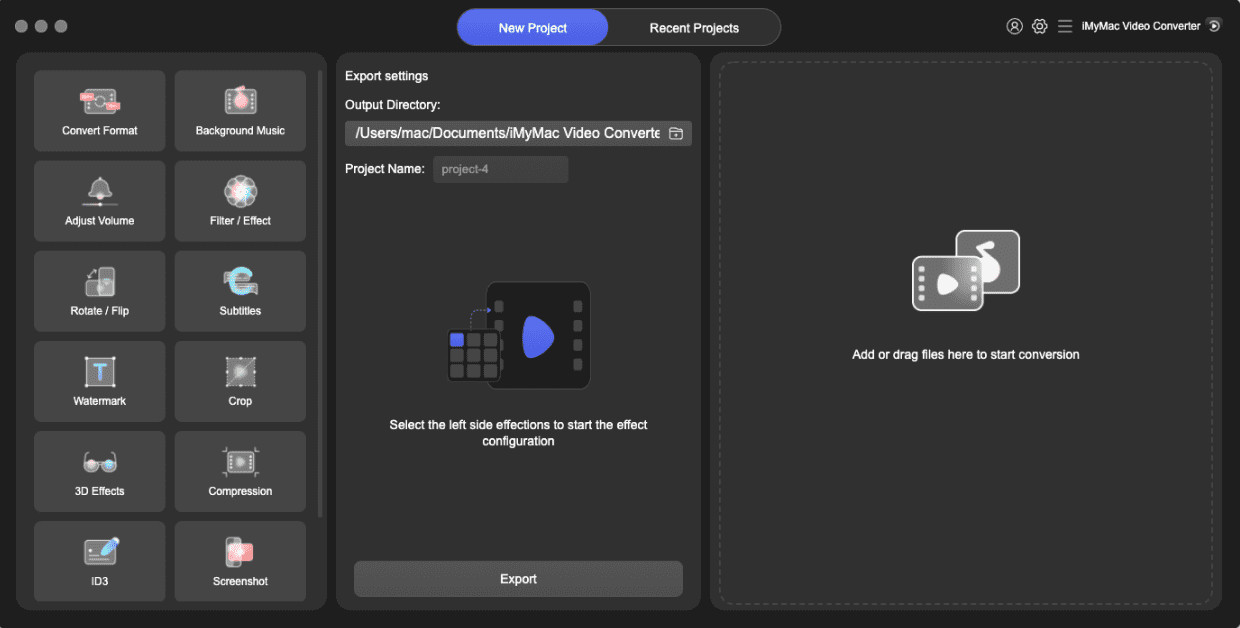
If you’re looking for a Mac video converter that trumps above the rest, then your go-to tool should be iMyMac Video Converter. This powerful software allows you to convert audio and video files from one format to the next.
Conversion is done losslessly and results in high-quality files that you will love. Additional features of the tool include playing and editing video files. You can rotate, trim, cut, and add subtitles to your videos. In addition, you can adjust brightness, hue, and saturation, among others.
The tool supports a lot of audio and video files including MP4, WMV, MOV, AVI, FLV, 3GP, MP3, AC3, FLAC, OGG, WMA, WAV, and a whole lot more. These formats enable you to create video files (or audio files) that can be played on multiple device types.
Here are the steps on how to use iMyMac Video Converter:
Step 1. Download, Install And Launch The Tool
Download the tools from its official website here. Launch the installation file and follow the instructions on the screen to be able to place it on your Mac. Then, open the software to begin the process.
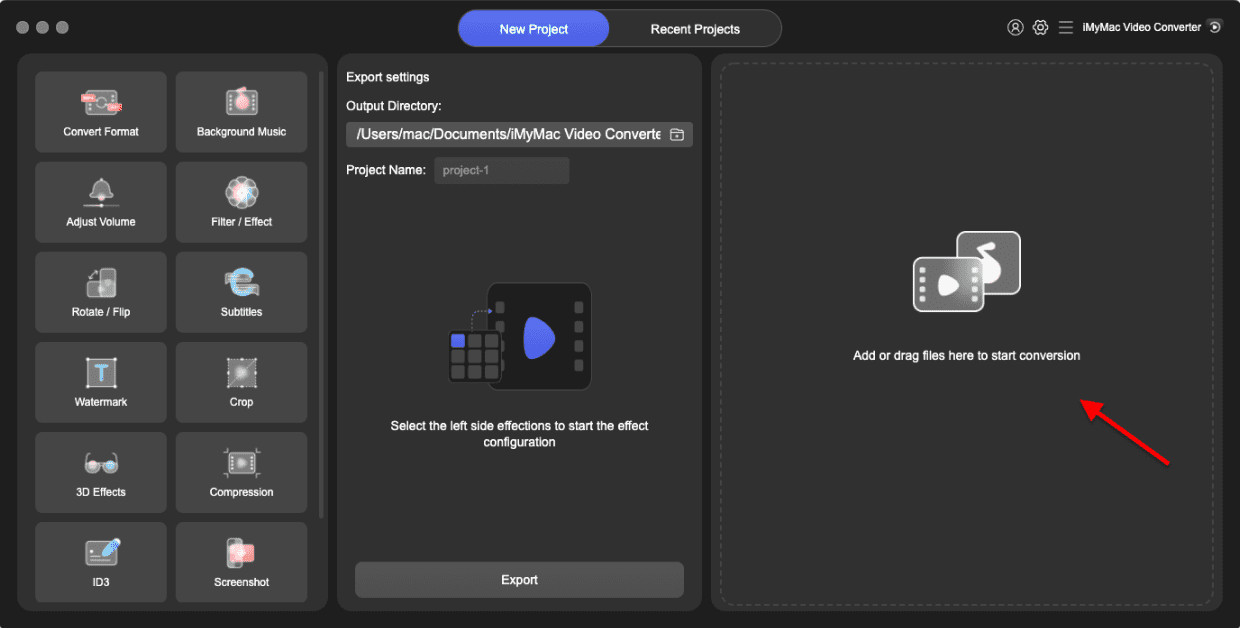
Step 2. Add Files
Add your video or audio files by dragging and dropping towards the interface. Or, you can click “Add Files” that contains a plus (+) sign at the top. Then choose the files from its folder to place it in the software.
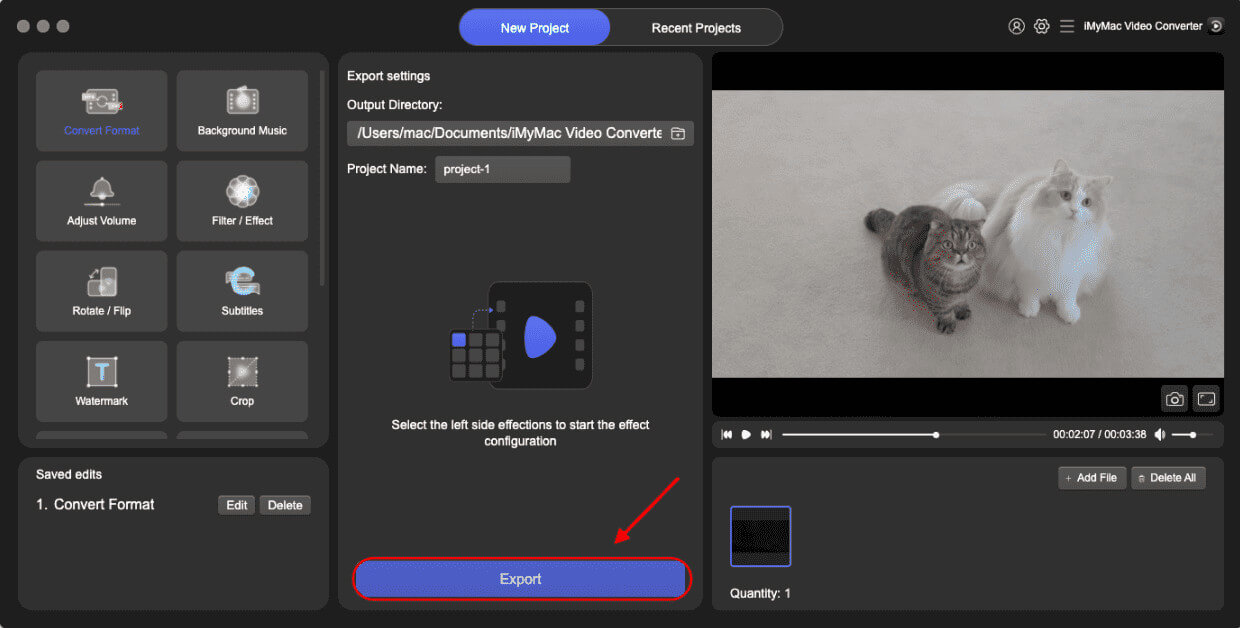
Step 3. Modify Settings And Convert
Modify the settings if you wish. You can change output formats, resolutions, and add other effects. Then, choose a destination folder where the output files will be saved. Finally, click “Convert” or “Convert All” in order to start the conversion process. These files will be saved to the destination folder you chose earlier.
Part 3: What Is the Best Free Video Converter for Mac?
This section contains your free Mac video converter list you can choose from. These converters are all free. However, they may have limited functionality since you don’t have to shell out money just to use them. Below is the list you have to check out:
Tool 01: How Do I Convert Videos On Mac Using QuickTime?
QuickTime is a video player bundles into the macOS platform and can be used as a Mac video converter with limited functions. The great thing about it is you don’t have to download anything within your device just to get things running. It even allows you to record your screen if you want to. Here’s how to use QuickTime Player to convert videos:
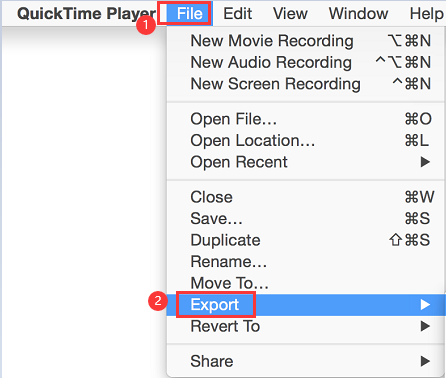
- Locate the video you wish to convert and open it using QuickTime.
- Choose File from the menu above. Then, click “Export”.
- Choose the settings you wish. For instance, you can choose an output format you’d like the new video to be in.
- Choose a resolution as well.
- Finally, click “Export” in order to start the conversion process. Wait until the procedure is complete.
Tool 02: VLC Media Player
VLC Media Player is popular among Windows users especially for playing video files that are difficult to open with Windows Media Player. As such, it has both Windows and macOS versions making it a capable tool for multiple platforms.
VLC can also be used as a conversion tool, not only as full-fledged playback software. Options are limited when it comes to output formats. However, if you’re going for the popular file types, you won’t have a problem with using VLC.
Here are the steps to using VLC as a Mac video converter:
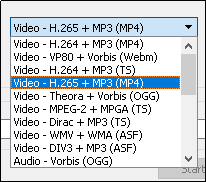
- Launch VLC Media Player using your Mac computer. Visit the File menu and choose “Convert/ Save”.
- A dialog box will appear. On this new window, select the files you want to convert by clicking “Add”. Then, click “Convert/ Save” again in order to choose options.
- A new window will appear allowing you to choose a profile that you wish. Select the output format you want the new file to be in.
- Select a destination folder where the new files will be saved.
- Click “Start” and wait for the process to be complete.
Tool 03: How Do I Convert Videos On Mac Using HandBrake?
HandBrake is a popular video conversion tool and is totally free. It supports a lot of input and export formats, especially the most popular ones. It was originally designed as a DVD ripping tool. However, as it evolved throughout the ages, it became a powerful video converter with a lot of features and advanced options.
All conversion features necessary to finish the said process is available with HandBrake. Plus, you can also add video subtitles, customize and set frame rate, adjust chapters for Blu-ray or DVD discs, and modify the type of video codec.
The steps to use the tool can be seen here:
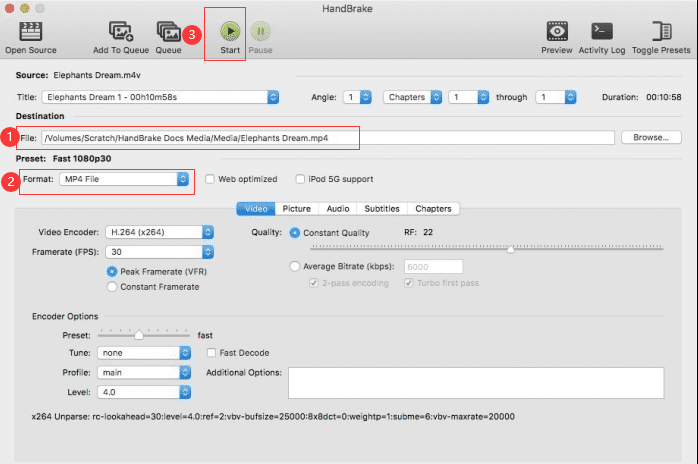
- First, download HandBrake from its official website.
- Then, install the software on your Mac computer and launch it.
- Add the video files you wish on the interface.
- Select “Device” and choose the output format that you wish.
- Make other modifications to the settings. You can see that there are a lot of options available.
- Finally, click “Start” in order to start the conversion process. Wait for the procedure to be completed.
HandBrake is a fast tool that converts your videos quickly. However, it all boils down to the speed of your Mac. And, of course, the length of the video is also a big factor in the overall conversion speed. If you think the conversion process is taking too long, then you can try to quit all open apps and make sure only HandBrake is running in the background.
Tool 04: Miro Video Converter
Miro is an extremely simple-to-use tool that can be understood by everybody who doesn’t have technical knowledge. If ease-of-use is your go-to characteristic for choosing tools, then Miro would be a top contender.
It supports a lot of video formats including the most popular FLV, MP4, XVID, and AVI formats, among others. Compared to other tools, Miro allows you to convert multiple video files in one batch. This is possible even though you’re converting to different types of formats.
Here are the steps to use Miro as a Mac video converter:
- Download, install and launch Miro on your computer.
- Then, drag the videos and drop them towards the interface of the Miro converter.
- Choose a device you wish to convert the videos.
- Finally, click the “Convert” button to start the operation.

Part 4: Conclusion: Wrapping Up Our Mac Video Converter List
iMyMac Video Converter, QuickTime, VLC Media Player, and Miro are the tools we recommend you use if you want to find the best Mac video converter for your video files. These tools support a wide range of formats and they basically get the job done.
If you want the answer to the question, “What is the best video converter for Mac?” we’ll give you the answer. It’s iMyMac Video Converter. The tool is one of the most robust software out there and it finishes the task without resulting in loss of video quality.
As such, if you want to get iMyMac Video Converter, do so. The link is here to help you download the installation package on your Mac computer. Entertainment is always at its finest with iMyMac and its video conversion tool!
