


Do you know how to share files between users on Mac? Well, if you don’t, you’ve come to the right place. This article will show you just how to do that.
Of course, there are a lot of ways to share files. Two of the most common ways are to email files or to download them to an external drive. Another possible way for you to share files is to make use of an online backup service where everybody in the office can access all the files through a dashboard. Now, what if you don’t have that particular service?
Emailing and downloading files to an external hard drive just so you can share them with others aren’t exactly the safest ways to do it. Confidential information could leak in the transfer of files.
There are safer ways to share files especially between users on Mac. As a matter of fact, there are three methods on how to share files between users on Mac. These three methods are safer. The files are protected and they won’t end up just anywhere. Read on to learn how to share files between users on Mac.
Contents: 3 Methods On How To Share Files Between Users On Mac Bonus Tip: Clean Up Duplicate Files With iMyMac PowerMyMac
People Also Read:4 Easy Steps on How to Share Files between Mac and PCA Guide On How To Move Files From Android To Mac
3 Methods On How To Share Files Between Users On Mac
Method 1: Use A Network To Share Folder Between Macs
How do I share files between users on a Mac? This first method allows connecting to two or more Macs. So, if you have been using an external hard drive to transfer data between your Mac and another Mac, then you’ll find that this particular method is very useful.
For starters, you don’t have to use an external hard drive anymore. To connect two or more Macs, follow the steps below.
- Connect both of your Macs to a network. It’s recommended that you use a wired Ethernet cable to your network card. This way, you will have a more reliable connection. You can use your home network or work network. For security reasons, avoid using an open public network, like an internet café or any free Wi-Fi connection. You might end up compromising your files.
- Decide which Mac you want to store all your files in. So, you might want to choose the Mac that’s less mobile. For example, between a Mac mini desktop and Mac Book Pro, the former would be a better place to store all your files.
- Go to System Preferences on the Mac that you want to store all your files in.
- Select Sharing.
- Click on File Sharing and check the box.
- Click on the + icon you see on the right panel. You will see this right below the box of the Shared Folders.
- Choose the file or files that you want to share when you get to the next window. You can do that if you just want to share a specific folder with the recipient Mac. If you want to share your entire hard disk drive with the other Mac, you would have to remove your Public folder from the menu. You can remove the Public folder by choosing the minus button instead.
- Take note of the address Mac has given you.
- Go over to the other Mac.
- Go up to the Finder menu.
- Click on Go.
- Scroll down to Connect to Server.
- Type in the new address in the Server address
- Click connect.
- Choose the folder where you want to connect on the pop-up window.
- Click OK.
- Provide your username and password if it’s the first time the two devices are being connected. The window of the folder that you want to access should pop up on your screen. If it fails to do that, go to the menu above. Click on Go. Then click on Computer to select the folder that you want to access. If it’s a shared hard drive that you are trying to access, you would need to create a new folder. Follow the steps below to do just that.
- Create a folder.
- Name the folder.
- Right click and choose Make Alias in the dropdown menu. That will create a shortcut to the folder. This is another folder that you can drag onto your desktop of the receiving Mac. Hence, you can access the files from the hard drive of the other Mac right on the desktop of the receiving Mac.
Make Sure Both Macs Are Turned On
Keep in mind that both Macs have to be turned on for file sharing. The good thing about this particular method is that you can just drag a file into a folder on One mac. Then you can view it on the other. This comes in handy for folks who work on one Mac and at the same time, want to share files with another Mac.
Disconnect File Sharing
You can also disconnect from the shared Mac. Just follow the steps below.
- Go up to the menu.
- Click on Go.
- Select Computer on the dropdown list
- Right-click on the folder that’s being shared.
- Choose eject.
You can also stop sharing from the main Mac, by going to the file sharing menu and deselecting the file sharing option. You will then have the option to warn the other connected users that the main Mac is shutting down by allowing to display a popup timer on the other Mac. If you choose not to use a popup timer to display on the other Mac, you can just select 0. Then click OK. A message will pop up on the devices that are connected.
That is how to share files between users on Mac. That is, if the users are on different Macs.
Method 2: Use Public Folder And DropBox To Share Files Between Users On Mac
How do I share files between two users? This second method also shows you how to share files between users on Mac. Unlike method one, this file sharing method can also be used between users on the same Mac. In this method, you will be using both the Public folder and the DropBox.
It is important that you know the difference between the Public folder and the Dropbox. Public folder is where you can put files that you want to share with another user on the same Mac.
The other Mac users won’t have permission to access anything else on your account. They won’t be able to work with the file on your computer. They can just pull it from your computer and make a copy of it and put it on their Mac.
The Drop Box, on the other hand, is the opposite. This is where the other Mac users can share a file with you. To see both the Public folder and the DropBox folder, follow the steps below
- Go the menu above and click on Go.
- Select Home on the drop-down menu list. The Home folder contains all the basic default folders like Downloads, Desktop, Music, and Movies; to mention a few. Together with all those basic default folders, you will also see a Public folder. If you’re not using the Public folder, all you will see inside it is the DropBox folder. Hence, you have two folders. A public folder with the DropBox folder right inside it.
- Check the Public folder. If there’s a file, aside from the DropBox folder, someone is sharing it with you. That is the file that the other Mac user made available, made public, so other users, like you, can access it.
- Double click on the file to open it. However, you won’t be able to edit it.
- Get permission to edit by dragging it out to your desktop or any Finder folder.
- Open the file from your desktop to be able to edit it. At that point, you already have permission to edit the file since you’re working on your own copy of the file already.
File Share As A Guest
You can do the same thing if you want to use File Sharing on the same Mac and connect as a guest. You would still be able to view the Public folder and see the DropBox folder as well. However, you would have to use the latter to share the document. You won’t be able to put a file in the Public folder. You can only drag it into the DropBox.
Here’s the thing. Since you don’t have permission to look inside the DropBox folder, you’re going to get a warning that you won’t be able to see the file anymore. Once it’s in the DropBox, you won’t have access to it anymore. The file now belongs to the other user.
Needless to say, the Public and the Dropbox folders are safe ways to share files back and forth.
Method 3: Share Files Using A Shared Folder
If you want to collaborate with another user on the same Mac, you can resort to setting up a Shared Folder. Follow the steps below to know how to access shared folder on Mac between users.

- Go to the Home folder.
- Create a new folder.
- Name it Shared. You can send documents in the Shared folder and other users will be able to see them in that particular folder.
- Go to File.
- Select Info on the drop-down list to get information on the Shared folder.
- Open the Sharing & permissions area.
- Change the Privilege of the user you want to share files with to Read & Write. You would need to unlock it first. So, put in your username and password on the pop-up window.
Now, other Mac users can see the Shared folder the same way they can see the Public folder. The only difference is that they can actually manipulate the files in the Shared folder.
If, in case, you’re not able to edit a file from the Shared folder, you can change it right away by getting permission to read and write the file. That’s the good thing about creating a Shared folder. You and the other user can work on the same file from the same Shared folder on the same Mac.
This method is a good way for users on the same Mac to collaborate and work on a single file. There won’t be a need for copying and pasting the file or putting in the username and password just to have access to the file. The Shared folder makes it a lot easier for the users on the same Mac to share files.
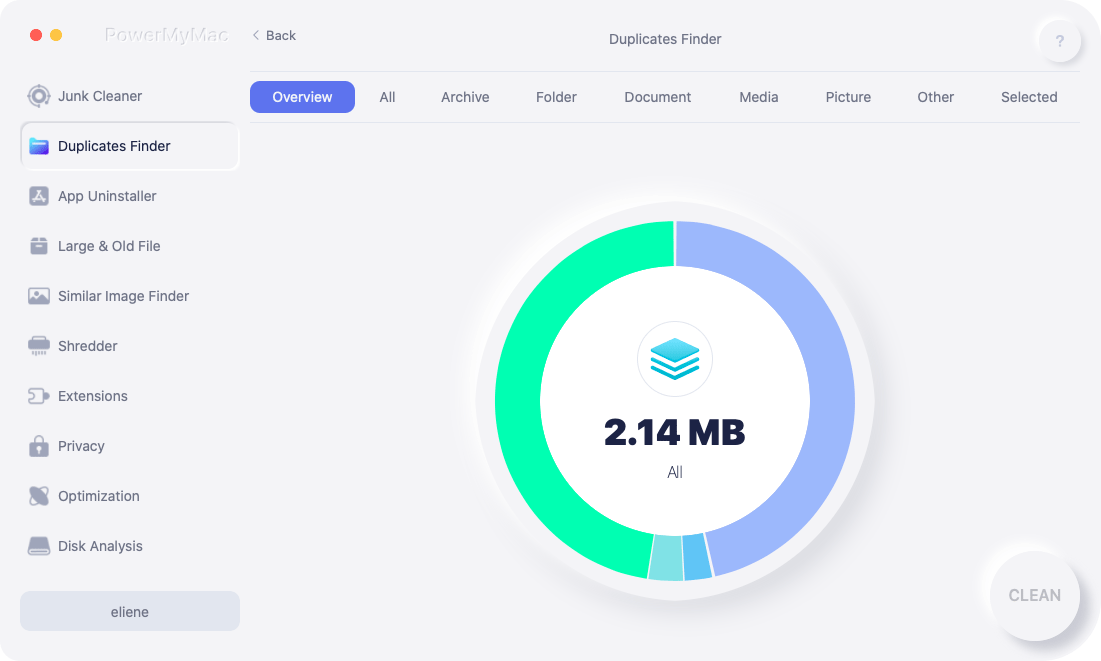
Bonus Tip: Clean Up Duplicate Files With iMyMac PowerMyMac
The thing about file sharing is that you’re bound to end up with a lot of duplicate files. You’re going to have to clean them up at some point. If you leave all the duplicate files stored on your Mac, you can get pretty confused as to which file is updated and current.
The iMyMac PowerMyMac can finds and cleans up duplicate files. It searches for duplicate files and scans them all. Before they delete any duplicate files, they will ask you first. Of course, deleting duplicate files can save you a lot of space on your Mac. Space on your Mac is very important especially if you’re sharing it with someone.
Finding, scanning, and deleting duplicate files are just some of the functions of the PowerMyMac. It can do more than just get rid of the duplicate files on your Mac. As a matter of fact, the PowerMyMac comes with multiple functions that help optimize your Mac’s performance.
Again, that is very important especially if you are sharing your Mac. Learn more about iMyMac PowerMyMac here.
Conclusion
File sharing makes it a lot easier for you and other Mac users to collaborate. You can, definitely, get a lot of work done.
However, file sharing requires some kind of security measure. You have to be careful when sharing files. That said, you have to really know how to share files between users on Mac. You simply cannot resort to emailing or even downloading files to an external hard drive. What if the hard drive gets lost?
The three methods on how to share files between Mac not only makes it easy for you but safer as well. Now that you’re familiar with the methods, feel free to comment below and share with us which method works best for you.

