


Adding an extra layer of protection is essential to avoid theft especially on your personal files saved on a computer. Encryption allows you to password protect any file or folders inside your device to ensure that no one steals your private information. Learn how to encrypt files on Mac in this brand new post.
Tips:
Article GuidePart 1. Encrypt Files on Mac using Disk UtilityPart 2. How to Encrypt Startup Disk Using FileVaultPart 3. How to Use the Print to PDFPart 4. Conclusion
Part 1. Encrypt Files on Mac using Disk Utility
We all have files saved on our Mac that we don’t want other people to see or gain access to; these files may include your bank details, personal records, and other important notes. Good thing we can easily encrypt these files on Mac using the Disk Utility.
Although we can use FileVault, which is full-disk encryption that prevents unauthorized access to the information on your startup disk, we could feel safer when we also encrypt specific files or folders most especially when we are sharing computers with someone else.
How to encrypt files on Mac? We will use Disk Utility and set a layer of protection by adding a password.
How to Turn a Folder into a Password Protected Disk Image
- Launch the Disk Utility from the Applications folder, under Utilities. You may also use the Spotlight search
- Inside the Disk Utility menu click File and then go to New Image. Click Image from a folder and wait for a pop window to appear
- Provide the required details to save a new disk image. Enter the needed info for Save As, use a more relevant filename. Under the 'Where' select the right folder location; and under Encryption, you can choose between 128Bit and the 256Bit. Note that the higher the encryption applied, the longer time needed to complete the encryption. 256 bit is more secure but is slower to complete the encryption.
- For the Image Format, select read/write to allow you to still edit the files inside the encrypted folder. Select Save and enter the desired password. Use passwords that are easy to remember yet difficult to decipher. You may need to enter the password twice to verify. Click Save and hit done.
You can now find the encrypted disk image inside the folder location you have set earlier as a DMG file with the filename you have also entered. You can now delete the old file or folders without the encryption. Before you delete the old file or folder, make sure you have created a backup in case you messed up somewhere in the process.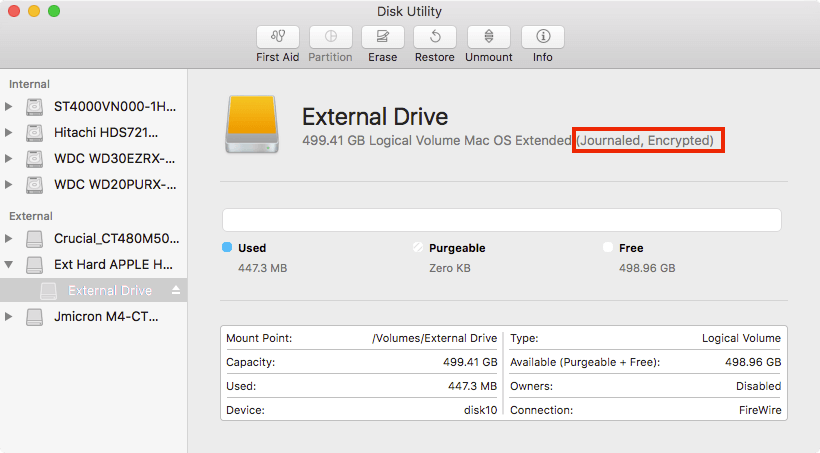
How to Open a Password Protected File/Folder?
In order to access or open the encrypted disk image, you simply need to double-click on the disk image file and enter the password and click OK. Note that you don’t need to tick the box below to remember the password in keychain otherwise, it just voids all the process we did especially when other users have access to your keychain. After entering the correct password, the disk will be mounted and the files will appear and will be now accessible.
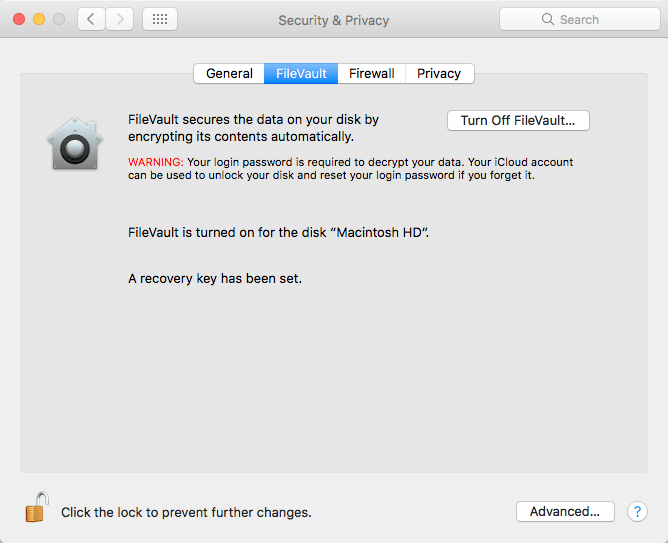
Part 2. How to Encrypt Startup Disk Using FileVault
Like we mentioned earlier, FileVault is a special encryption setting provided on your Mac to ensure that you get full disk protection which uses XTS-AES-128 encryption with a 256-bit key.
Steps to Setup FileVault
- Go to Security & Privacy settings from System Preferences under Apple Menu
- Click FileVault
- Click the lock icon and enter the Administrator username and password
- Turn on FileVault
If you have multiple users on a Mac, each user should also need to enter a password for them to be able to unlock the disk. The encryption takes a while since it is using a more secure key however, you can continue working on your Mac. It continues the encryption on the background and only when the Mac is awake and plugged in.
After the encryption is completed, restart the device and enter the password you have created earlier. You will need to do this every time you log in to your Mac on startup. All users are required to enter their own passwords.
Steps to Turn Off FileVault
If in any case, you may want to turn off the FileVault, simply go back to Security & Privacy> Find and click FileVault> Click the lock icon and enter the Admin user and password> Click Turn off FileVault. Decryption process also takes a while before it will be completed.
Steps to Reset FileVault Password
What will happen if you have forgotten your FileVault password? There are three ways you can choose to reset the password.
- You can use your iCloud account for recovery and unlock the disk for those using iOS Yosemite or later
- A local recovery would be fine too if you don’t want to use iCloud as your account recovery option
- Lastly, you can opt for three security questions and store it in FileVault recovery key. This is available if you are using iOS Mavericks
Part 3. How to Use the Print to PDF
If you only want to encrypt a single file, well you can also take advantage of the Print to PDF option. We assume everyone is familiar with this option. Any files which allow you to print to PDF can be encrypted. Check these steps below:
- Open the exact file you wish to encrypt and go to print
- In the Print window, choose the PDF and click Save as PDF
- Click on the Security Options button
- Tick the box for ‘Require password to open document’. Enter the desired password and verify. The other boxes below are optional in case you may want to add a password when editing or printing the document.
- Click OK
That’s it! You have practically encrypted a PDF document. You can do this for your personal notes and other single file or documents.
Part 4. Conclusion
There you have it, we have finally learned how to encrypt files on Mac using Disk Utility as well as encrypting the entire disk using FileVault. However, using FileVault might consume or take much space on your drive and may cause latency or poor device performance. If you need to optimize and clean your Mac and gain more space, use PowerMyMac. This is an all-in-one solution that helps you optimize your Mac by giving us 8 powerful options. Feel free to use this program in case you need more storage space!
We hope you have learned something from this guide and let us know your thoughts in the comments below!

