


Your iCloud photos not showing up on Mac! Has this ever happened to you? That could be a real pain. You would need your iCloud photos to show up on your Mac. That way, you could transfer them onto your Mac.
You wouldn’t want to keep all your photos on your iPhone, would you? You’re going to run out of space on your iPhone. One sure way for you to have more space on your iPhone is to transfer all your photos to your Mac.
If you encounter the issue of iCloud photos not showing up on Mac, then you have a problem. Don’t worry; it’s not that big a problem. It could easily be resolved.
There are 6 things you can do to resolve the above issue. Read on to learn how you can resolve this particular issue.
Contents: 6 Tips to Fix The Issue of iCloud Photos Not Showing up on Mac Bonus Tip: Use PowerMyMac To Avoid Syncing Issues In Conclusion
People Also Read:How to Deal iPhone Photos Not Showing Up On MacGrappling with iPhone Calendar Not Syncing with Mac
6 Tips to Fix The Issue of iCloud Photos Not Showing up on Mac
Tip #1: Use Image Capture
You can use Image Capture to take your photos from your iOS device to your Mac. So, when your iCloud photos not showing up on Mac, you can always resort to doing this without using the photos application in Apple on you Mac.
This method is very easy. Just follow the steps below.
- Go to Applications and find Image Capture from the drop-down list.
- Click on Image Capture.
Another way you can also find Image Capture is by taking your cursor to the magnifying glass and clicking on it. Then type in Image Capture. That’s a faster way of doing it.
- Make sure Image Capture is opened up.
- Select the iPhone you want to pull in images from.
- Unlock the iPhone if needed. Put in your password to unlock it.
- Create a new folder on your Desktop to import your photos to your Mac.
- Click the image that you want to transfer to your new folder.
- Drag the image to your new folder and you will see the photo will show up on your Mac’s desktop.
If you want to delete the photos that you have transferred to your new folder, you can use the Command key to select multiple photos. Then hit delete. The photos will be deleted on your iPhone as well.
Tip #2: Check Wi-Fi Settings
Another reason as to why iCloud photos not showing up on Mac is that you’re facing some download issues. You’re not able to download some of your photos from iCloud. You could fix this by checking your Wi-Fi Settings.
Follow the steps below to check on your Wi-Fi settings.
1) Go to your Wi-Fi settings to check if you’re connected to a network. Some Wi-Fi connections that don’t allow any kind of download activities from iCloud.
2) Consider connecting to another Wi-Fi if you’re not able to download.
3) Go into your General Settings to check if both your software and firmware are fully updated.
4) Click on Software Update if you need to update.
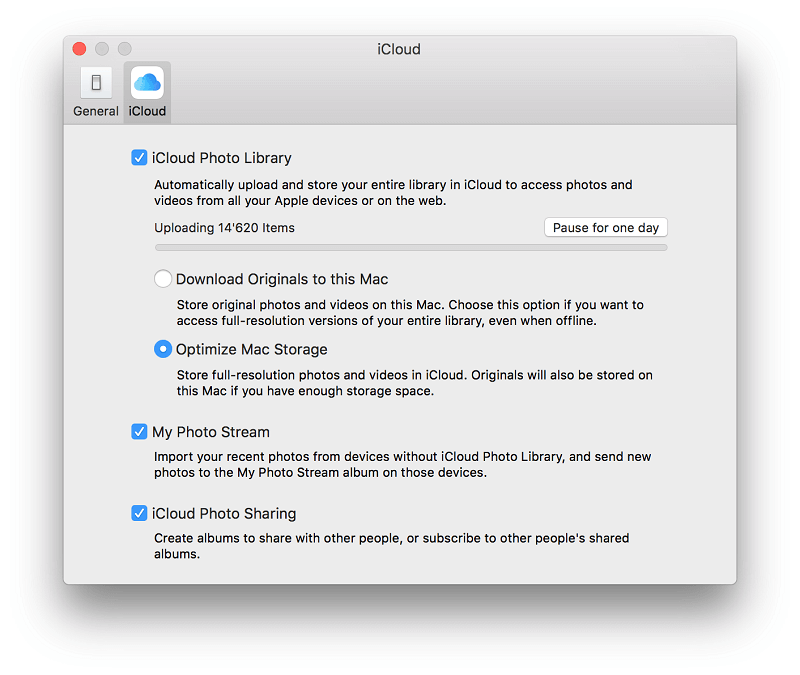
Tip #3: Turn On My Photo Stream
Here’s another reason as to why your iCloud photos not showing up on Mac. Your iCloud photos are probably not syncing. To make sure they are, follow the simple steps below.
1) Go to Settings.
2) Go to iCloud.
3) Click on Photos
4) Turn on My Photo Stream. By doing this, your photos will automatically upload to iCloud.
To make sure you won’t have any trouble restoring your backup, go into iTunes. Plugin your device and check if you need there’s an update button. If you see an Update button, click on it to install the update.
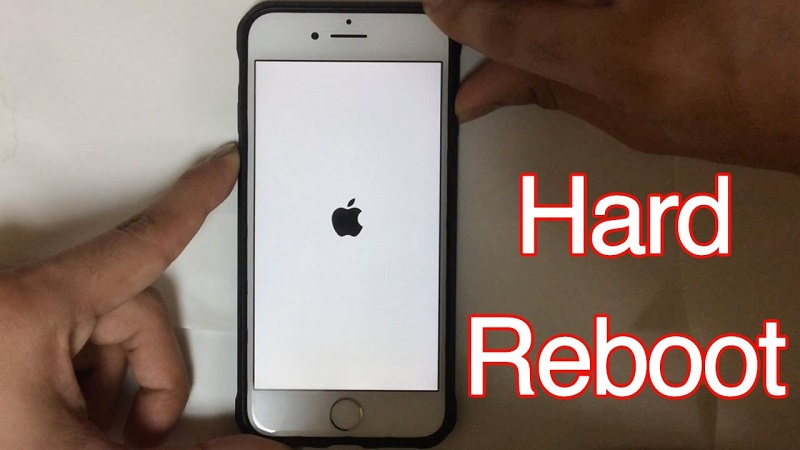
Tip #4: Do A Hard Reboot
If you are still not able to resolve the issue of iCloud photos on showing up on Mac, consider doing a hard reboot of your iPhone. Follow the steps below to do a hard reboot.
1) Hold down on both the Home and power button of your iPhone; that is if you’re using a version before iOS11. If not, then the process is different. You’d have to use the following buttons and they are the top volume control button, the lower volume control button, and the power button. A quick press on both the top and lower volume control buttons while you’re doing a long hold on the power button.
2) Release the Power button once you see the Apple logo. That will take a few seconds to happen. Once you’ve released the Power button, the hard reboot is completed. Your screen should go back to its Home screen.
That’s it. You’ve done a hard reboot to solve this issue.
Tip #5: Check On The Storage Space Of Your iCloud
Another reason as to why you’re facing the issue of iCloud photos not showing up on Mac is that you’ve run out of space on your iCloud account. When that happens, your iPhone won’t be able to back up to iCloud.
To make sure that this doesn’t happen to you, check on the storage space of your iCloud. Follow the steps below to avoid running out of storage space in your iCloud account.
1) Go into your iCloud settings.
2) Go to Settings and then to iCloud.
3) Click on Storage.
4) Go to Manage Storage to see if your iCloud is filled up. If it is filled up, you have the option to upgrade your iCloud account to a paid version.
5) Go to your iCloud Photo Library to disable and delete it. That way, you’re able to save up on more space on your iPhone. You’ll also be able to backup once you have more space on your iPhone.
Tip #6: Make Sure You’re Using The Right Password
Another way for you to resolve the issue of your iCloud photos not showing up on Mac is to make sure you’re using the right password.
You have to sign in to your iCloud account with the right password. If you forgot your password, then you can change your password by simply following the steps below.
1) Click on Settings.
2) Scroll down to look for iTunes and App Store; that is if you’re using a version after iOS 9. If you’re using the version before iOS 9, click on iCloud instead. Then tap on your account. For this article, let’s use the iTunes and App Store.
3) Tap on your account.
4) Select Account Info from the drop-down list.
5) Click on Forgot if the password you’re using is not working.
6) Click on Continue to recover your password.
7) Type in your email address.
8) Tap on next on the top right-hand of the screen.
9) Choose the option I need to reset my password.
10) Tap on next on the right-hand of the screen.
11) Select how you want to reset your password. You can either do it by clicking on Get an email or Answer security questions.
12) Check your email if you choose that option.
That’s how easy it is to reset your iCloud password. Keep in mind that your iCloud password is different from your iPhone password. You can only reset your iCloud password if you’re able to unlock your iPhone.
Bonus Tip: Use PowerMyMac To Avoid Syncing Issues
If you want to avoid the issue of iCloud photos not showing up on Mac, then you should also avoid syncing issues between your Mac and your iPhone.
One good reason as to why you’re Mac is not syncing with your iPhone is that your iCloud account is not working. To make sure that your iCloud account is always up and working, you can use the iMyMac PowerMyMac to monitor it. The Maintenance feature of its Optimization module provides a lot of tools that can help with the maintenance of your Mac.
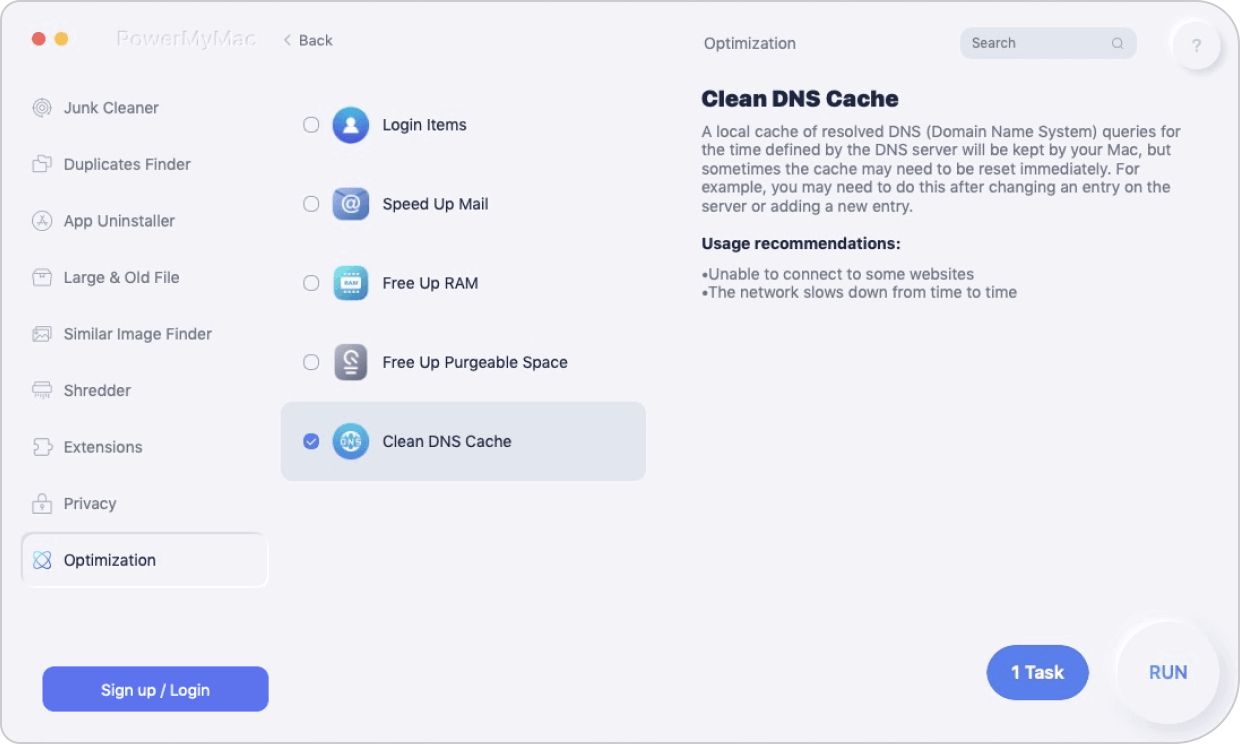
The PowerMyMac can do a lot more for your Mac. Their easy-to-navigate program can easily connect you to the internet. It can easily flash out DNS cache so that you won’t have a hard time connecting to the internet.
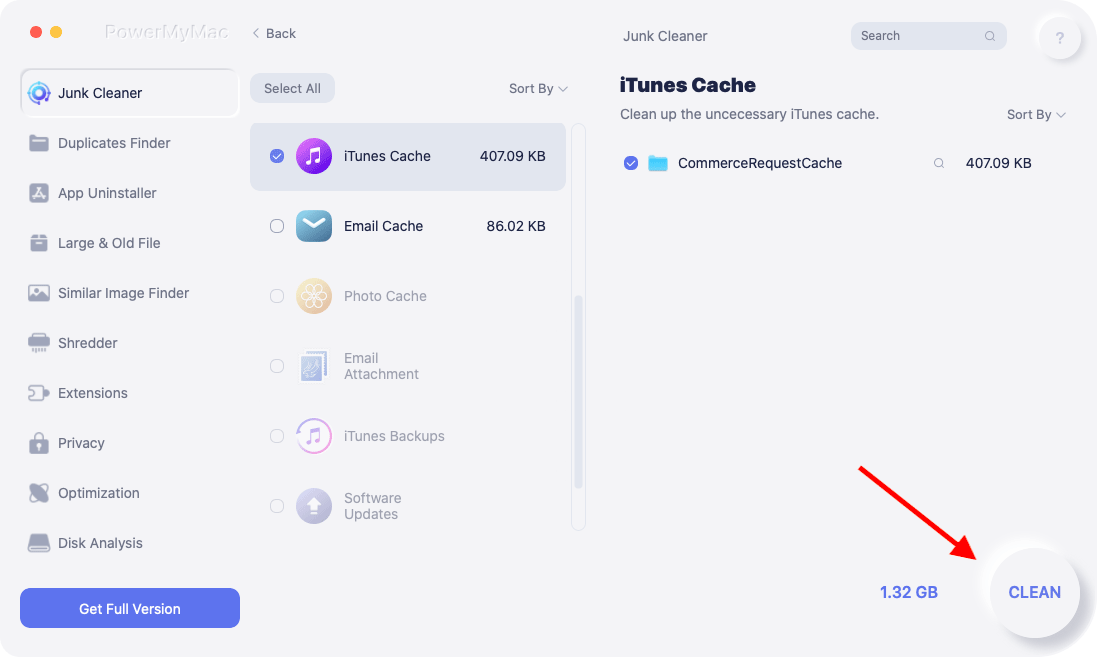
Another reason as to why you’re facing some syncing issues is that your iTunes is not up-to-date. The PowerMyMac can inform you if your iTunes needs to be updated. It can delete the backups and the corrupted downloads of your outdated iTunes. You won’t have to do it yourself.
That’s the good thing about the PowerMyMac. It does all the things that you should do to keep your Mac running in top shape so that you can avoid syncing issues.
In Conclusion
You can encounter the issue of iCloud photos not showing up on Mac anytime. To avoid an issue, just make sure to take note of the 6 ways to resolve it.
Have you ever encountered this issue before? If yes, what did you do to resolve? Share with us your thoughts and ideas.

