


How to install MySQL Mac? Although Mac OS somehow doesn't include something like a pre-configured version of MySQL, these step-by-step instructions would make the whole thing simple for everyone. Through the conclusion of just this article, you should have been able to install the MySQL domain controller onto your Mac enabling local production.
Contents: Part 1. How to Install MySQL on MacPart 2. How to Configure MySQL on Mac for the Terminal Application
Part 1. How to Install MySQL on Mac
- To get started you must first, look at what versions of Mac you were using on. And after that you must now press on the apple symbol which is located from the uppermost top right part of the screen, then after which you must tap on the option “About This Mac”.
- Afterward, you must go straight into the download section of MySQL in which there is a fully whole range of options that you could select, whenever you were to make use of it for the first time.
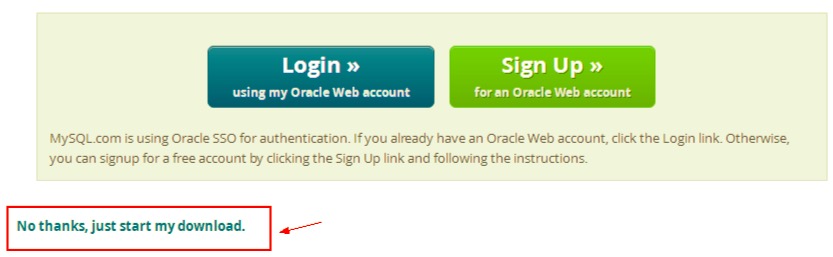
Even though MySQL has been free as well as an open-sourced operating system (FOSS), users shouldn't need to join up as well as establish an account to use it. “No thanks, just start my download” tap. Because once requested, simply would let downloading go right into your "Downloads" directory, since you might store it wherever.
Even though it is 350MB, this downloading would require some practice, therefore go have a cup of coffee. When the downloading was indeed finished. When you double-click the files, a display with various popups should appear.
- From there, you must double click on as well as go in through the process of installation, after which you must now copy then paste on the passcode to use it into future references.
- And after that, you must now insert into the path.
- Afterward, you must now add the MySQL downloads into the path so you can now make use of the command “
mysql” right into the command lines. After the, test it on. - Thereafter, because now MySQL has been installed as well as available again from Terminal, users could access the database as well as begin the Mysql database. But only after, login into it as administrator (root@localhost) as well as enter the odd passcode which thus appeared throughout the warning box during our installation.
- Afterward, though, login into it then activate the MySQL servers.
- That is indeed fantastic! Users can already build datasets as well as execute SQL queries directly first from the command prompt. That would be a great start, and yet absolutely nobody has always been going to recognize such a password, and it's not fun to punch in each and every time you would really like to operate MySQL. So this whole password-changing documentation may be found elsewhere.
- And from there, mostly in the terminal, press
Control + Donce again to shut down the servers. Huge congrats! You've managed to install MySQL on Mac, rendered this then command-line available, as well as change the administrator user’s passcode.
Part 2. How to Configure MySQL on Mac for the Terminal Application
- To get started, you must launch first the MySQL by using the terminal application, you must make use of the following commands prompt “
mysql. server start”. However, this command would then display on some following errors into your terminal home screen indicating “command not found: mysql. server”. - After that, you have to fix several issues, which you must know the path of the MySQL paths into the directory files. For that, there would be then a very easier option for you to use and open on the files which you have been wanted to open, you must do now was to enter on the following commands into the terminal panel as well as you must enter on the passcode.
- You must then take in one per line which would be then given on for the paths into the “
/etc/paths” files. - Afterward, you must input on the command so that it would then begin the MySQL servers.
- Next after which, there would be then an output whenever the MySQL has been started well.
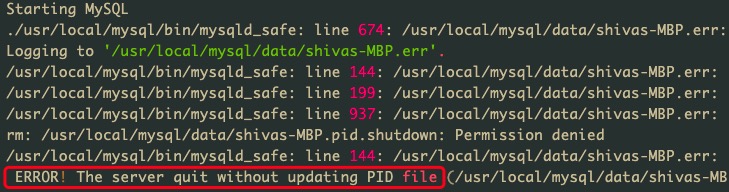
- For to get started the MySQL, you must use the command “
sudo” together with the “mysql. server start” then it would then perhaps appears a permission errors popup.
This article has been talked about certain guidelines you could use on how to install MySQL on mac. Also, we have added on how to configure MySQL on mac with using on the terminal application. We hope that this article would then help you a lot.
If you want to uninstall MySQL from your Mac, you can use PowerMyMac to remove it completely with all its related files, you can guide to the provided link.

