


Do you want to learn the ropes on how to move photos from iPhone to Mac? Search no further, you’ll know the ins and outs of this process right here and apply a method tailored to your demands.
Moving files allows you to edit and back up your treasure troves of photographic art. But before we dive beneath these apps and services to sync iPhone photos with your Mac, remember wireless platforms require Wi-Fi. Read on to discover the method that is best suited to your needs.
Contents: Part 1. Download Photos from iPhone to Mac Using the Charger CablePart 2. Automatic Wireless Import of Photos from Your PhonePart 3. Other Techniques to Move Photos from iPhone to Mac
People Also Read:How to Deal iPhone Photos not Showing up on MacHow to Access iCloud Photos on MacFour Methods to Help You Transfer Videos from iPhone to Mac
Part 1. Download Photos from iPhone to Mac Using the Charger Cable
With a cable at hand, it’s easy and quick to move photos from iPhone to Mac.
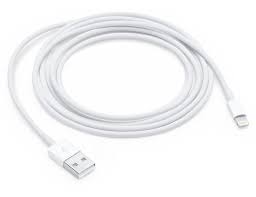
- Just plug the iPhone into the Mac USB port. If the Photos app is configured to launch automatically, it pops up once you connect.
- Equally, unlock by confirming you approve the device. You may want to access the phone in the bar on the left of your window.
- Select images to stick out in the window. The Photos app will showcase all the images archived in the camera roll.
- Click ‘Import All New Photos’ to move everything to Mac. You can also select by clicking on specific photos or set the app to automatically delete the images after syncing on your Mac.
Part 2. Automatic Wireless Import of Photos from Your Phone
Method 1: Transfer Images with iCloud Photos
iCloud Photos carves a more straightforward way to relocate your whole library from your phone to Mac. With iCloud Photo Library, all your images sync across your Mac and Apple devices. But you must gain access to Wi-Fi or other networks.
Install iCloud Photo Library on Mac by accessing the main iCloud panel in the System Preferences. Also, access it via Photos> Preferences.
Clean, Shield and Optimize Mac
Cleaning up your Mac is a devil of a job. Failure to undertake regular maintenance curtails performance. Junk files, old iOS backups, language files, old Dmgs, and duplicate copies eat up disk space.
Once you launch iCloud Photo Library using Photos, two options appear. If you have run out of space, consider iMyMac PowerMyMac to quickly and safely delete junk files freeing up more room.
It determines your Mac core status including CPU, Memory, and Disk. Large or old files add clutter and thus, diminish performance. PowerMyMac sifts through everything to eliminate overkill files and optimize Mac storage.
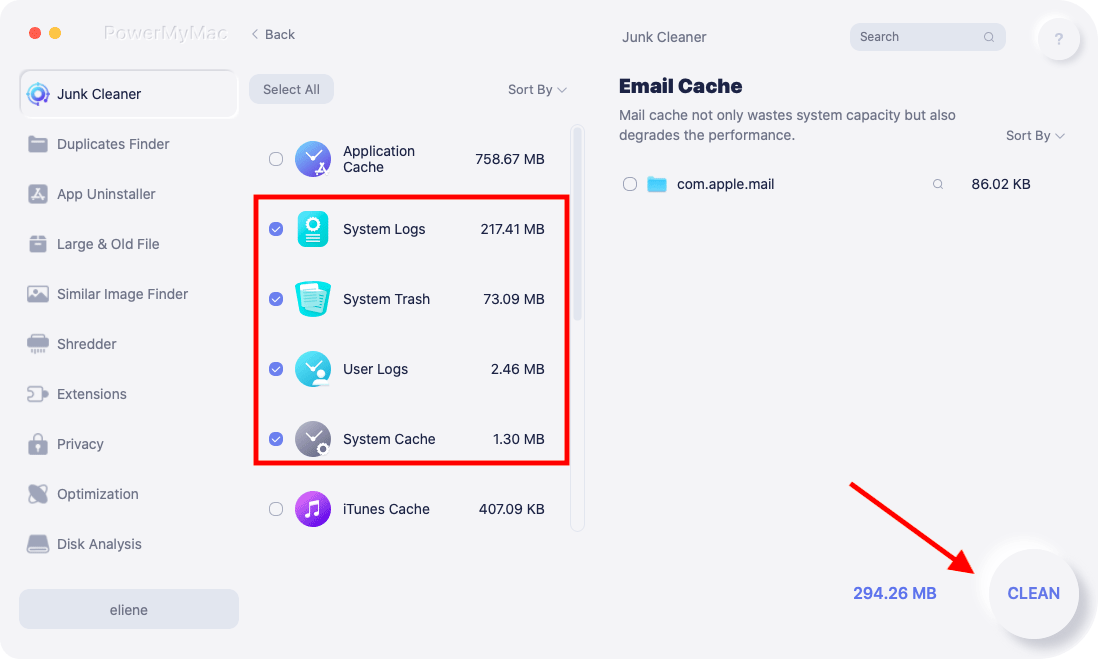
You can easily clean your Mac by deleting junk files, and removing software caches effortlessly with the help of PowerMyMac when you finish the process to move photos from iPhone to Macs. You can do a complete scan of your Mac to find the junk files and remove them with the Junk Cleaner feature.
This all-in-one app runs a deep screening of your Mac, including Mail Attachment, iTunes Backup, Trash Bins or redundant folders. It’s powerful, lightning-fast, versatile and includes a Free Trial.
Take your cleanup and optimization a notch higher with PowerMyMac to rev up your system. It tops it all with a performance monitor, memory retriever, application uninstaller, as well as all bells and whistles.
Method 2: Steer Clear of Fees with My Photo Stream
For those who don’t want to pay on the nail for the iCloud Photo Library, My Photo Stream automatically loads images and transmits them to interconnected devices. Simply log in your iCloud account while connected to Wi-Fi so you can move photos from iPhone to Mac.
The flip side of using My Photo Stream instead of iCloud is the constraints associated with third-party software. For instance, you cannot exceed the limit of 1,000 photos or access them after the 30-day period. But this is curable as long as you move them over to Photos or another folder on your Mac.
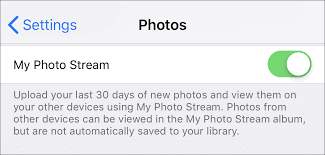
To activate My Photo Stream on the iPhone, go to Settings> Photos > Camera, you’ll access the slide for turning on Upload to My Photo Stream. For Mac, select Photos and click on Photos> Preferences > iCloud and turn on My Photo Stream. Download individual photos from My Photo Stream to Mac by right-clicking on it and select save.
Part 3. Other Techniques to Move Photos from iPhone to Mac
#1 Use Email or iMessage
If you don’t want to grapple with the stresses and strains of apps, you can use iMessage or an email to download the attachment later.
Open Photos on your iPad and iPhone to zero in the photo. Click the share icon and tap the bar for iMessage or Mail. The photo will appear on your desired destination. You can transmit a mass of pictures by selecting them, choose copy and then paste them in an opened email or iMessage account.
#2 Use AirDrop
AirDrop works best for wireless transfer of highlighted photos automatically on your Mac. Apple’s AirDrop allows you to relocate selected photos between nearby Apple devices. However, the photos offload directly to your Mac’s hard drive rather than the Photos app. AirDrop offers a quick and effortless way to move photos from iPhone to Mac.
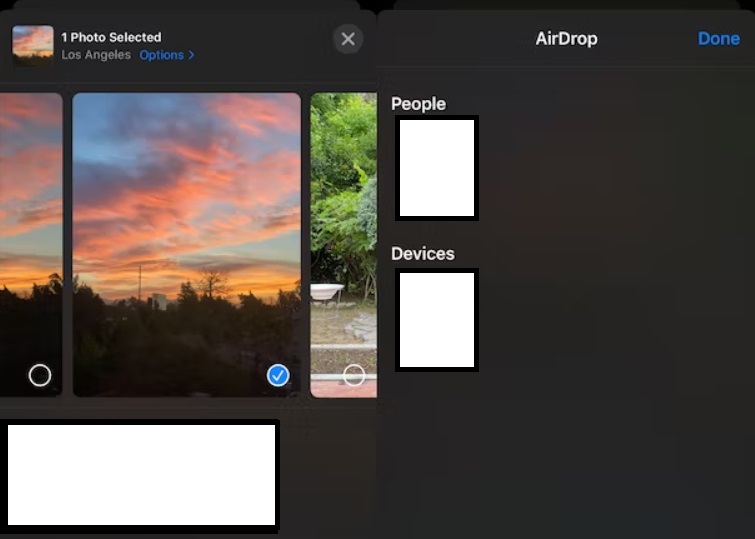
To set AirDrop up, activate Wi-Fi or Bluetooth on your iPhone and Mac. The Bluetooth or Wi-Fi icon should be blue for iPhone. Also, ensure you’re logged in your iCloud with the same Apple ID on your synchronized devices.
Next up, open the Photos app on your iPhone and home in the images you want to remove. You need to view the photos in thumbnail and click Select in the upper-right edge. In the AirDrop part, tap your Mac’s name. The photos highlighted will copy on your Mac’s Download’s folder.
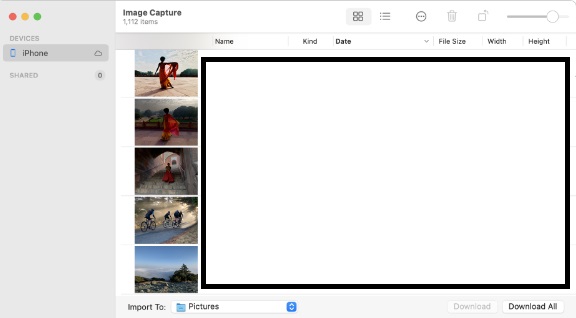
#3 Use Image Capture
Image Capture remains useful for first-generation iPhone enthusiasts who want to import images onto their Mac. Tooling up with this app gives photographers leverage to organize photos in separate folders from the primary Photos Library.
Image Capture moves screenshots or photos temporarily to Mac. Connect your iPhone and open Image Capture. You’ll glimpse a list of your images paired with technical features such as file sizes or aperture settings exploitable by those skilled in the art. Use the ‘Import All’ command or simply choose specific photos that you want to move.
By default, the app will stream in photos into the Pictures folder separate from other files. It comes in handy if you want to split your collections. Bear in mind Image Capture may convert HEIF files into JPEGs. To avoid this, tap Settings> Photos and browse down to the ‘Transfer To Mac Or PC’ area, turn on Keep Originals.
In Conclusion
You can easily move photos from iPhone to Mac so as to free up iPhone space or create backup files for pictures by storing them in your Mac. Given their compact size, your Mac offers the best storage while you can edit or tweak photos using advanced software. It works in the same way for the iPad.
The Photos for Mac or iCloud Photo Library provide excellent options if you depend on Apple to archive your pictures. If you can’t take your chances with iCloud, third-party cloud services will do the job.
To sum up, we hope you have acquired in-depth knowledge on how to transfer photos from iPhone to mac. Lastly, we invite you to share this article on social media or try out useful software such as PowerMyMac and get off to a flying start.

