


Clearing up old multimedia cache files will help guarantee that Adobe continues to work smoothly, which is important for maintaining maximum performance. It is really necessary to have knowledge on how to clear Adobe cache on Mac. Today, we are going to demonstrate exactly how to remove program caches completely.
Contents: Part 1. Where is Adobe Media Cache on Mac?Part 2. How Do I Clear Adobe Cache Easily?Part 3. How to Clear Adobe Cache on Mac Manually?Part 4. Conclusion
Part 1. Where is Adobe Media Cache on Mac?
On a Mac, the Adobe Media Cache for applications like Adobe Premiere Pro and Adobe Illustrator is typically stored in the following directory: /Users/[YourUsername]/Library/Application Support/Adobe/Common
In this directory, you will find the Media Cache and Media Cache Files folders, which store various cache files used by Adobe applications to improve performance and speed up the editing process.
Is It Safe to Clear Adobe Cache Files?
es, it is safe to clear Adobe cache files. These cache files are used to improve performance by storing frequently accessed data. Deleting them can help free up disk space and resolve performance issues or glitches. Adobe applications will automatically regenerate these cache files as needed when you continue to work on your projects. Regularly clearing cache can ensure smooth performance and manage disk space effectively.

Part 2. How Do I Clear Adobe Cache Easily?
Your Mac may be cleaned and optimized with the help of the all-in-one application iMyMac PowerMyMac. It can find all kinds of files and apps, and get rid of unneeded storage space on your Mac with only a few clicks of the mouse.
With the app's Junk Cleaner, removing Adobe cache Mac is a simple and risk-free process that will allow you to free up more storage space. It can also delete all kinds of program caches like removing Mac mail caches quickly.
To clear Adobe cache Mac easily, just follow the instructions provided.
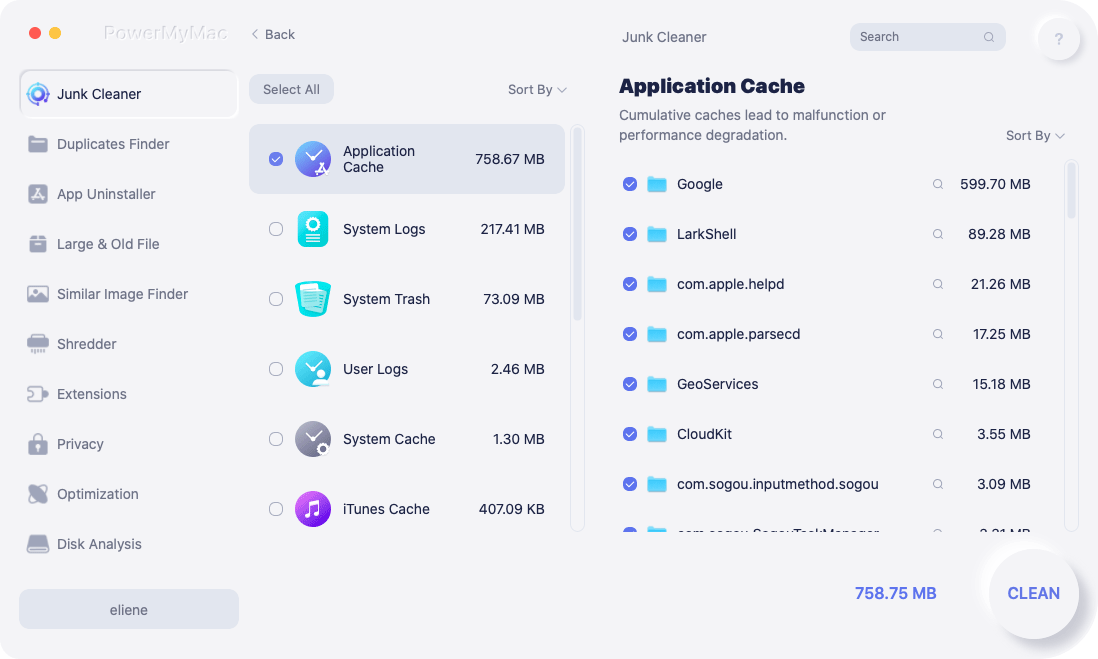
- Select Junk Cleaner after clicking SCAN to start scanning all of the undesirable files on Mac.
- You may view all of the garbage files on your Mac by category after the scanning is complete.
- Choose the file you want to remove, or just choose "Select All" to delete every unwanted file.
- PowerMyMac quickly deletes the files you've chosen when you pick "CLEAN."
- A pop-up window labeled "Cleaned Completed" will appear when the cleaning process is finished, letting you view how much space was recently cleaned and how much space is now usable on the hard drive.
Part 3. How to Clear Adobe Cache on Mac Manually?
Adobe will take up a lot of storage space on your Mac. Altering the usual Adobe cache size and removing any and all Adobe cache files are required to resolve this issue.
Change the Default Adobe Cache Size
You are able to make adjustments to the default Adobe media cache size that Adobe products use, even if they do establish their own. Launch the program's options, then choose "Media & Disk Cache" from the menu that appears. To make the number smaller, you will need to click on the highlighted blue text and then make the appropriate changes.
Note that caching data helps the software run more quickly; hence, you may need to keep adjusting this amount until you discover something that is suitable for your requirements.
Clear Adobe Cache Mac Files
Getting rid of outdated cache files might help clear Adobe cache on Mac. Adobe makes use of a number of storage facilities across its many sites to archive cached data.
Delete Application Support Adobe Cache
- Open Finder.
- You may access the Library by selecting it from the Go drop-down menu (if you don't see the Library option, hit the option key).
- Launch the Application Support directory in your file explorer.
- Launch Adobe's file folder in your file explorer.
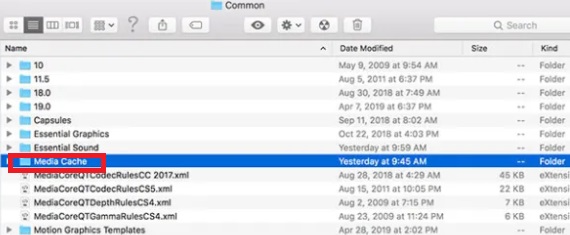
- To get started, open the folder labeled "Common."
- Delete the Media Cache folder, as well as the Media Cache Files folder.
Clear Adobe Cache on Mac from the Caches folder
- Open Finder.
- You may access the Library by selecting it from the Go drop-down menu (if you don't see the Library option, hit the option key).
- Activate the Caches folder in your file manager.
- Launch Adobe's file folder in your file explorer.
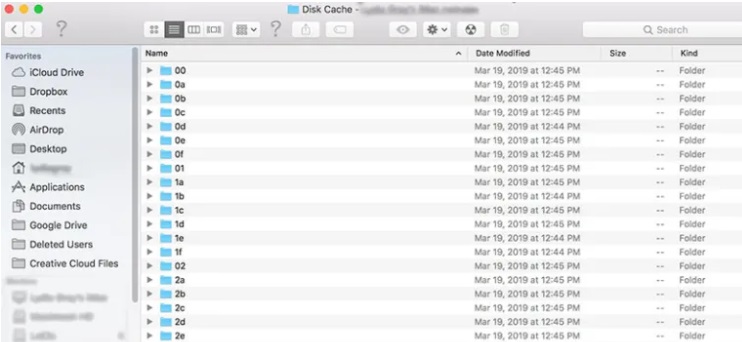
- All of the Adobe items you have installed will be shown. Once you've opened each folder, look in it and any subfolders it may have for a folder labeled "Disk Cache." Delete any directories that are labeled "Disk Cache" that you discover.
Part 4. Conclusion
We hope that this guide on how to clear Adobe cache on Mac was useful. Consider automating this procedure by changing the cache settings when you're out of hard drive space or just want to be more organized. It's time to clear Adobe cache Mac and return to the artistic side of video editing.

