


Do you love music? Then, you must know Spotify and other music streaming services such as Tidal, Apple Music, and SoundCloud. These music streaming services have gone off the roof, especially when music lovers are not stopping anytime soon.
However, Spotify is without drawbacks. Sometimes, it doesn’t work properly. That’s why you may want to clear Spotify cache Mac. This will enable you to fix most of the issues and bugs you’re experiencing with their app or desktop software.
If you’re looking for step-by-step instructions on how to clear Spotify cache (Mac), you’ve come to the right place. This article will help you learn how to do just that. And lucky for you, it’s easy to clear Spotify cache (Mac). But first, let’s talk about whether you can actually delete your cache on Spotify to avoid the system running out of space and what happens if you implement it.
Contents: Part 1. Can I Delete Spotify Cache Files On Mac?Part 2. How To Clear Spotify Cache On Mac Manually?Part 3. How Do I Clear The Cache On Spotify Quickly?Part 4. Bonus: How To Manage The Size Of Spotify Cache On Mac?
Part 1. Can I Delete Spotify Cache Files On Mac?
Before we teach you how to clear Spotify cache (Mac), we’ll talk about whether you can delete it or not. Fortunately, it is possible to clear your Spotify cache on Mac and even on Windows. It’s actually easy to implement with automatic methods. But sometimes, it can be hard to locate. So, we’ll teach you how to do it later.

What Happens If I Clear Spotify Cache?
Now, we will be discussing how to clear Spotify cache (Mac). But what happens if you clear the cache on your Spotify? Well, first of all, clearing your Spotify cache can help solve a lot of issues you face. These issues may include crashing, slowing down, freezing, and even music not launching. Clearing the cache will give a fresh start to your Spotify app.
In addition, if you implement how to clear Spotify cache (Mac), downloaded music which is available only on Premium subscriptions will be removed. Fortunately, your playlists won’t be affected. The library won’t be affected too. You just have to download the songs back again in order to listen to them offline.
Can’t Find Spotify Cache On Mac?
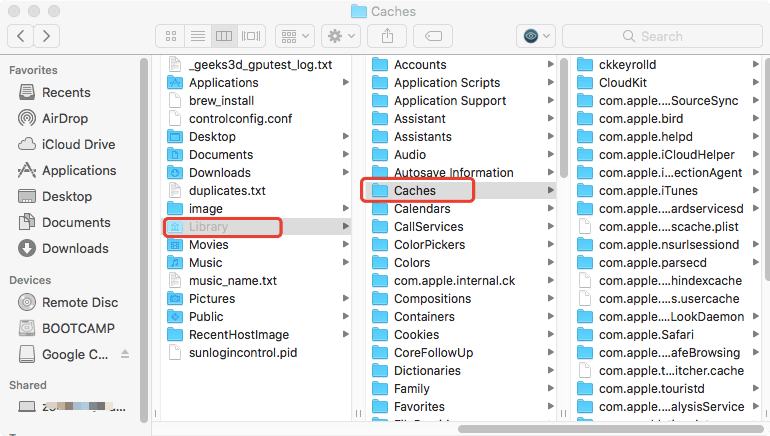
Now, you want to clear the Spotify cache (Mac). But what if you can’t find the Spotify cache? Where is Spotify cache on Mac? Well, that is a problem that’s easy to fix. Generally, the Spotify cache on Mac can be found in the “Caches” folder within your Library folder. You can go to this Library folder by using Finder.
Sometimes, the Library folder doesn’t show up. So, how do you fix this? Check out the steps below to find the Caches on your Mac:
- Launch Finder. The first thing you should do is to open Finder on your Mac.
- Press Go. Then, you should press the Go button located at the upper part of the screen. It is located within the menu bar.
- Choose Library. A drop-down menu will be present. Choose Library from it. If the Library doesn’t show up, it is necessary to hold down the key for ALT in order to show it.
- Open Caches. Now, find the cache folder and open it. By this time, you have found the place where Caches are including Spotify’s caches.
Part 2. How To Clear Spotify Cache On Mac Manually?
We’re now moving on to the important part of this article – the instructions on how to clear Spotify cache (Mac). Make sure you really want to do this because there’s no turning back. Below are the steps you should follow in order to clear Spotify cache (Mac):
- Launch Finder. The initial step will be to launch Finder and click the menu called Go. Choose the option to Go To Folder.
- Enter The Right Directory. Now, enter the directory without the quotes and period in it: “~/Library/Application Support/Spotify/PersistentCache/Storage”. Another thing you can do is to visit the Advanced Settings of Spotify and then click the section for Offline Songs Storage. Locate the cache folder there.
- Delete Contents. Once you are in the cache folder, delete all its contents.
- Empty Trash. Finally, you should empty the Trash to save more space on your Mac computer.

It is important to note that caches will grow gradually when you use Spotify. Thus, you must continuously clear Spotify cache (Mac) on a regular basis. Another thing you can do is restart the Mac computer regularly. That’s because the app will automatically clear Spotify cache on Mac once you restart your Mac.
Typically, Spotify will take care of the cache itself. This is the normal case wherein you don’t have to think about the cache from time to time. However, things can go the opposite side. That’s why you may want to use a tool to help you clear Spotify cache on Mac including other unnecessary caches on your system. The tool we recommend will be given below:
Part 3. How Do I Clear The Cache On Spotify Quickly?
There are other ways you can implement to clear Spotify cache (Mac). The one we recommend is through the use of iMyMac PowerMyMac’s Junk Cleaner Feature. PowerMyMac is a great tool from iMyMac to help you remove unnecessary files from your system. It has a lot of modules and features that will help you scan your entire system for junk. You can actually delete these junk files in a few simple clicks. One of its modules allows you to uninstall apps as well. Uninstallations are done without leaving leftover files on the system. So you can also use it to delete apps that can't work well and install a new one.
PowerMyMac has a performance monitor that allows you to check how smooth or fast your computer works. It also tells how much RAM is consumed and the available storage space that you have. Because it removes the clutter from your system, it boosts the performance of your Mac computer. Plus, this frees up more space for important files such as work, business, and school documents.
So, here are the steps to clear Spotify (Mac) using this tool:
Step 01. Download, Install, And Open The Software
Initially, you have to download iMyMac’s PowerMyMac software from the official website of the company. You can opt for a free trial or you can purchase it immediately if you want to. Once you have downloaded the installer, you should open it. Afterward, follow the instructions on the screen to make sure you install the tool on your Mac computer. Once that is done, you can simply open the software on the Mac.
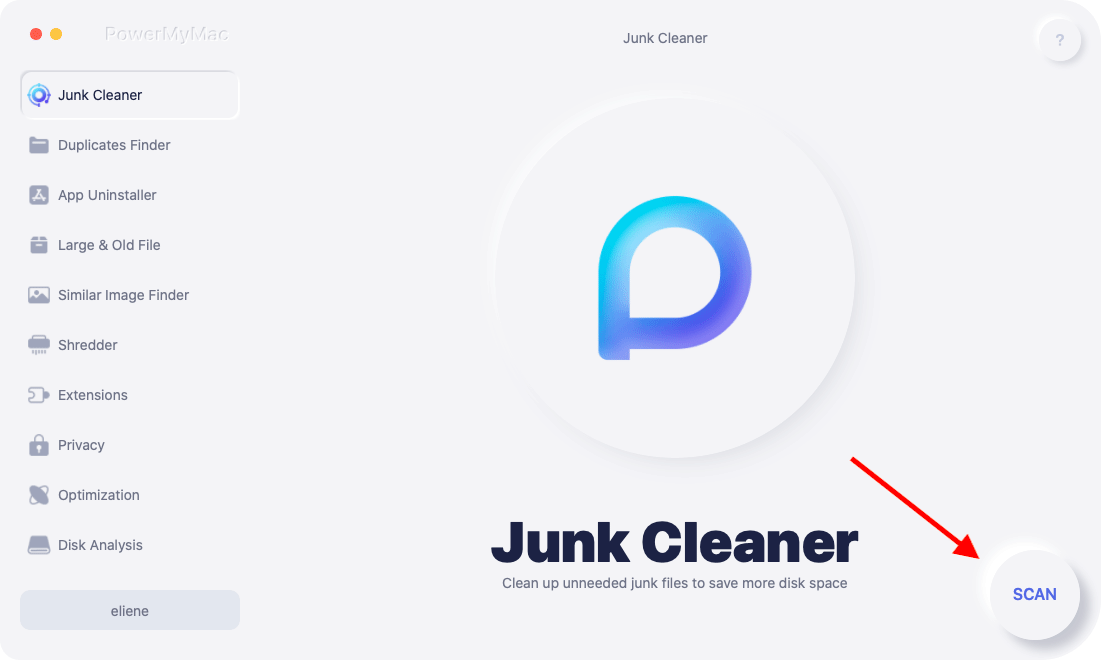
Step 02. Click Junk Cleaner
The Junk Cleaner was created in order to clear different types of system junk including system cache, Spotify cache, application cache, email attachments, user logs, iTunes downloads, and more. It’s a deep cleaning system on your Mac.
Thus, if you want to clear Spotify cache (Mac), you should click the Junk Cleaner module. This can be found in the left sidebar of the PowerMyMac interface. In addition, it is found at the topmost part of all the modules. Run Junk Cleaner on the central bottom part of PowerMyMac.
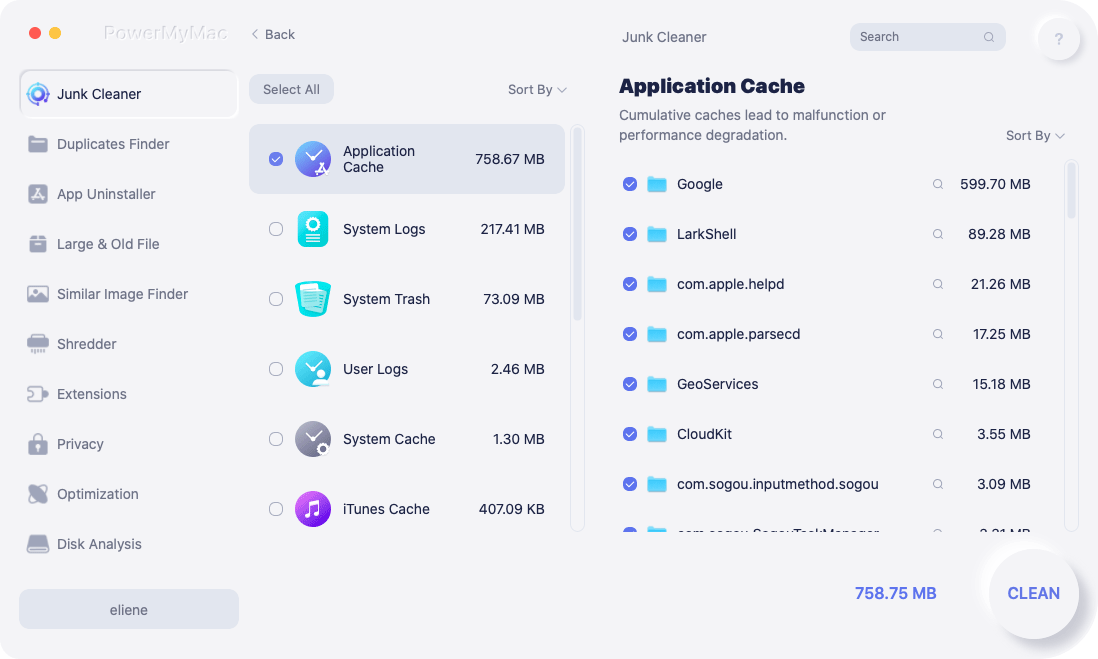
Step 03. Review Files After Scanning and Choose Application Cache
Wait until the scanning process is complete. Then, review the files and folders you can delete. Select the Spotify cache in the Application Cache category.
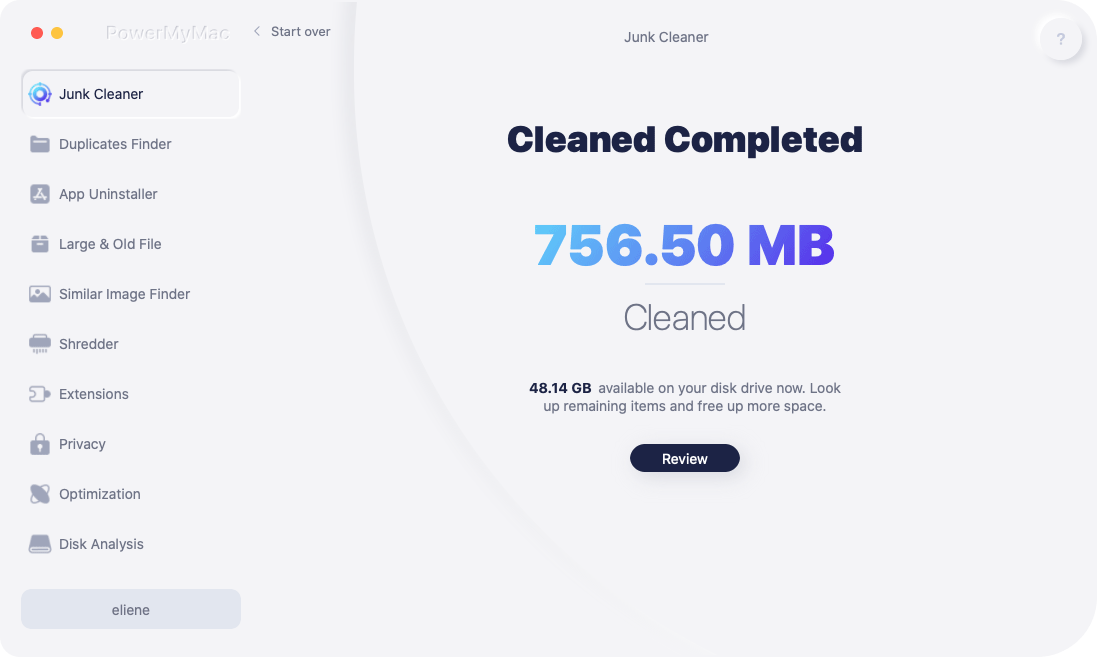
Step 04. Done Clear Spotify Cache
Next, you have to click the Clean button to start the process. Wait until it says “Cleanup Completed” to make sure everything has been removed. Now, you have finished how to clear Spotify cache (Mac) easily and quickly.
Part 4. Bonus: How To Manage The Size Of Spotify Cache On Mac?
After we have talked about how to clear Spotify cache (Mac), let’s talk about how to manage it. In order to do so, you have to decrease the size of the cache. In this way, it won’t be necessary to clear it every now and then.
To manage the size of the Spotify cache on your Mac, you must check out the Preferences section on the Spotify app. After that, you can simply locate the quality settings. It is important to note, that the higher the quality, the higher the amount of data that are streamed. In this case, the cache will grow bigger at a faster rate.
In addition, make sure you download songs that you only listen to. Downloading Spotify songs can take a tedious toll on your cache size. That’s why you must limit the number of songs you download.
So, here are the steps to make sure you reduce the size of your cache on Mac. In this way, you don’t have to clear Spotify cache (Mac) every now and then.
- Launch Spotify. Obviously, you have to open the app of Spotify on your Mac.
- Go To Preferences. Next, you have to go to the menu and then Preferences.
- Go To Music Quality. Go to the music quality section. Then, change the settings to Normal or Low.
Now that we’ve given you how to clear Spotify cache (Mac), you’re ready to clean up your Spotify’s system. This will be helpful if you have problems with the app as well. Of course, we recommend that you use PowerMyMac from iMyMac in order to clean up caches easily including those of Spotify. Download the free trial of the software today!

