


One of the best features that every Mac device has is iMessage. This is a messaging platform wherein you can use it to send text messages to other Apple user without being charged for it. This messaging platform of Apple is absolutely for free. All you need to make sure of is that you are connected to the internet.
However, not all Apple users – especially iPhone users know how to sync iMessage to Mac. And that way, they will still be able to access iMessage just by using their Mac device. They can even send out messages as well. Basically once that you have synced your iMessage to your Mac device, it will also receive all of the incoming messages and also have the messages that you sent using your iPhone device.
So, for those of you who do not know how to sync iMessage to Mac, then this article is for you. Do not worry about anything because syncing your iMessage to your Mac device is actually dead easy.
Contents: Part 1. How to Set Up iMessagePart 2. How to Sync iMessage to MacPart 3. Make Your Mac Clean and Perform Faster – iMyMac PowerMyMacPart 4. Conclusion
People Also Read:Quick Fix: iMessage On Mac Not WorkingBest Guide on How to Delete All Messages on Mac
Part 1. How to Set Up iMessage
How do I sync my text messages from my iPhone to my Macbook? Now, before you start syncing your iMessage on your Mac, you have to make sure that you have actually set up your iMessage. Commonly, all you need to have is an Apple ID which is commonly set up by most users when they purchased their Mac or iOS device. Aside from that, it is also the one everyone use for them to install iTunes.

Now, here is how you can set up your iMessage on any device that you have. This includes your iPhone, Mac, iPad, and iPod.
Step 1. Go to the Settings of the Apple device that you are using.
Step 2. And then, you will be asked to enter your Apple ID. Or if you were not able to set one, then create your own.
Step 3. After that, toggle the button beside the iMessage option for you to enable it.
Step 4. Now, if what you want is people to send out messages to your Apple ID, all you have to do is to look for “Send and Receive” or “Receive At”, and then enter the Apple ID and also some other contacts details that you want such as your email address.
Step 5. You can also have enabled SMS or group messaging.
Step 6. You can also choose to turn on Reading Receipts wherein the person that you are trying to send messages to will know the time or date that you have read their message.
Once that you have done this, then you can enjoy using your iMessage on any Apple device that you have.
Part 2. How to Sync iMessage to Mac
When it comes to syncing your devices such as your iPhone, iPad, or even your Mac, there are instances that some would not get it the right way. This is because there are still some users who are having trouble with their iMessage not syncing. One example of which is when you send out a message using your iPhone and the message that you sent did not appear on your Mac. Same goes with the other way around.
So because of that, here is the best way for you to be able to sync your iMessage to your Mac device.
• On Your iPhone Device:
Step 1. Get your iPhone device and have the Settings opened up.
Step 2. From the Settings of your iPhone device, scroll down and look for Messages.
Step 3. The on the option number five wherein you see the “Send and Receive” option, you will see a phone number or even an email address. So just tap on it.
Step 4. After that, you will then see all of the contact numbers and as well as email addresses wherein you will be contacted using iMessage. From there, just tap on any numbers that you like or you can also choose an email address if you want to.
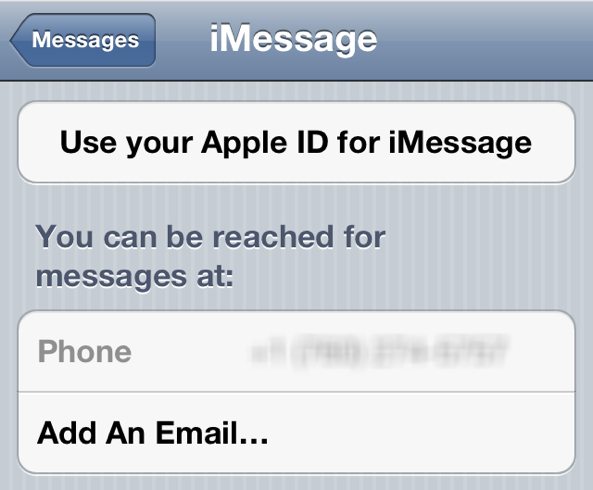
Technically, when we tap on that part, you will only be seeing the number that you are using on your iPhone device. If that is the case, then what you need to do is to tap on the “Use your Apple ID for iMessage” option located at the top of your phone number.
Once that you have entered your Apple ID, it will then show you a list of email addresses that you have used and are registered to your Apple ID. And from there, you can just choose all of the email addresses that you want to use. And in case you want to remove a certain email address from the list, just tap on the “I” icon and then choose “Remove This Email”. And that's all for how to sync iMessage to Mac from iPhone.
• On Your Mac Device
Step 1. Now, using your Mac device, just open up your Messages application.
Step 2. And then, click on Messages which is located at the upper part of your menu bar.
Step 3. From there, click on “Preferences”.
Step 4. After that, click on the “Accounts” option.
Step 5. Just like what you did on your iPhone device, from here, you will be needing to click all of the email address that you want to be connected to your iMessage on your Mac.
Step 6. But if you see that the Apple ID that you are using is indicated as “Inactive”, then just simply click on it. Then enter what it requires you enter.
Step 7. After that, choose all of the phone numbers or the email addresses that you want to use.
And once that you are done with the whole process that we have shown you, then you are all set to use your iMessage. But, you have to restart your messages on both your iPhone and Mac that we have dealt with. Once that both devices are booted up, then you can see if you have actually mastered how to sync iMessage to Mac.
Part 3. Make Your Mac Clean and Perform Faster – iMyMac PowerMyMac
Now that you have learned how to sync iMessage to Mac, here is a tip for you to do on your Mac. It is a must that you once in a while clean up your device. This way, you will be able to gain more space and at the same time, boost the performance of your Mac. Cleaning up your Mac is also one way for you to prevent any issues that you might have with your iMessage such as not receiving messages on your Mac device.
And when it comes to cleaning up your Mac, there is just one tool that is perfect for you to use, and this is the iMyMac PowerMyMac. This is a program wherein it can become the performance monitor for your Mac and at the same time, a smart cleanup wherein it will automatically know which of the files that you have are actually considered to be useless or merely just a litter in the virtual aspect.
And one way for you to clean up your Mac is by removing all of the junks that are eating up space. And once junk that you should be considering to remove is your system junk. The system junk composes of your System Cache, Application Cache, System Logs, User Logs, and your Localization. And removing all of these on your Mac will free up more space and as well as boost the performance on your Mac.
Just like show you how to sync iMessage to Mac, we are going to show you how to clean up the system junk on your Mac step by step.
Step 1. Get the iMyMac PowerMyMac
First of is that you will be needing to download the iMyMac PowerMyMac from its website. And then, install it on your Mac.
Step 2. Start Up the Program
After the successful installation process, open PowerMyMac on your Mac. And by default, you will be able to see your Mac’s status. You will be able to see your Memory Usage, Disk Usage, and as well as your CPU usage.
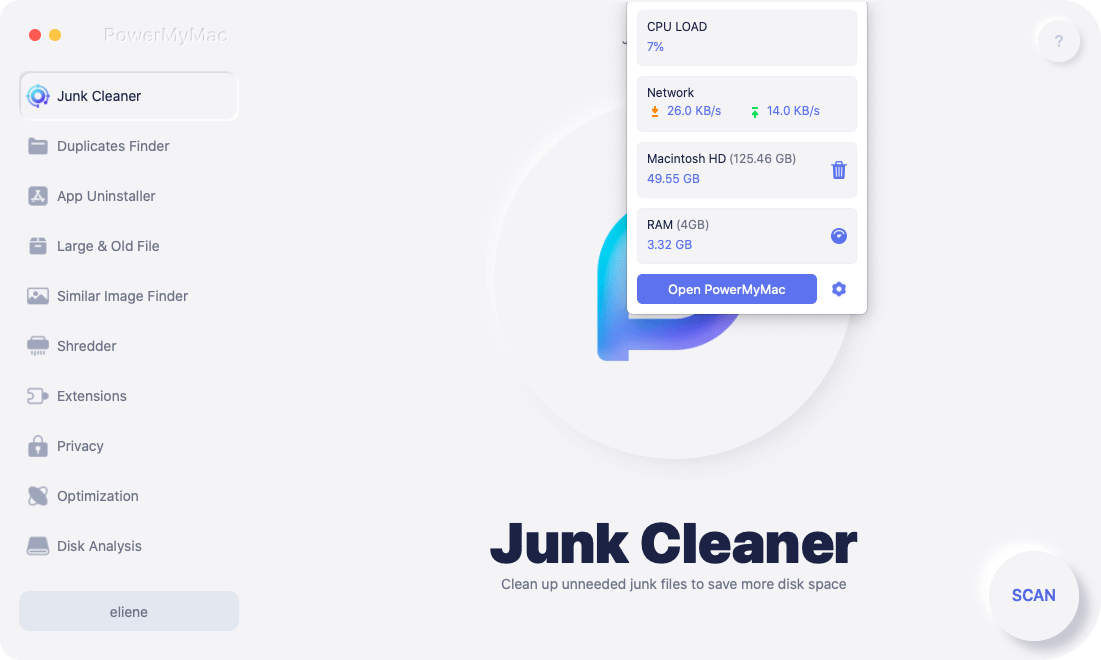
Step 3. Choose Master Scan
Then on the main interface, you will be able to see several options that you can choose to clean up your Mac. From those options, choose Master Scan.
Step 4. Start A Scan
After that, start a scanning process on your Mac. This way, PowerMyMac will be able to detect all of the system junk that you have on your Mac. So just simply hit on the Scan button. Wait for the program to finish up the scanning process.

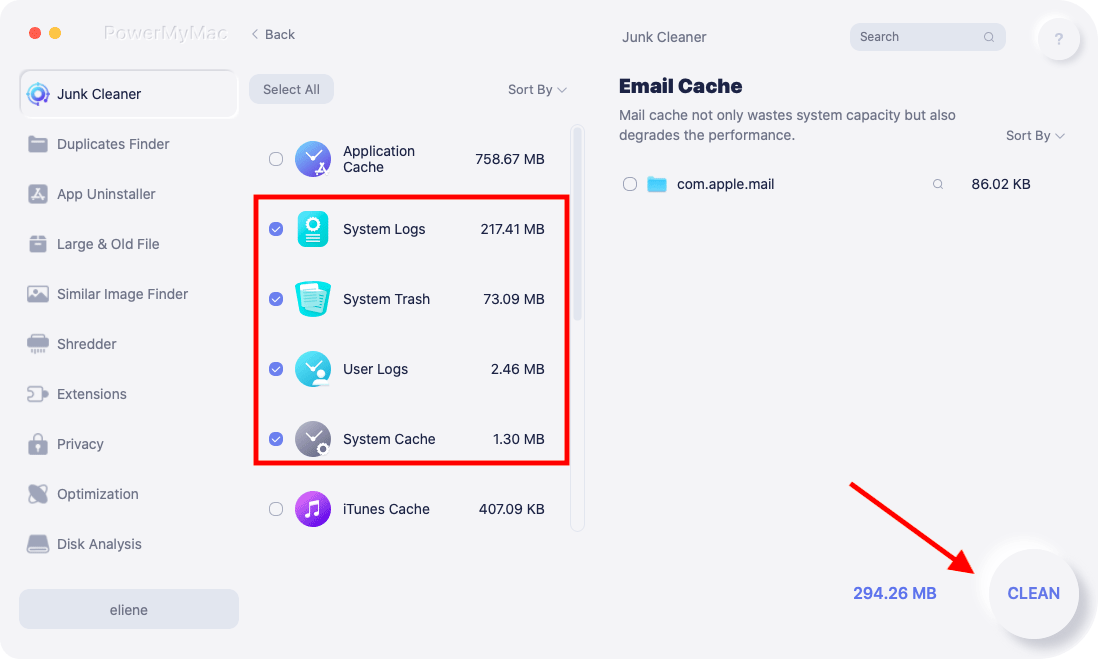
Step 5. Choose All Desired Files to Delete
Once that the scanning process is complete, you can take a look at the result. There is a list of categories such as Application Cache, System Cache, System Log, User Logs, and Localization. Notice that if you click on the each of them, they will be expanded on the right side of your screen showing you all the files that they contain.
So from there, just choose all the files that you would want to remove from your Mac. You can have them tick one by one for you to choose the files, or you can also just make use of the “Select All” button at the top of your screen. That way, you will be able to choose all the files on your screen in just one click.
Step 6. Clean Up Your System Junk
Once that you have chosen all of the files that you want to remove on your Mac and you are satisfied with it, then remove them completely out of your Mac by clicking on the Clean button right below your screen.
Aside from the fact that you can clean up your System Junk, you can also have those other junks from your Mac be removed. All you have to do is to use PowerMyMac and choose the area that you would want to clean. You can also make use of this program if you want to uninstall apps on your Mac and so much more.
Part 4. Conclusion
Knowing how to sync iMessage to Mac is one clever thing to do. Doing this will allow you to send or receive iMessage just by using your Mac. You can also try to start a conversation using your iPhone or iPad device and finish it using your Mac. All this once that you have synced your iMessage. It is one great messaging platform for all Apple users because it is free of charge. All you need to have is an internet connection.
Also, make it a habit of cleaning up your Mac every now and then. This way, you will be able to continuously receive messages on your Mac. Why? Because once that you clean up your Mac, you will be able to free more space allowing to have more of your messages.

