


If you're a user who is looking to uninstall Swift Publisher from Mac, you've come to the right place. Swift Publisher is a popular desktop publishing software that allows users to create stunning designs, brochures, flyers, and more. However, there may be instances when you need to remove it from your Mac, either to free up disk space or to switch to a different publishing tool.
In this article, we will walk you through a comprehensive step-by-step guide on how to delete apps from your Mac, ensuring a clean removal and optimizing your system's performance. By following these instructions, you can confidently uninstall Swift Publisher and pave the way for a seamless transition or the installation of alternative software.
Contents: Part 1. Things You Should Know about Mac APP RemovalPart 2. Remove Swift Publisher from Mac SystemPart 3. Automatically Uninstall Swift Publisher [Recommended]Part 4. Conclusion
Part 1. Things You Should Know about Mac APP Removal
When it comes to uninstalling applications on a Mac, it's important to understand the underlying process to ensure a clean and thorough removal. Here are a few key things you should know before proceeding with the uninstallation of Swift Publisher on your Mac.
- Dragging the App to Trash is Not Enough: Simply moving or transferring the Swift Publisher app to the Trash bin is not sufficient to completely remove it from your system. This method leaves behind residual files and folders that can take up valuable disk space.
- Uninstaller Utility: Some applications, including Swift Publisher, come with their built-in uninstaller utility. It is recommended to use this tool to ensure completely uninstall Swift Publisher from Mac with its associated files.
- Third-Party Uninstallers: If an application doesn’t have an uninstaller utility, you can rely on third-party uninstaller apps to help you remove it completely. These tools scan your system for all related files and provide a hassle-free uninstallation process.
By being aware of these aspects of Mac app removal, you can proceed confidently with uninstalling Swift Publisher from your Mac, knowing that you are following the proper steps for a thorough removal.
Part 2. Remove Swift Publisher from Mac System
To permanently uninstall Swift Publisher from Mac, follow the step-by-step manual instructions provided below:
- Quit Swift Publisher. Before uninstalling any application, it's essential to close all its processes. To do this, right-click on the Swift Publisher icon in the Dock, then choose "Quit".
- Remove Swift Publisher from the Applications Folder. Open the "Applications" folder on your Mac and locate the Swift Publisher app. Click and hold the Swift Publisher icon, then drag it to the Trash bin in the Dock. Alternatively, you can right-click on the app and select "Move to Trash".
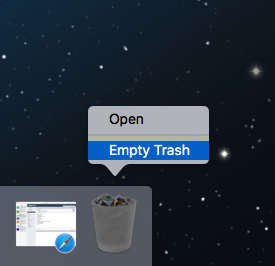
- Empty the Trash. To uninstall Swift Publisher from Mac, you need to empty the Trash bin. Right-click on the Trash icon in the Dock and select "Empty Trash". Confirm the action in the dialog box that appears.
- Remove Swift Publisher Support Files. Even though you have removed the Swift Publisher app, some associated files may remain on your system. These files include preferences, caches, and other support files. To remove them manually, follow these steps:
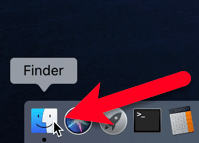
- Open the Finder on your Mac.
- Click on the "Go" menu in the menu bar and select "Go to Folder".
- In the text field, type "
~/Library" (without quotes) and press Enter. - Locate and open the following folders one by one: Application Support, Caches, Preferences
- Search for any folders or files that are related to Swift Publisher. Select them and move them to the Trash.
- Empty the Trash Again. After removing the support files, go back to the Trash bin and empty it once more to permanently delete all the associated files from your Mac. That's all the steps to uninstall Swift Publisher from Mac manually.
Congratulations! You have successfully uninstalled Swift Publisher from your Mac manually. Ensure to restart your Mac to complete the process and optimize your system's performance.
Part 3. Automatically Uninstall Swift Publisher [Recommended]
If you prefer a more convenient and efficient method to uninstall Swift Publisher from your Mac, using a reliable uninstaller like iMyMac PowerMyMac is highly recommended. PowerMyMac is an all-in-one Mac maintenance tool that includes a powerful uninstaller feature to thoroughly remove applications and their associated files. Here's how you can use PowerMyMac to uninstall Swift Publisher from Mac:
- Download and Install PowerMyMac. Visit the actual official iMyMac website and download the PowerMyMac application. Follow the prompts on the screen to install it on your Mac.
- Launch PowerMyMac and Select Uninstaller. Open PowerMyMac from your Applications folder or Launchpad. Once the program is launched, click on the "App Uninstaller" module on the main interface.
- Scan for Applications. Click SCAN. PowerMyMac will automatically scan your Mac for applications installed in it. Wait for the scanning process to complete.
- Locate and Uninstall Swift Publisher. In the list of applications displayed, locate Swift Publisher. You can use the search bar or browse through the list manually. Select Swift Publisher and click on the "CLEAN" button next to it.

PowerMyMac will now automatically uninstall Swift Publisher from Mac and its associated files from your Mac, ensuring a thorough removal. You can also use PowerMyMac for various other maintenance tasks to optimize your Mac's computing performance. By using the tool called PowerMyMac, you can simplify the uninstallation process and ensure a clean removal of Swift Publisher from your Mac without the hassle of manually searching for and deleting associated files.
By using the tool called PowerMyMac, you can simplify the uninstallation process and ensure a clean removal of Swift Publisher from your Mac without the hassle of manually searching for and deleting associated files. Try removing other unwanted applications like Desktop Manager to discover more of what PowerMyMac has to offer.
Part 4. Conclusion
Uninstalling Swift Publisher from your Mac can be a necessary task for various reasons, such as freeing up disk space or transitioning to a different publishing software. In this article, we have provided you with comprehensive instructions on how to uninstall Swift Publisher from Mac using both manual steps and an automated third-party tool.
While manually removing Swift Publisher requires careful deletion of associated files and folders, using a dedicated uninstaller like PowerMyMac offers a convenient and efficient solution. PowerMyMac simplifies the process by scanning for all related files and allowing you to uninstall Swift Publisher with just a few clicks.
Whether you choose to follow the manual steps or use PowerMyMac, it's crucial to ensure a clean removal to optimize your Mac's performance and avoid any leftover files taking up valuable space.
By going through the guidelines in this article, you can confidently uninstall Swift Publisher from Mac, paving the way for a smooth transition to another application or simply freeing up disk space for other purposes.

