There are various techniques to capture the different parts of your Mac’s screen such as keyboard shortcuts which might be helpful. This can include how to screenshot on Mac.
You’ll have to actually know that there are few common shortcuts using your keyboards such as if you possess a specific MacBook that offers a touch bar in it that you can use if you need to take screenshots regularly at work or school.
In addition to this, we can also help you with working with the screenshots once you’ve taken these. Apple has some tools that you’ll appreciate and can be used regularly which gives a variety of options on saving, deleting for freeing up more purgeable space, and opening your screenshot for actual markup. Furthermore, if you're seeking tips, just keep reading below.
Contents: Part 1. How to ScreenShot on Mac Using Popular Keyboard Shortcuts?Part 2. Easily Do Annotation to Your Screenshots
Part 1. How to ScreenShot on Mac Using Popular Keyboard Shortcuts?
How do I capture a screenshot? The first keyboard shortcut you should know to implement how to screenshot on Mac is CMD-Shift-3. Actually, this is a keyboard shortcut that is used to take a screenshot of your entire screen.
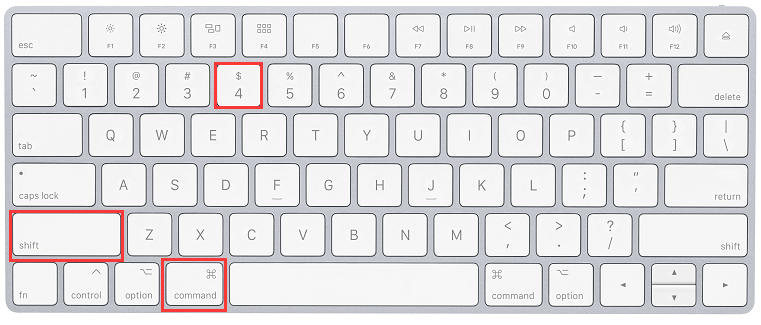
Shift-Command-4
How do you take a freehand screenshot on a Mac?Shift-CMD -4 is a keyboard combo wherein you can use when you drag to actually select a section of your computer screen capture to turn your cursor into a crosshair. To take the shot you must release first the trackpad or your Mac’s mouse button.
After pressing Shift-CMD-4, you have a variety of alternative options:
- Press and then release the keyboard’s
spacebar:
Click on your desired window you want to take a screenshot and when the crosshair changes into an icon that looks like a tiny camera where you can move over to open a window. This method produces a screenshot with a border colored white around its window and a slight drop shadow.
- Press and then hold the press on your keyboard’s
spacebar (this is done once you have finished dragging in order to highlight a specific area. But do it before the trackpad or mouse button is released):
Just hold down the space bar to reposition the cursor before releasing your mouse button in order to take a specific screenshot. This method locks in the shape and size in the selection area and still lets you reposition within its screen.
- Holding down the keyboard’s key for
Shift(This is done right after dragging in order to highlight a specific area. But do it before the trackpad or mouse button is released):
Without you releasing the button of the mouse, you should release the key for Shift and press it again. This is in order to reposition its selection’s right edge or toggle between its bottom edge and its right edge by keeping your button of the mouse engaged along pressing the key for Shift. This method locks in each side of the crosshair selection area except the bottom edge, allowing you to move your mouse up and down to position the bottom edge.

Shift-CMD-5
This relative combination of shortcuts was sent out last 2018 sums up a panel at the bottom of your display with your screen capture options which let you capture the entire screen, a window, or a selection of your Mac’s screen. This helps you implement how to screenshot on Mac in a different way.
You may record your full screen or a portion of it using the two video-recording buttons. There is an X button on the left to shut the screenshot panel, but you may also just use the Escape key to leave.
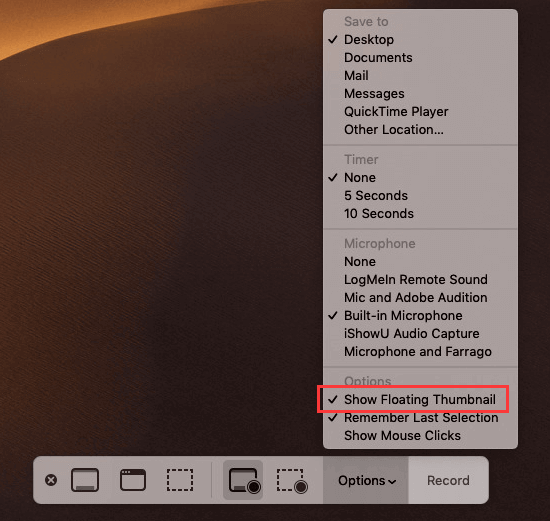
Where do screenshots go on Mac? An Options button is located on the right side which allows you to pick where you want to store your screenshot either on the clipboard, documents, desktop, or preview and as well as create a five to ten-second delay wherein you can line up elements that could otherwise disappear when you use your screenshot tool
The option to Show Floating Thumbnail is activated by default in wherein you can use it to turn on or off the thumbnail preview of the screenshot you have just captured. Finally, you can choose to include your mouse pointer in a screenshot or within a video. Grab the part of the left corner and relocate it towards a new area on your Mac’s screen, if the panel for the screenshot is obstructing your work.
Command-Shift-6
Just tap Command-Shift-6 to capture an expansive and narrow screenshot of the Mac’s Touch Bar, if you own the MacBook Pro (16-inch) or any Touch Bar enabled Mac model. This is another way on how to screenshot on Mac.
Part 2. Easily Do Annotation to Your Screenshots
You'll easily gain access to that your Markup tools for annotating your screenshot by choosing its Floating Thumbnail. You may swipe the actual Floating Thumbnail so it will go away or simply let it go, and it will be stored at the location where the last screenshot was saved. When you click your Mac’s Floating Thumbnail, it will open in a Markup View preview window (instead of on Preview) including every tool for markup.
Right Click your Mac’s Floating Thumbnail in order to:
- Save the snapshot to your computer's desktop or documents folder.
- Open it within Preview of Photos.
- Show it within Finder.
- Open the window of the Markup Preview mentioned above.
- Exit (and save).
Here, we have talked about how to screenshot on Mac. These techniques are easy as long you know the basic keyboard shortcut mentioned above. As such, we have also taught you easy access to how to screenshot on Mac if you’ll use Floating Thumbnail.
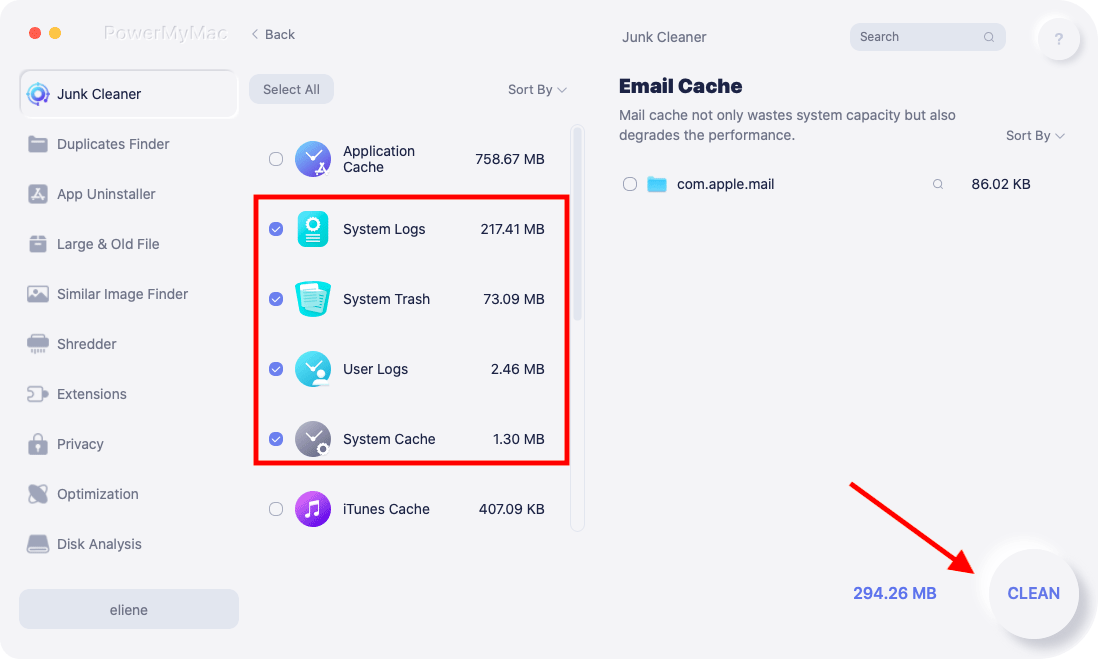
You can also use iMyMac PowerMyMac to make sure your Mac is in tip-top condition by managing your screenshots. It helps you clean up your Mac, uninstall unwanted apps with their related files within simple clicks. It saves your time and keeps your Mac healthy easily! Get the tool now!