


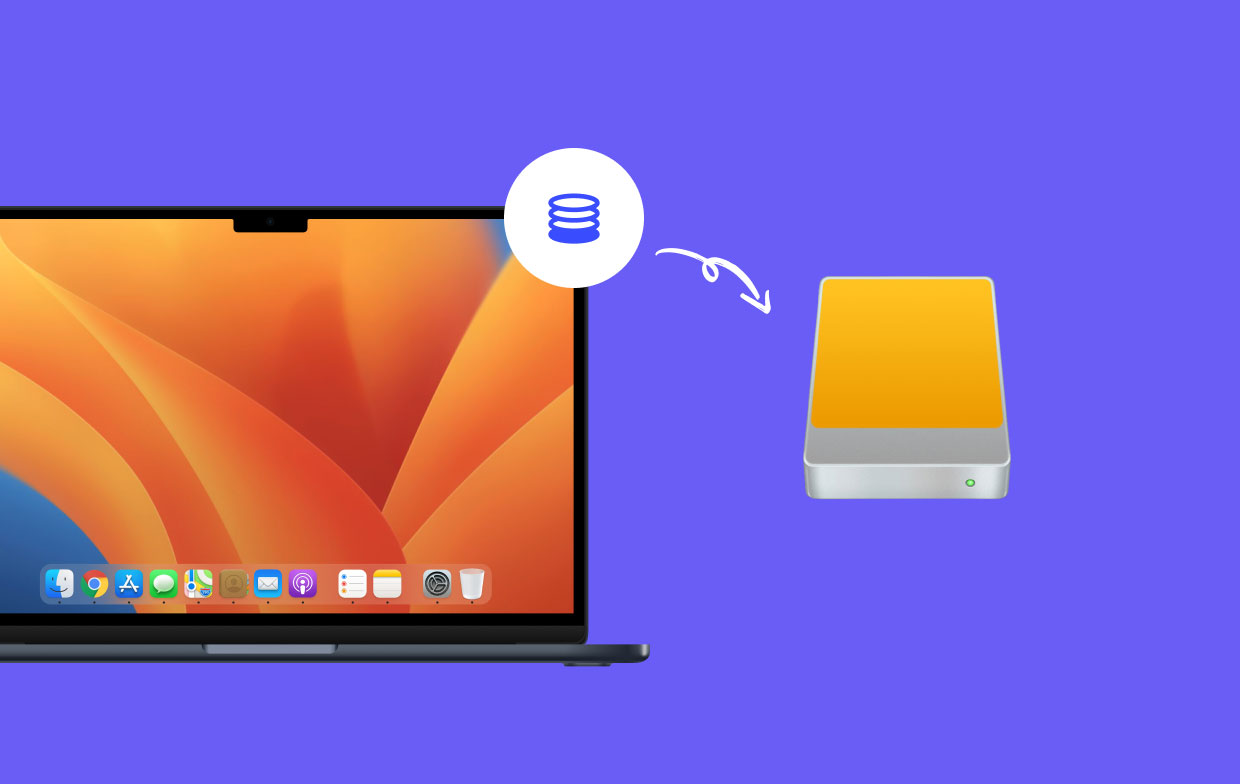
Keeping Mac OS and data on separate drives makes your computing world seamless and more productive. You don’t need to install an extra hard drive or partition as long as you’ve the storage space needed.
If you have put disk space at a premium, this is a way to use storage more prudently. Changing default locations for the operating system and data entails moving Mac user folder from the boot drive to a different one. User folders fill SSDs, relocating will maintain high-speed storage for the operating system or applications.
Contents: Part 1. Benefits of Keeping Mac OS and Data on Separate DrivesPart 2. How to Move Mac User Folder to External DrivePart 3. Other Options to Partition Your Hard DrivePart 4. Final Thoughts
Part 1. Benefits of Keeping Mac OS and Data on Separate Drives
Why Move Operating System to Another Drive?
For most Mac owners, the operating system gobbles up the lion’s share of their boot drive. Moving it to another driver frees up space on the macOS boot drive. You carve out room for sizable media files and downloads with a larger capacity drive.
You can connect an external desktop hard drive and move the user account to salvage space. Relocating your OS and User folder from the SSD boot drive steers clear of the strains if you’ve ballooning user contents.
Must-Haves
- SSD boot drive housing your OS and user data
- External or internal HDD to transfer your OS and data onto
- Retain one user account on your boot drive for troubleshooting and restoring user account
- Mounted HDD or SSD at the ready
- External desktop hard drive should always be connected lest your User folder becomes inaccessible
Part 2. How to Move Mac User Folder to External Drive
How do I move my Mac user folder to a separate drive the boot drive? For keeping Mac OS and data on separate drives, just follow the steps below to move your macOS user folders:
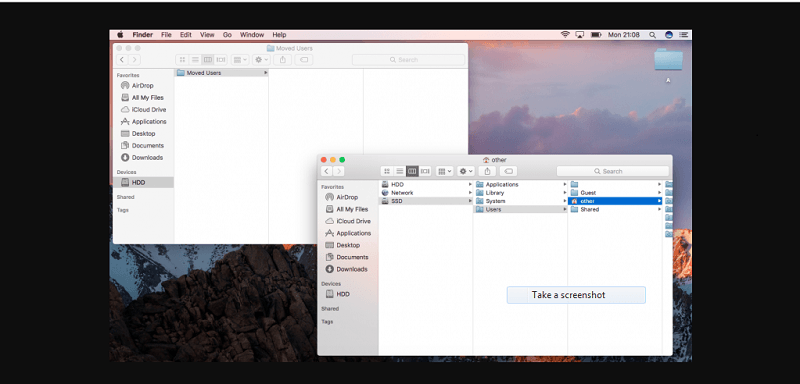
Step 1. Go to Your User Folder on SSD
- The recipient HDD should be formatted to GUID partition table, macOS Extended (Journaled). To format it, invoke the Disk Utility tool. This will nuke all existent data from the drive.
- Go to your User folder on the boot drive (SSD). It should have a bespoke name which you create with your account. Don’t leap at the Users folder. Your target resides in Users and has an idiosyncratic name.
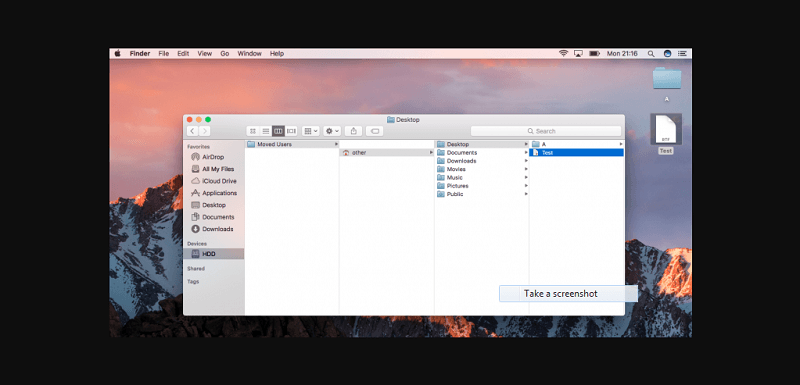
Step 2. Paste Your User Folder
- Highlight the folder before copying it.
- Head to the destination drive (HDD), and paste your User folder.
- Once the folder copies, cross-check to confirm all components have relocated. For avoidance of doubt, your User folder on the SSD should have the same side as the copied one on the HDD.
Step 3. Transfer Entire Folder to HDD
- Open the System Preferences app, and hit the pane labeled Users & Groups.
- In Users & Groups, open the pane to introduce tweaks, by hitting the padlock in the lower-left of the window and typing your password.
- Choose User in the left sidebar and right-click it. An option pops up Advanced Options…
- Choose Advanced Options…and a fresh window sticks out.
- Check for the field labeled Home directory: your existent user folder’s flight path, viz.,
/Users/Your-User-folderthrusts into view. Click the Choose… button on the right of the field to create a new file path. - On the sequential page, find your way to the HDD, and then choose the User folder you transferred to the HDD. Make sure you select the entire folder.
- Once you click Open followed by OK, the system notifies you to restart the computer for the modifications to take effect. After rebooting, the system will scan for the User folder in the new destination.

Step 4. Save to Desktop or the Path You Fed the HDD
- Check whether files have been written accurately to the new account destination by launching TextEdit and saving an empty document. For the save destination, choose Desktop folder with a custom icon.
- After saving, counter check the location, the Desktop folder in the User folder of the HDD. It must be saved to
/HDD/Your-User-folder/Desktopor the path you fed the HDD.

Part 3. Other Options to Partition Your Hard Drive
Partitioning Hard Drive
Keeping Mac OS and data on separate drives can be done by partitioning your hard drive and this compartmentalizes it at the lowest level of your OS. It comes in handy for dual-booting macOS and Windows more efficiently. A separate partition for core files or folders can house troves of contents such as media and photos. It also makes data retrieval easier if your OS partition gets damaged or corrupted.
Set External Hard Drive as Default Mac
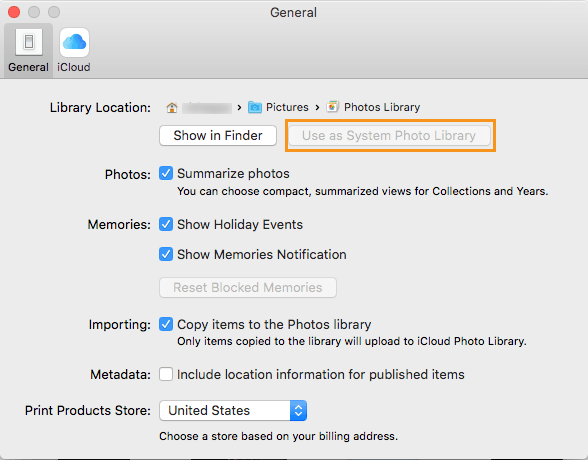
Changing the default domiciles for specific applications such as Photos, iMovie or Final Cut Pro will get space constraints off your chest. They stash data in a Library or monolithic file that balloons with an increase in contents. Their default destinations reside in ~/Library/Pictures or ~/Library/Movies.
The home directory resides in the boot drive (SSD). You can free up more disk space by relocating these to another drive. For example, click Photos and select Create New…and navigate to the new drive. Click on Select, launch Photo Preferences and choose Use as System Photo Library.
Tip: Superior Optimization Utilities - PowerMyMac
Rather than translocate your operating system and data, install iMyMac PowerMyMac to automate cleaning and optimization. Stop your computer from getting stalled by useless files or memory-hogging applications with this all-in-one toolkit.
Keeping your Mac in mint condition over the long haul could leave you scrambling as junk and digital debris finds their place on your system.
PowerMyMac comes with a variety of tools to fix bugs and keep your computer as sound as a barrel. Find covert debris, large or obsolete files, vestiges of uninstalled apps, and spot heavy memory guzzlers. It’s the best-in-category tool to free up space on your Mac and tune it at full throttle.
It offers a comprehensive package with extra tools for uninstalling apps exquisitely, boosting disk performance, and erasing broken links, files, or other morsels that survive a banished app.

Part 4. Final Thoughts
Hopefully this gets the job done freeing up SSD boot drives cramped like sardines. You can use an external hard drive to store data to mothball your Home directory on another drive instead of the startup one.
Gone is the days when you’d copy the Home folder to a new drive and then signal it with symbolic links, it’s now easy as A, B, C. Remember to retain one user folder in your boot drive as your ace in the hole.
Did this article answer your question about keeping Mac OS and data on separate drives, and will you try it out? Need help with the process? Leave your comments below.


Nigel2023-07-06 11:40:13
Excellent explanation if I can understand it at 74 years then anyone can. Have been wracking my brains how to do this kept coming across conflicts in reference words like migration, export, import etc etc. Have been struggling with advice written for the most up to date computers but am using an old 2010 Mac Pro (love it) updated over the years but now needing new motherboard I think. Suddenly thought of a different search term and there was the answer many many thanks Regards Nigel Mee
Esteban2023-05-25 11:38:47
Well ned, I cannot understand this not working for you. Especially with such clear and non-self-involved instructions. What don't you understand about "Don’t leap at the Users folder"? I could go on, but "don't-invest-in-BS" alarms going off.
ned2020-10-30 05:07:07
didn't seem to work for me. perhaps the instructions are OS X version dependent. I'm running El Capitan 10.11.6 on a Mac Mini (mid 2010). I'm open to suggestions.