


Be careful with malware. No computer is spared from it. Since malware can easily get to any computer, your Mac isn’t spared.
For all you know you might have some kind of malware like WebHelper. It’s for that reason that you should know how to remove WebHelper to protect your Mac.
This article will show you how you can remove WebHelper malware. Make sure to read until the end to see what program you can use to clean up your Mac and prevent any kind of dubious apps and extensions on it.
Contents: Part 1. What You Should Know About WebHelperPart 2. How to Remove WebHelper CompletelyPart 3. Bonus: Keep Your Mac Safe with PowerMyMacPart 4. Conclusion
Part 1. What You Should Know About WebHelper
Is WebHelper a virus? In fact, the answer is yes! WebHelper is a kind of malware. Some folks say that it isn’t dangerous at all. At the most, it’s just annoying because it’s going to prompt a lot of pop-ups on your Mac. These pop-ups display adverts and they show up incessantly on your screen.
Whether this particular malware is dangerous or not, it’s considered a potentially unwanted program or PUP. So, if you don’t want it, get rid of it fast. Why keep in on your Mac, right? It’s best to remove WebHelper as soon as possible.
How it Gets to Your Mac
WebHelper, like any other malware and virus, could get to your Mac if you download bundled packages. You see, it hides in legitimate packages you download. This often happens when you download free software. WebHelper is often bundled with Utorrent. So, be careful.
How to Avoid It
You can always avoid webHelper or any other malware by being cautious with your downloads. Avoid downloading free software and using the site’s download manager. Don’t ignore the warnings on your screen. if you get a warning that a site is harmful, avoid it.
Avoid clicking on any link that’s unfamiliar to you. If you don’t know where it’s going to lead you, just ignore the link. Lastly, never trust a pop-up to update software. If you’re curious about updating anything on your Mac, go to the App Store instead.
Part 2. How to Remove WebHelper Completely
Even if WebHelper is harmless, but it is a virus for sure, don’t ignore it. The sooner you remove it, the better. Below are ways for you to get rid of WebHelper from your Mac.
Option #1. Run First Aid on Mac
Yes, you can run First Aid on your Mac. The steps below will show you how you can do it.
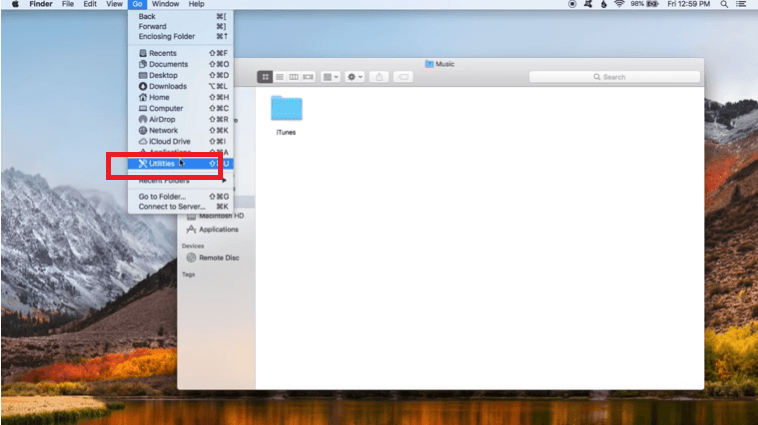
Step 1. Open up Disk Utility
Go to the Dock and click on Finder. Once you have opened Finder, take your cursor to the top menu of your Mac screen and click on Go. Scroll down the drop-down list and click on Utilities. Open Disk Utility.
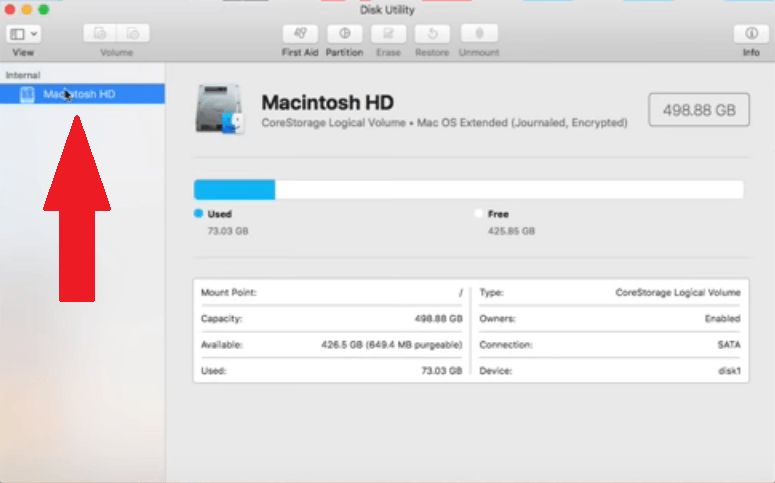
Step 2. Click on an Item under Internal
Once you see the Disk Utility folder on your screen, take a good look at the left-hand side of it. You will see items listed under Internal. If there’s only one item listed down, it’s okay. That means that you would have to run First Aid only once.
If there’s more than one item listed down, then you would have to click on each one to run First Aid. Just make sure to select an item to run First Aid.
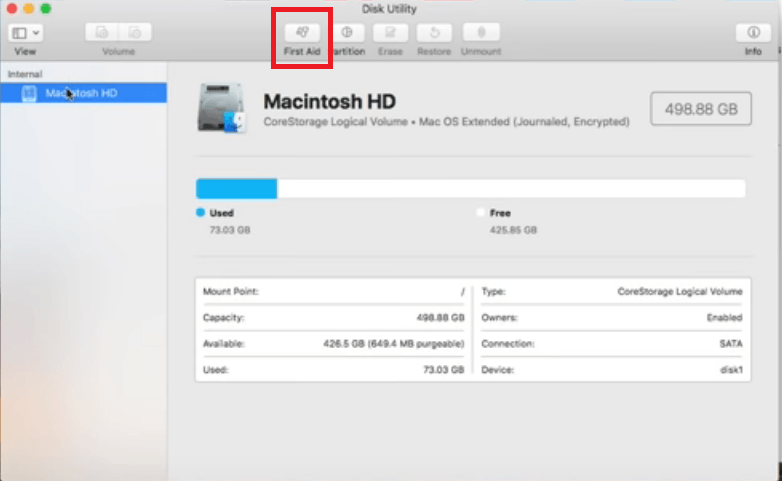
Step 3. Click on the First Aid Tab
Once you have selected an item, take your cursor to the top menu of the Disk Utility folder. Click on the First Aid tab to run it.
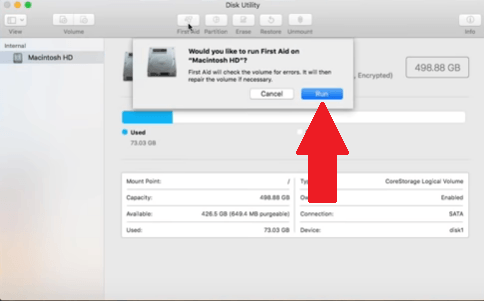
Step 4. Run First Aid
Once you clicked on the First Aid tab, a pop-up window will appear to confirm your action. Click on the Run tab. Again, if there is more than one item listed under Internal, click on each item. Then click on the First Aid tab again to run it. Do this process until you have run First Aid on all the items listed under Internal.
Step 5. Close Other Programs
The process of running First Aid will slow down your Mac. Make sure to save and close the documents you’re working on. Close other apps as well.
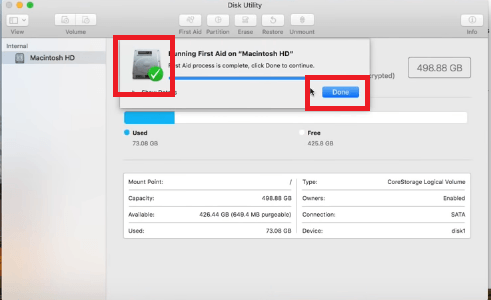
Then click on the Continue tab that you see on the pop-up window that appears on the screen. Once you see a green checkmark, everything is completed. Click on the Done tab.
Option #2. Clean Out Web Browsers
WebHelper could have been added on as an extension to your web browsers. While adding an extension could be convenient for you, it could also be a gateway to invade your privacy. That is why it’s best to remove any extension that could be dangerous to your Mac.
The steps below will show you how you can remove it from Google Chrome, Mozilla Firefox, and Safari.
Step 1. Clean out Extensions on Google Chrome
- Confirm your Google Chrome is updated. Open it up and click on the three dots you see on the right-hand corner of the screen.
- Then click on Help. A drop-down list will show up again.
- Click on About Google Chrome to confirm if the software is updated. If it is, go back to the three little dots.
- This time select More Tools from the drop-down list.
- Click on Extensions. Once the Extensions page is launched on your screen, choose which extension you want to remove.
- Disable it first before clicking on the word Remove.
Step 2. Clean out Extensions on Mozilla Firefox
- Check if Mozilla Firefox is updated. Open it up. Then go to the top, left-hand corner and click on the word Firefox.
- Select About Firefox from the drop-down list. If your Firefox is not updated, it will automatically update. You just have to click on the restart button after the update.
- Click on the menu button and select Add-ons.
- On the left side of the screen, click on Extensions.
- Then remove the extensions you want to get rid of by clicking on the Remove tab you see on the far, right-hand side of the screen.
Step 3. Clean out Extensions on Safari
- Launch Safari. Click on Safari on the top menu and select Preferences.
- Take a look at the left-hand side of the screen to view your extensions.
- Uncheck each extension to disable it.
- Then click on the Uninstall tab you see on the main screen.
Option #3. Clean Out Login Items
There’s no reason to run any apps soon as you log into your Mac. Cleaning out login items is also a good way to prevent any kind of malware such as webHelper. The steps below will show you how you can lean out login items.
Step 1. Click on the Apple Icon
Click on the Apple icon and select System Preferences from the drop-down menu. Then look for Users & Groups and click on it.
Step 2. Unlock Page
Click on your name under Current User. You will see this on the left-hand side of the screen. Then click on the padlock on the bottom part of the screen. Type in your username and password and then click on the Unlock tab.
Step 3. Remove Login Items
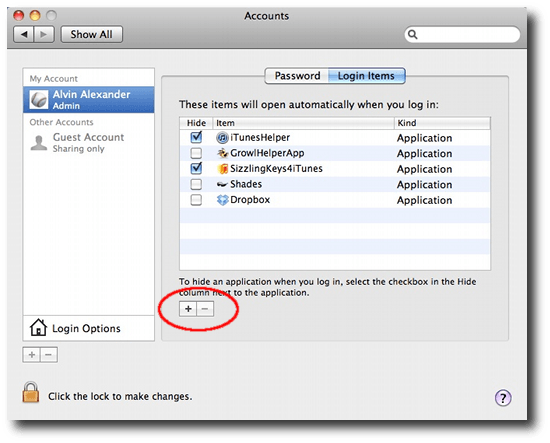
Once you have unlocked the page, click on the Login Items tab. That will list down all the login items. Make sure to remove all login items.
However, you would have to do it one by one. Select one item at a time and click on the – minus sign you see on the bottom part of the screen. Repeat on the next login item.
Option #4. Activate FileVault and Firewall
Make sure to activate FileVault and Firewall on your Mac. The steps below will show you how you can activate both.
- Click on the Apple icon and select System Preferences from the drop-down list.
- Click on Security & Privacy.
- Click on the FileVault tab. Then tap on the padlock icon to unlock it.
- Enable FileVault by tapping on Turn On FileVault tab.
- Click on the Firewall tab and make sure it’s turned on. If it’s not, unlock the padlock, Then click on the Turn On Firewall tab.
Note: The FileVault is an option to encrypt the drive in your Mac, keeping your data safe. It’s best that it’s turned on.
Part 3. Bonus: Keep Your Mac Safe with PowerMyMac
As you can see, you can navigate to certain parts of your Mac to remove webHelper. However, it’s best to be proactive rather than be reactive.
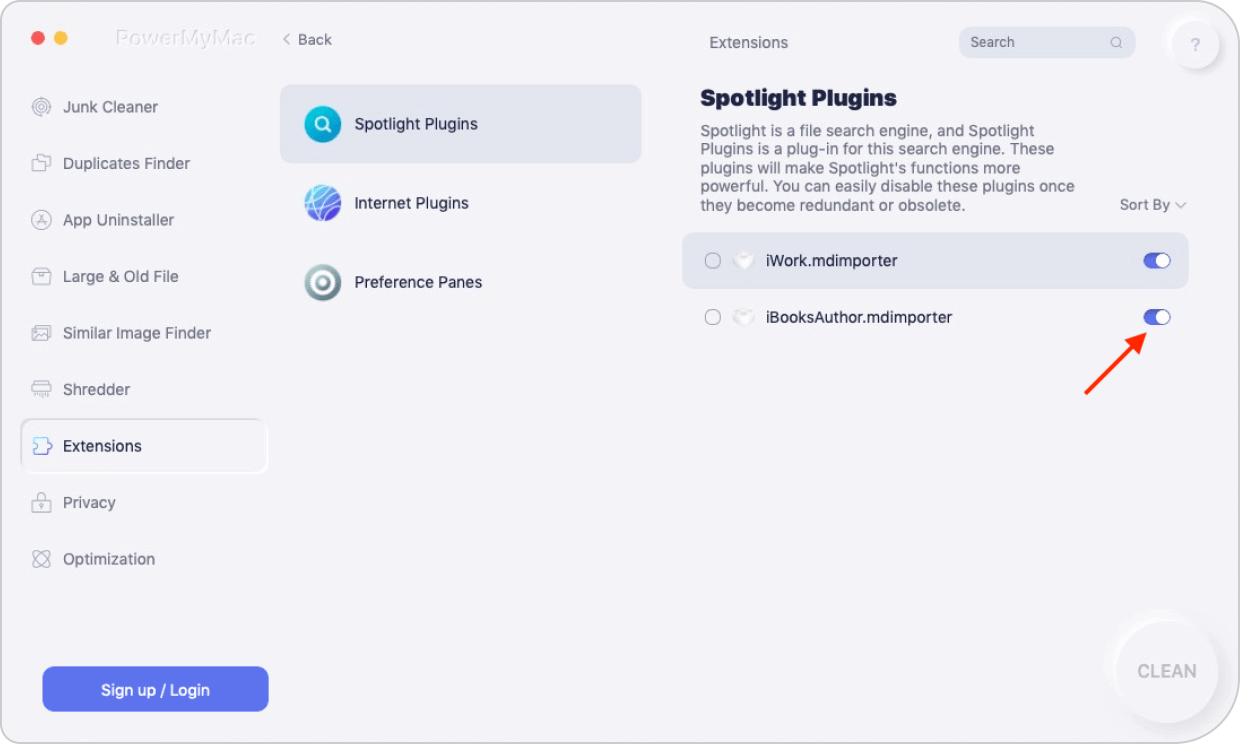
By using a program called iMyMac PowerMyMac, you can easily clean out any junk files or any extra files that may be the mail, photo, and iTunes apps. It also clears useless extensions from web browsers and keeps your computer as safe as possible.
PowerMyMac also keeps the speed of your computer at a very high level. The best thing about this particular Mac cleaning program is that it’s very easy to use. You just have to click on the various modules it offers.
For example, if you have to clean out extensions, you just click on the Extensions Module. That’s all it takes to clean out the extensions with this particular cleaning tool from iMyMac. You can have a free trial below.
Part 4. Conclusion
While you can always remove webHelper, it’s best to prevent it from infecting your Mac. You can always use the iMyMac PowerMyMac to ensure that your Mac is free of any useless files, apps, or extensions.
Have you ever had to get rid of webHelper on your Mac? If yes, how did you do it? Our readers would love to know how you went about it.

