


VirtualBox is a versatile and widely used virtualization software that allows users to run multiple operating systems simultaneously on a single computer. But over time, it can accumulate cache files that may impact its performance and result in various glitches. The process to clear VirtualBox cache can help optimize its functionality, enhance performance, and resolve issues such as slow response times, lagging virtual machines, or unexpected errors.
In this article, we will walk you through the step-by-step instructions of clearing the cache in VirtualBox and improve its overall performance.
Contents: Part 1. Is It Safe to Clear VirtualBox Cache?Part 2. How to Clear Virtual Machine Cache?Part 3. How to Clear VirtualBox Cache on Windows?Part 4. How to Clear VirtualBox Cache on Mac?Final Thoughts
Part 1. Is It Safe to Clear VirtualBox Cache?
By clearing the cache, you are essentially refreshing VirtualBox and allowing it to rebuild the necessary cache files as you continue using the software. Rest assured that clearing the VirtualBox cache is a standard procedure and should not pose any risk to your virtual machines or data.
In addition to being safe, it can help resolve performance issues that may arise from outdated or corrupted cache files. Moreover, by removing unnecessary cache data, you can free up valuable disk space on your host system, which can be particularly beneficial if you are running VirtualBox on a computer with limited storage capacity.

Part 2. How to Clear Virtual Machine Cache?
Clearing the cache in a virtual machine (VM) can help free up disk space and improve performance. The method to clear the cache depends on the operating system running inside the VM. Here’s how you can clear the cache on Windows:
Clear Temporary Files:
- Open the Start menu and type "Disk Cleanup" in the search bar.
- Select the drive you want to clean up (usually C:) and click OK.
- In the Disk Cleanup dialog box, check the boxes for the types of files you want to delete, such as Temporary files, Temporary Internet files, and Thumbnails.
- Click OK, then click Delete Files to confirm.
- Open the Start menu and type "cmd" in the search bar, then right-click on Command Prompt and select "Run as administrator".
- In the Command Prompt, type del /q/f/s %TEMP%\* and press Enter. This will delete temporary files for the current user.
- Type del /s /q C:\Windows\Temp\*.* and press Enter to delete system-wide temporary files.
- Open your browser and go to its settings or options menu.
- Find the section for clearing browsing data or history and select the types of data you want to delete (e.g., cached images and files).
- Click the appropriate button to clear the cache.
Part 3. How to Clear VirtualBox Cache on Windows?
If you're using VirtualBox on a Windows operating system, here's a step-by-step guide on how to clear the VirtualBox cache on Windows:
- Before proceeding with clearing the cache, make sure to close all instances of VirtualBox and any virtual machines that are currently running. This ensures that VirtualBox is not actively using the cache files during the clearing process.
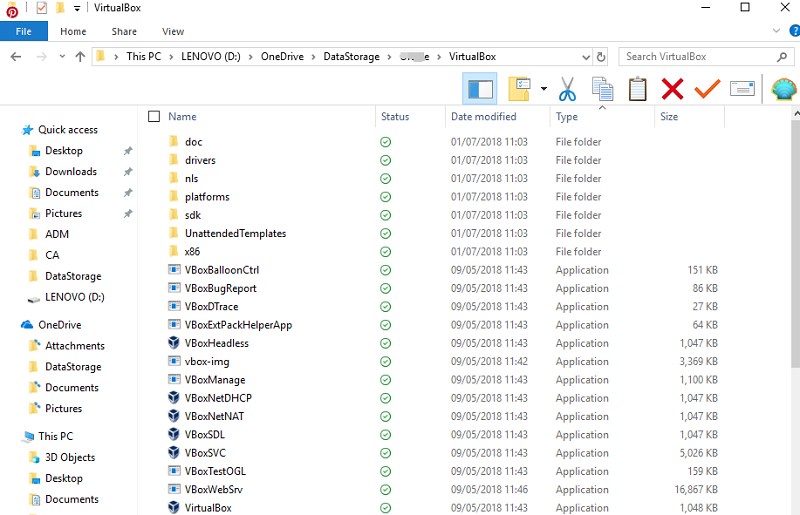
- The VirtualBox cache files are stored in specific directories on your Windows system.
- To locate these files, open File Explorer on your Windows computer.
- In the address bar, type or copy and paste the following path: %appdata%\VirtualBox
- This will take you to the VirtualBox directory where the cache files are stored.
- Once you are in the VirtualBox directory, you can proceed to clear the cache files. Here's how:
- Select all the files and folders within the VirtualBox directory.
- Right-click on the selected files/folders and choose "Delete" from the context menu.
- A dialog for confirmation may actually appear to ask you if you want to permanently delete the selected items. Click "Yes" to proceed.
- Note: Deleting the cache files will not affect your virtual machines or their associated data. It only removes temporary files used by VirtualBox for optimization.
- After deleting the cache files, it's a good practice to empty the Recycle Bin to permanently remove them from your system. To do this:
- Right-click on the Recycle Bin icon on your desktop.
- Select "Empty Recycle Bin" from the context menu.
- Now that you have cleared the VirtualBox cache, you can restart VirtualBox and your virtual machines. Launch VirtualBox and start your virtual machines to observe any improvements in performance and stability.
Optional Steps to Clear VirtualBox Cache
If clearing the cache does not resolve the issues you're experiencing, you may consider reinstalling VirtualBox as a more advanced troubleshooting step. This can help ensure that all associated files and settings are properly reset. However, note that this step should be taken with caution and as a last resort.
To reinstall VirtualBox, follow these steps:
- Uninstall VirtualBox from your Windows system. You can do this by going to "Control Panel" > "Programs" > "Uninstall a program." Locate VirtualBox from the list of installed programs, right-click on it, and choose "Uninstall".
- After uninstalling VirtualBox, restart your computer.
- Download the latest version of VirtualBox from the official website (https://www.virtualbox.org).
- Run the VirtualBox installer and follow the on-screen instructions to reinstall VirtualBox on your Windows system.
- Once the reinstallation is complete, launch VirtualBox and set up your virtual machines as needed.
Remember to back up any important data or virtual machine configurations before uninstalling or reinstalling VirtualBox.
Part 4. How to Clear VirtualBox Cache on Mac?
When it comes to clearing the VirtualBox cache and optimizing its performance, a reliable and efficient option is to use a dedicated system maintenance tool like PowerMyMac. It is a comprehensive utility software designed to clean up, optimize, and maintain your Mac system, including clearing cache files for various applications.
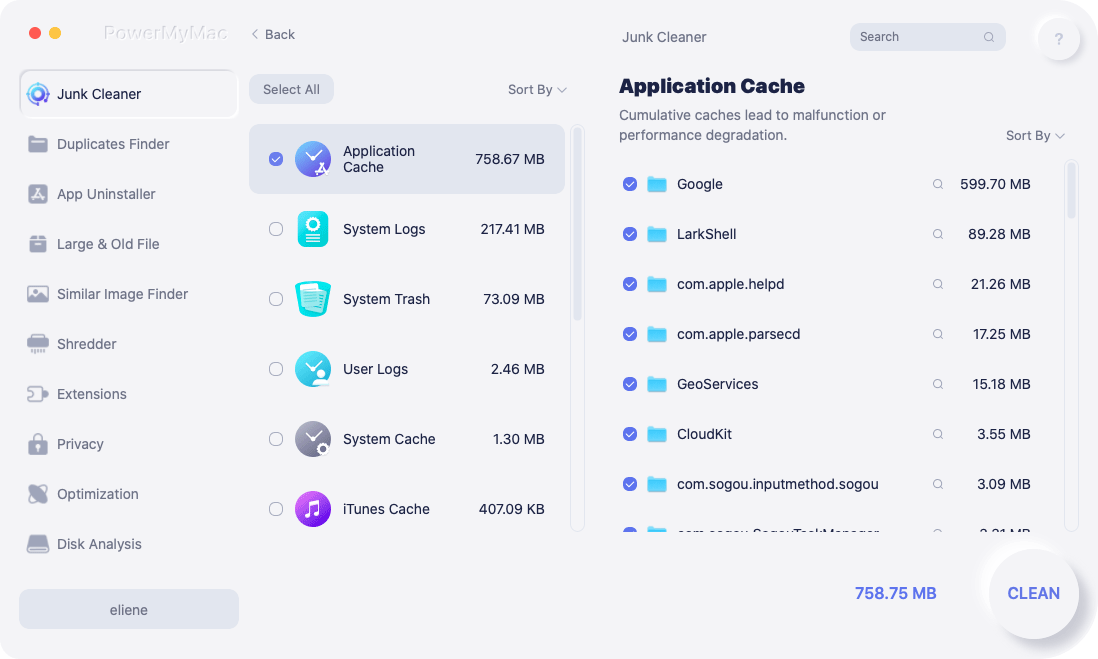
One of the standout features is its "Junk Cleaner" module, which specifically targets and clears app cache on Mac, including VirtualBox. Here's how you can use this tool to clear VirtualBox cache on Mac:
- Download and Install PowerMyMac. Follow the instructions to install it on your Mac.
- Open the app from your Applications folder and click on the “Junk Cleaner” module on the main interface.
- Click on the “SCAN” button to analyze your Mac system and identify junk files, including the VirtualBox cache.
- Once the scan is complete, PowerMyMac will present a list of junk files found on your system. Browse through the list and locate the VirtualBox cache files.
- Select the VirtualBox cache files from the list and click on the “CLEAN” button to remove them from your system.
PowerMyMac will safely delete the cache files, freeing up storage space and optimizing the performance of VirtualBox. In addition to clearing VirtualBox cache, it offers various other system optimization tools such as App Uninstaller (for you to delete VirtualBox if you want), Duplicate Finder, Privacy, and other functions, making it a versatile solution for maintaining the overall performance and health of your Mac.
Final Thoughts
When it comes to clear VirtualBox cache and optimize your virtualization experience, we show you several ways to do that on different devices. PowerMyMac ensures a smooth and optimized virtualization experience, making it the best tool for the job.
Additionally, consider analyzing disk space usage to identify and remove large cache files would be a good idea.

