


Visual Studio on Mac is a piece of technology that lets you build mobile applications for the Android and iOS platforms. Despite its popularity and utility, you may have to uninstall VS Code Mac at some time.
Once you install Visual Studio Community, you'll be prompted to install some extra components. You may have unknowingly installed extra software on your system alongside the Visual Studio program. If you downloaded ASP.NET Core or Xamarin.Forms, for instance, you'll have to uninstall those as well.
It's critical to remember that almost all programs are made up of a variety of files. If users want to completely get clear of an app from Mac, delete all of the service files. In the long run, this procedure will assist you in avoiding unwanted technical difficulties with other apps on the computer.
Contents: Part 1. Where Does VS Code Get Installed in Mac?Part 2. How to Remove Visual Studio Code from Mac Manually?Part 3. How Do I Completely Uninstall Visual Studio Code on Mac?Part 4. Conclusion
Part 1. Where Does VS Code Get Installed in Mac?
Before learning how to uninstall VS Code on Mac, we will talk about this app first. The Visual Studio Code (VS Code) seems to be an available coding tool that makes it easy to get started coding. It allows you to code just about any coding language without needing to change editors.
Many languages are supported by Visual Studio Code, such as Java, JavaScript, Python, C++, and others. It is a must-have component in the toolboxes of several developers. You might want to download Visual Studio Code.app from the official site or use Homebrew instructions to install it on macOS. And where does VS Code get installed on Mac? The normal folder is: /Library/Application Support/Code.

Despite all the pros the Visual Studio Code has, there are still cons many users are experiencing, such as the settings are not user-friendly enough because it is difficult to change, it gets high usage on CPU when sometimes running that is why the program freezes, slower debugging, needed plugins are hard to install that it sometimes causes the VS Code to crash, etc.
If it is not helpful, you may uninstall VS Code on Mac, by following the steps below. You might also need to reinstall VSCode from scratch if it does not operate correctly and you have spent hours debugging it.
Part 2. How to Remove Visual Studio Code from Mac Manually?
How to uninstall vs code from ubuntu using terminal? To help you thoroughly uninstall VS Code on Mac using Terminal, please follow the instructions below.
With the exception of the Visual Studio Code.app, that can be seen in the Applications folder, below are mostly the areas where VSCode keeps data on Mac OS X:
rm -fr ~/Library/Preferences/com.microsoft.VSCode.helper.plistrm -fr ~/Library/Preferences/com.microsoft.VSCode.plistrm -fr ~/Library/Caches/com.microsoft.VSCoderm -fr ~/Library/Caches/com.microsoft.VSCode.ShipIt/rm -fr ~/Library/Application\ Support/Code/rm -fr ~/Library/Saved\ Application\ State/com.microsoft.VSCode.savedState/rm -fr ~/.vscode/
In the home directory, there may also be concealed extension directories. Make sure you've checked for those as well if you want to get rid of everything. These begin with the .vscode- prefix.
rm -rf ~/.vscode*
The problem was solved by trying to cd the following directory...
/Users/<user>/Library/Application\ Support then erase the directory called Code. This folder holds all of the settings and will not be overwritten by a fresh installation. When you look at the complete file structure, you'll notice that VSCode uses a distinct name for each folder. For instance, .vscode/, code/, and Visual Studio Code.app are all common names for directories.
- Quit VS Code. Or else, the whole process can possibly trigger some error messages or may cause failure. VSCode maybe quit by right-clicking on the icon within Dock and selecting Quit. If VSCode isn't responding, you may force it to shut through the use of Activity Monitor.
rm -rf $HOME/Library/Application\ Support/Coderm -rf $HOME/.vscode- Remove the VSCode coming from the application.
- You may reinstall the VS Code whenever needed.
Part 3. How Do I Completely Uninstall Visual Studio Code on Mac?
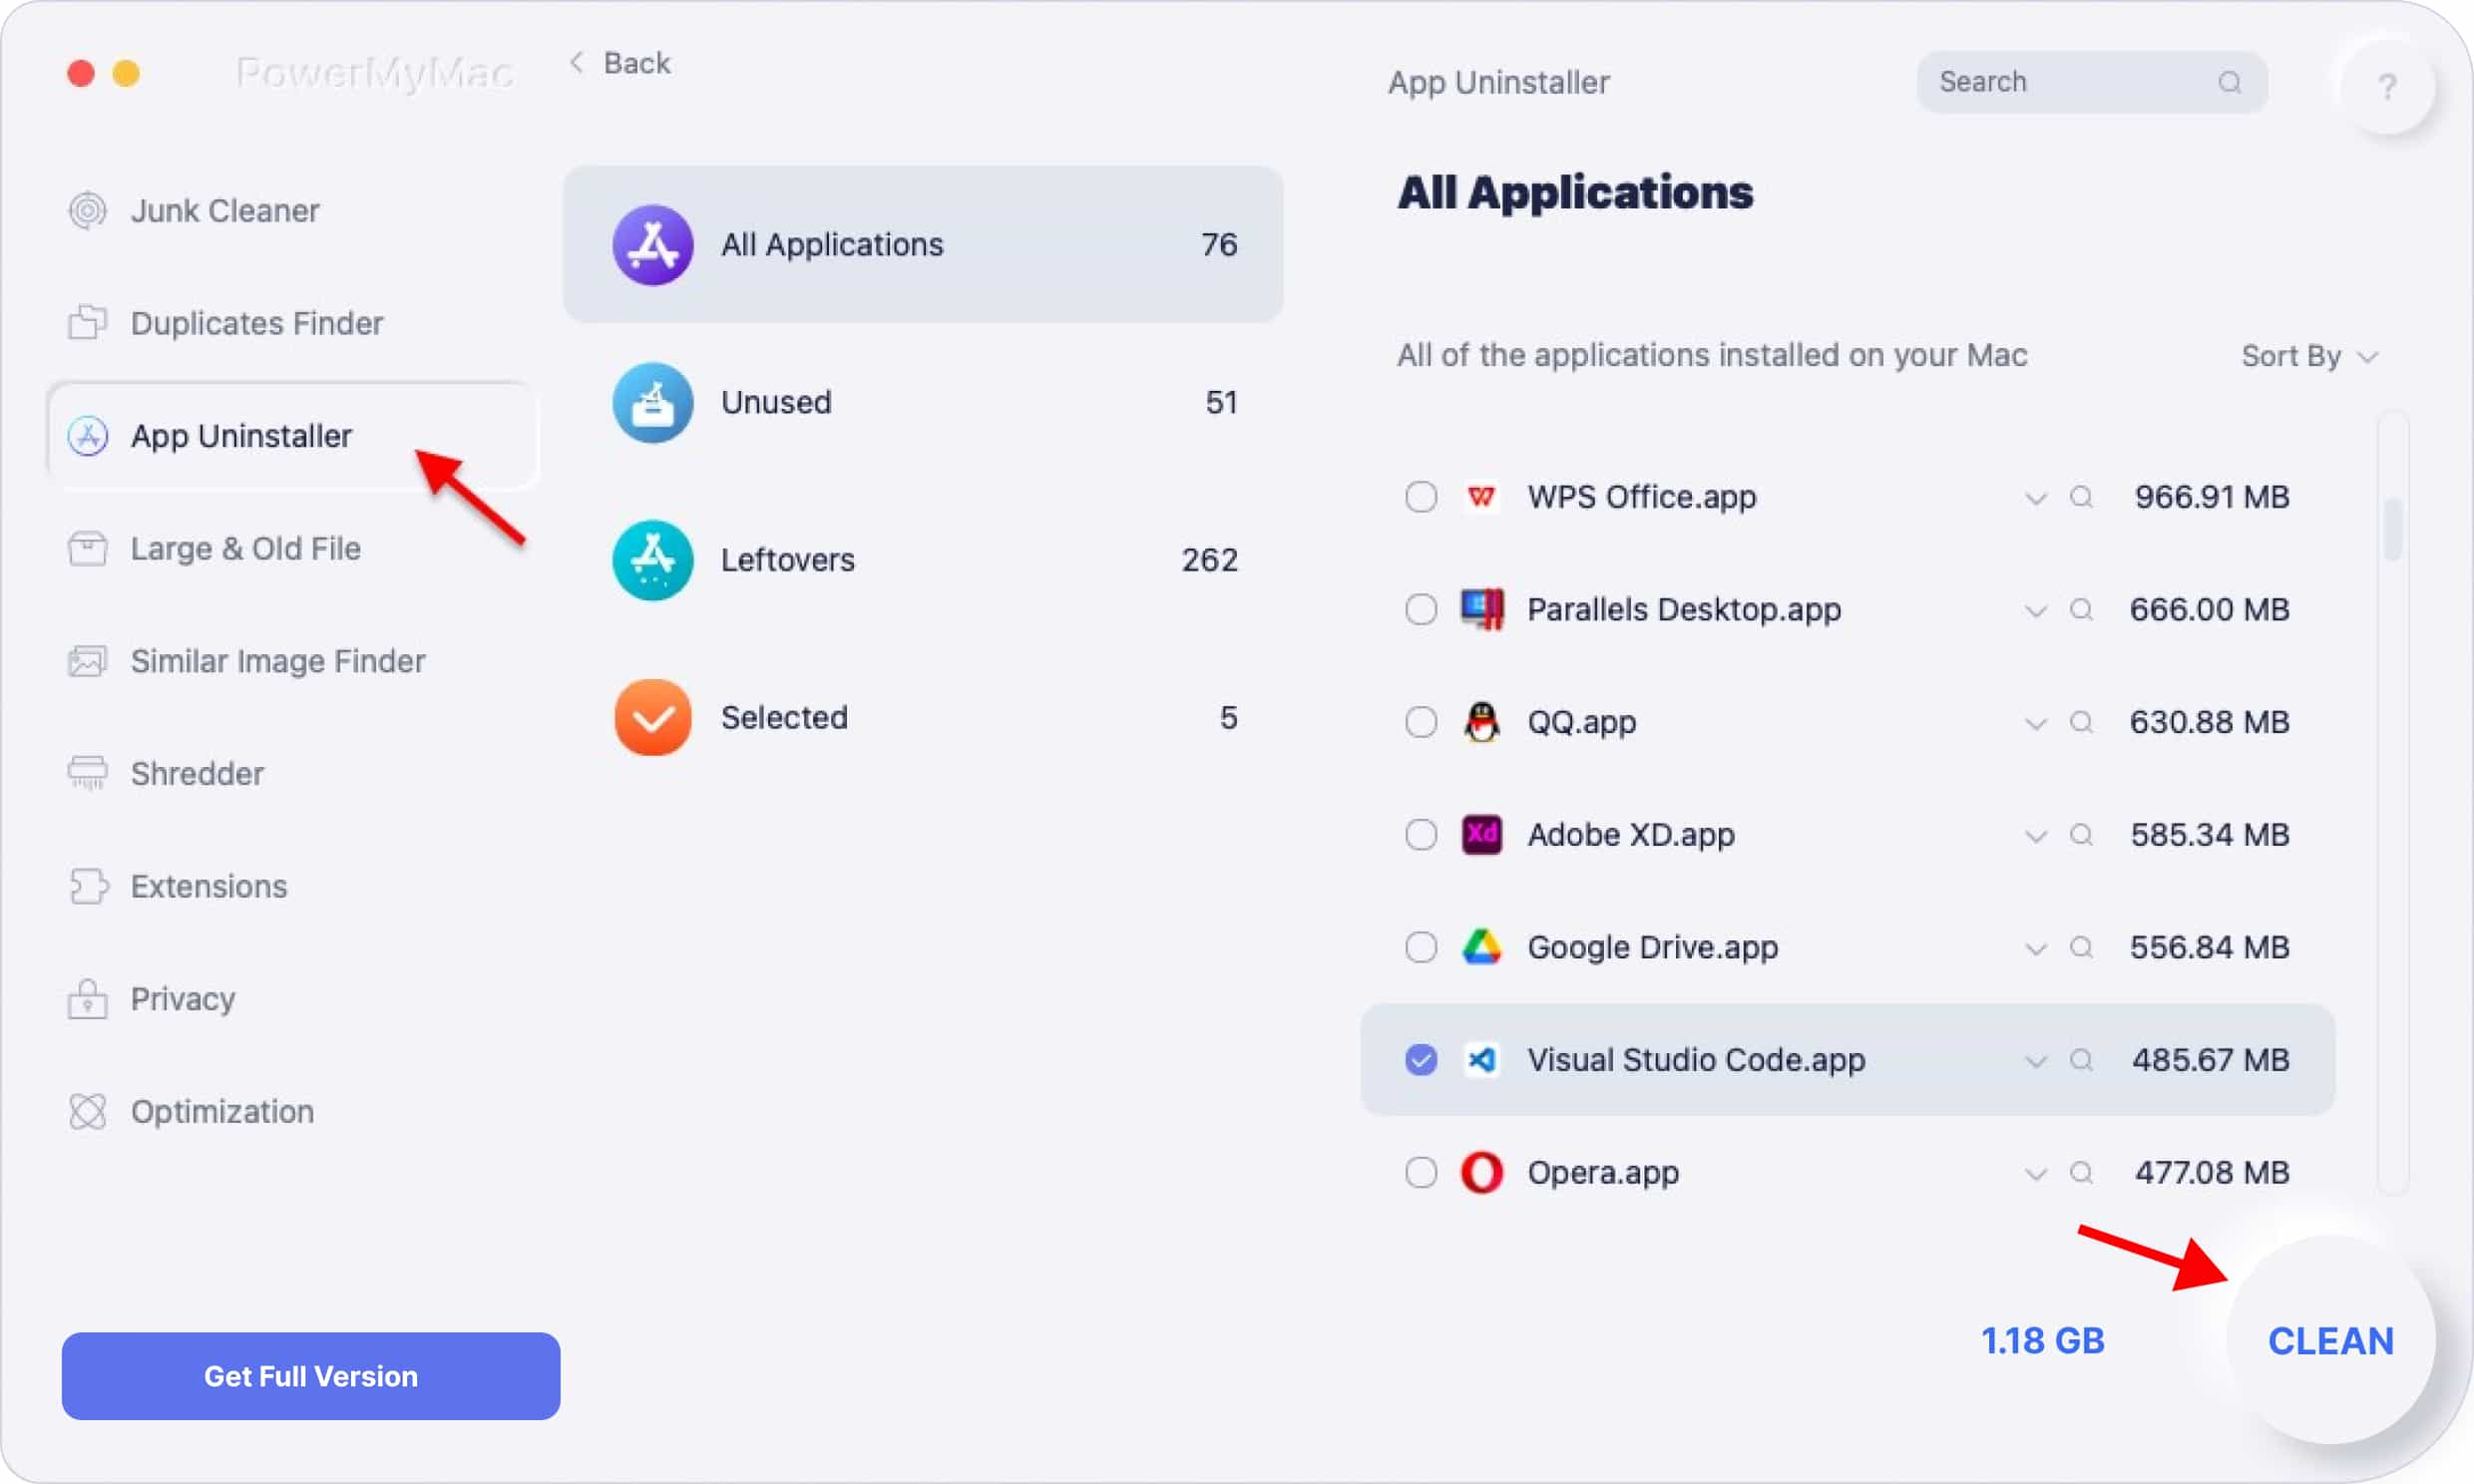
Using an uninstallation utility, PowerMyMac's App Uninstaller is the simplest and fastest approach to uninstall VS Code on Mac.
With only a few clicks of a button, you may delete unnecessary applications and their remnants. PowerMyMac is a free program that may be downloaded. Let's see how to use App Uninstaller to completely uninstall vscode macOS.
To uninstall Visual Studio Code Mac thoroughly and automatically:
- Select SCAN from the App Uninstaller tool. Allow the scanning process to complete.
- When everything has been examined, installed apps will display on the left side. Type the name of the software you wish to remove, such as Visual Studio Code, into the search box. When you click the VS Code.app, the app's linked files and folders will show on the right side.
- Choose all of the support files you want to get rid of. Select CLEAN to eliminate all of the items.
- When you're finished, a popup notification will show with the words "Cleanup Completed", indicating that the uninstallation is complete. Now you know how to uninstall VS Code Mac successfully.
If you manually deleted Visual Studio Code, look for any leftover files on your Mac. For this, you can use the PowerMyMac app.
Part 4. Conclusion
Users install several programs on their devices on some kind of daily basis. If you aren't using certain programs, you should remove them to free up space for the hard drive. It is critical to remove software accurately and entirely by eliminating all of the leftover files. In this article, you were provided with instructions on how to uninstall VS Code on Mac manually using the Terminal and automatically using the PowerMyMac's App Uninstaller.
To make it easier and faster, you can use the PowerMyMac app. Manually doing the uninstallation can make it more complex since it takes too much of your time and does not assure you of complete removal. On the other hand, PowerMyMac also makes the removal efficient and safe for your device while you do the task.

