


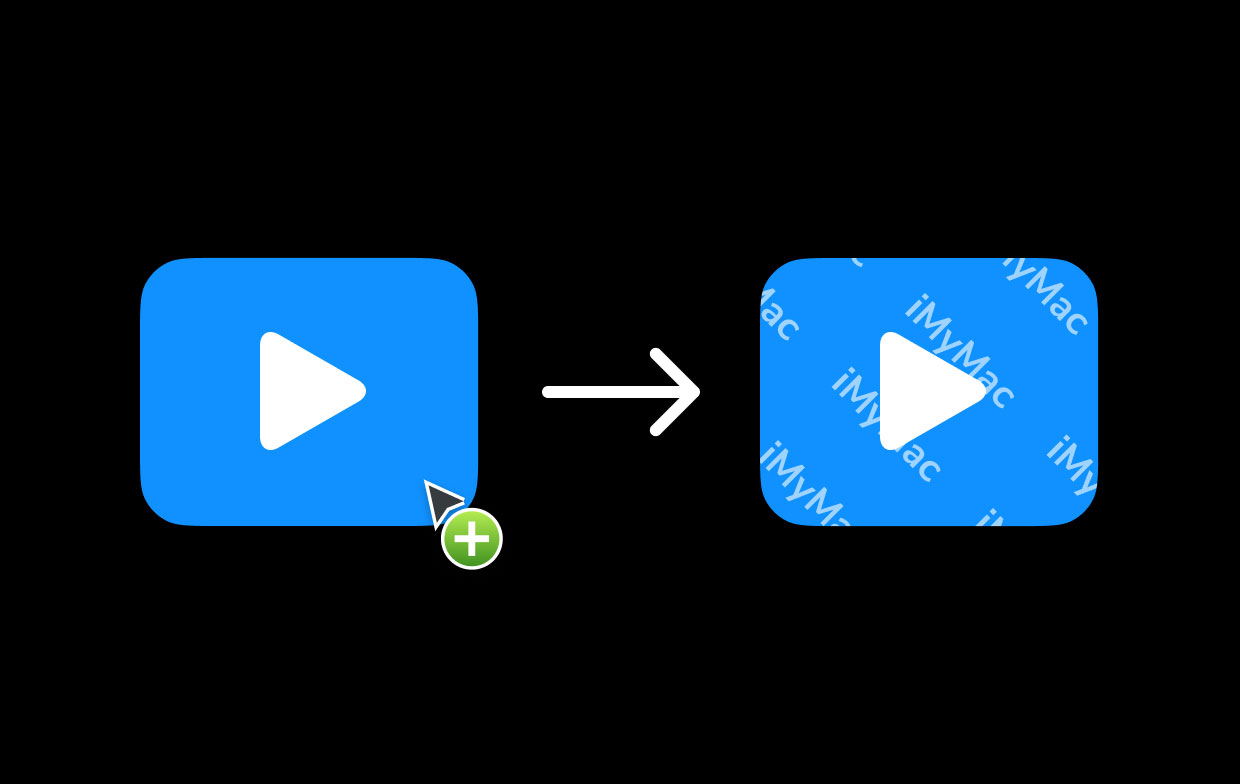
There are a lot of issues with regard to the illegal distribution and use of videos. That’s why it’s a good precaution to make sure your videos won’t get pirated. There are a lot of ways to do it. The easiest method is adding a watermark to the video.
If you’re here to protect your media, you may want to add watermark to video files you own. It’s just common sense to make sure the video you worked hard to do won’t get pirated by others. Adding a watermark is really helpful to not being pirated, but the gamers don't need a watermark when recording video. Here is another recommendation for the screen recorder without a watermark.
Here, we will help you add watermark to video files easily. We will start with how to do it on Mac. Then, we will be recommending a great tool to add a watermark to video data. Finally, we will end with free online tools to help you get the job done.
Contents: Part 1. How To Add Watermark To Video With iMovie On Mac?Part 2. Best App To Add Watermark To Video On MacPart 3. Free Watermark Software Online
Part 1. How To Add Watermark To Video With iMovie On Mac?
iMovie is software that’s readily available on Mac computers. It helps you play or edit video files as you wish. Thus, it’s not surprising to know that you can add a watermark to video files using iMovie. This is a very versatile software that will enable you to edit videos.
The disadvantage to iMovie is that the output files take up a lot of space on your computer. That’s why we will recommend the next tool (more on this later). Still, it has the basic features you need in a video editor. For instance, you can add image clips, titles, and more.
So, here are the methods to add a watermark to video using Mac’s iMovie app:
Method 01. Adding Text Watermark
To add watermark to video files on Mac in the form of text is easy. iMovie gives you various options to choose from a myriad of title templates. Simply select a template that you want and place the characters you wish to add as part of the watermark.
The downside to doing this is modifications are limited. For instance, you won’t have the ability to change the title position. Even though, this is an easier option if you just want the text (and not an image) as your watermark.
Method 02. Adding Images As Video Watermarks
This is an easy way to add watermark to video files, provided you already have an image or logo. Ensure that you have a PNG file because this is a file format that accepts transparent backgrounds. Unfortunately, JPEG files don’t support transparent backgrounds, so you must ensure you have a logo in PNG with a transparent background.
But, if you’re okay with having a designed or colored background, JPEG files are okay as well. PNG files with transparent backgrounds just look amazing, if you have an exact logo a graphic designer has made. Apart from using the image as a watermark, you can add a title to it that will appear like a text watermark.
So, here are the steps to use images or logos to add a watermark to video files using iMovie on Mac:
- Ready Your Image File. You must ensure you have the logo or image you want to add as a watermark. If possible, hire a graphic designer to make the image for you. Then, make sure you get the best version of that image for video.
- Launch iMovie. The next thing to do is to open iMovie on your computer. Then, add your project or video files in iMovie.
- Import Watermark. To add watermark to video files, you make sure you import the watermark in iMovie. It’s best to go with the PNG format as stated previously. Drag the watermark towards the video where you wish for it to show up.
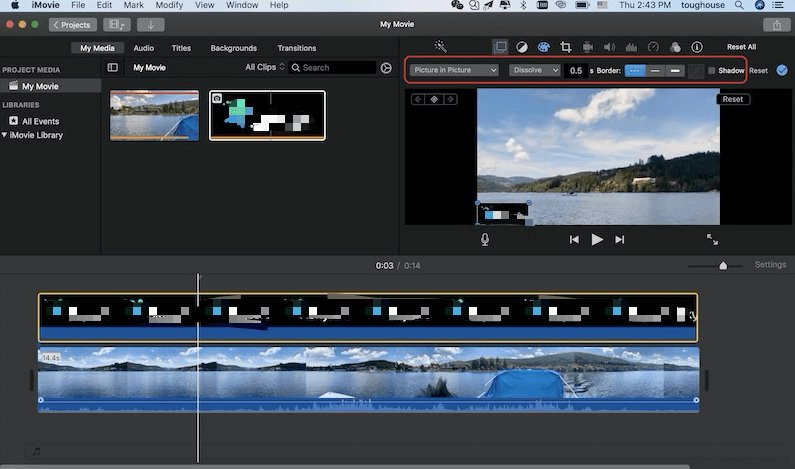
- Drag Watermark On The Right Position. You must drag the watermark on iMovie’s timeline. The timeline is located at the upper portion of the video clip. Once you do this, the controls for Video Overlay will appear. If it doesn’t appear, click the button for the settings of Video Overlay.
- Activate Picture-In-Picture. The next step is to go to the left side and press the menu that’s in the drop-down format. Then, activate Picture-In-Picture.
- Check The Viewer. Now, you should check the viewer of the edits you made to the video. The watermark must show up within the inset window that is found on the upper part of the video where you placed it.
- Modify Settings. When you want to add watermark to video, you can modify settings too. Change the duration, shadow, position, border, size, and more.
- The last step is to click the Apply button.
Method 03: Placing Video Watermarks Using iMovie
Now, we have talked about how to add a watermark to video files, specifically text and image watermarks. But, how about video watermarks? We do not recommend you put a video watermark, unless necessary. That’s because it may get the attention of the viewers from the actual content of the video.
Nonetheless, the steps you should follow are the same as the ones in Method 02 of this section. A video watermark is a unique way of placing a video clip on your media file. If you want to use it, then go ahead and add a watermark to video files.
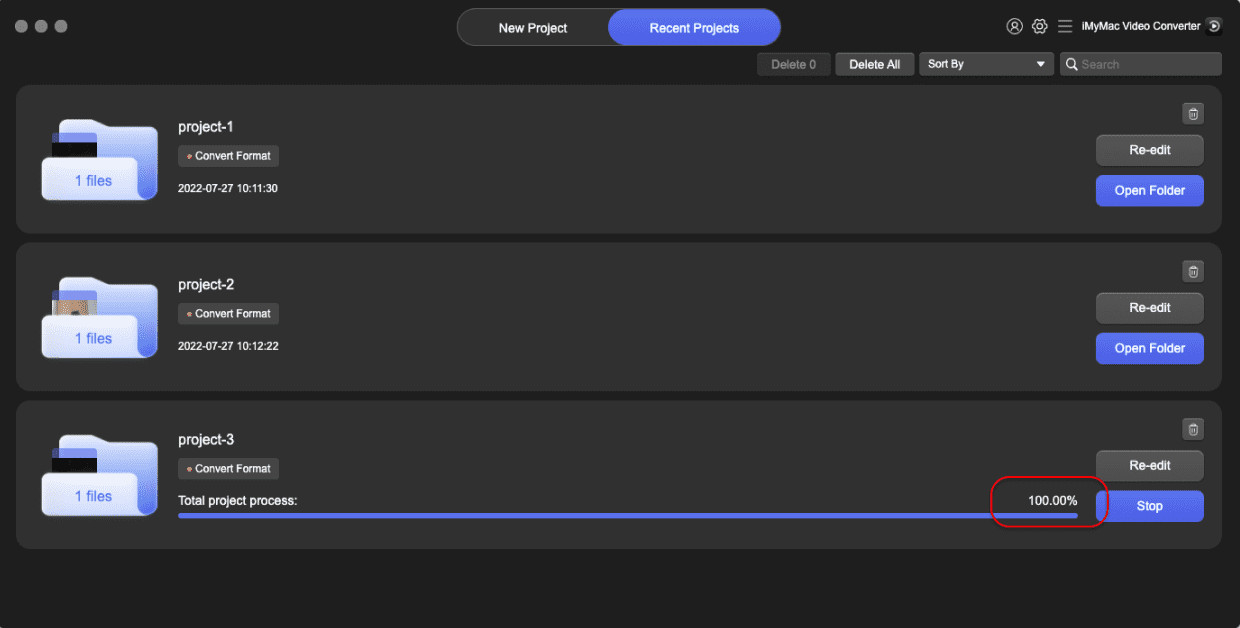
Part 2. Best App To Add Watermark To Video On Mac
The best app you can use in order to add a watermark to video on Mac computers is here. This application is a conversion software that gives you the added benefits of video resolution upscaling and even video editing.
We’re talking about iMyMac Video Converter here. It’s a comprehensive tool with a lot of features and benefits for Mac users. You can even grab a free trial from their site to test out the tool for your media needs.
iMyMac Video Converter is part of a suite of tools made by the company iMyMac. This video conversion software can help you add a watermark to video with ease. Plus, you can use it to crop, trim, rotate, cut, and clip your videos.
Apart from adding watermarks, you can use it to add subtitles and audio effects. Plus, using it won’t take a lot of your effort and time. The interface is very simple to understand. And, it uses hardware acceleration technology for fast conversion processes.
Here are the steps to use iMyMac Video Converter to add watermark to video on Mac:
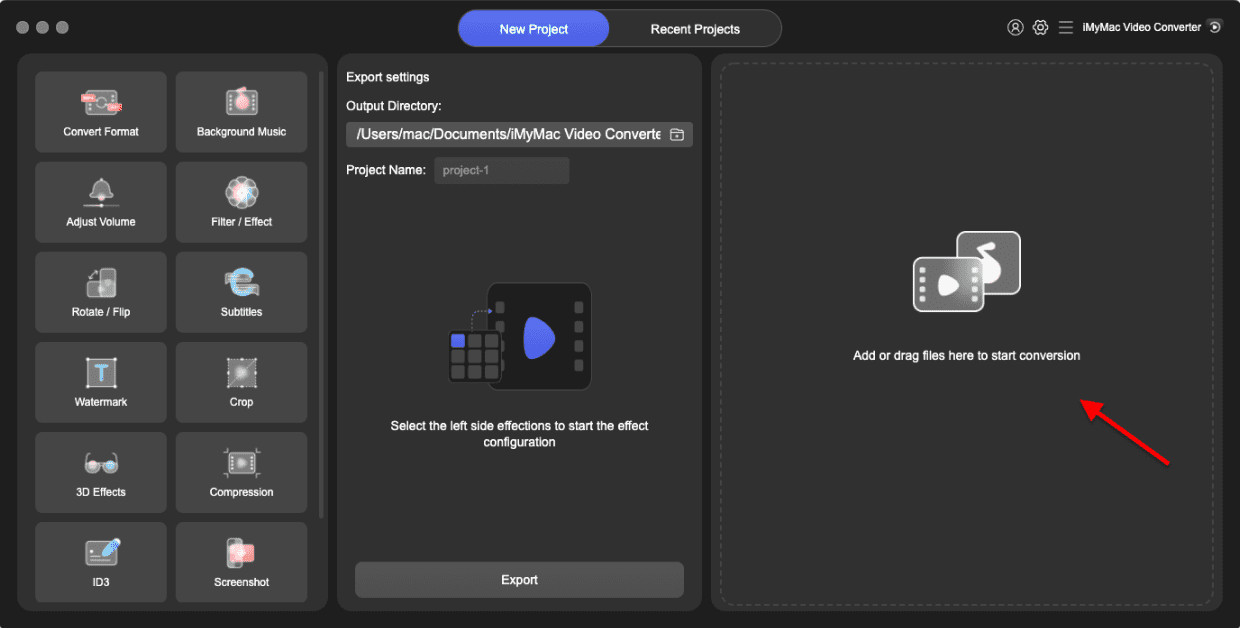
Step 01. Download The Tool
Grab the tool from iMyMac.com with the Video Converter menu at the top. Purchasing the tool is possible if you want a comprehensive set of features. Once downloaded, install the tool on your Mac. Then, go to the Applications folder and double-click the icon to open it.
Step 02. Add Files
Simply locate the files that you want to convert on the drive. Then, drag and drop them towards iMyMac Video Converter. Or, you can click the "Add Multiple Videos or Audios" button on the upper left corner of the interface. Locate the files and then add them to the software.
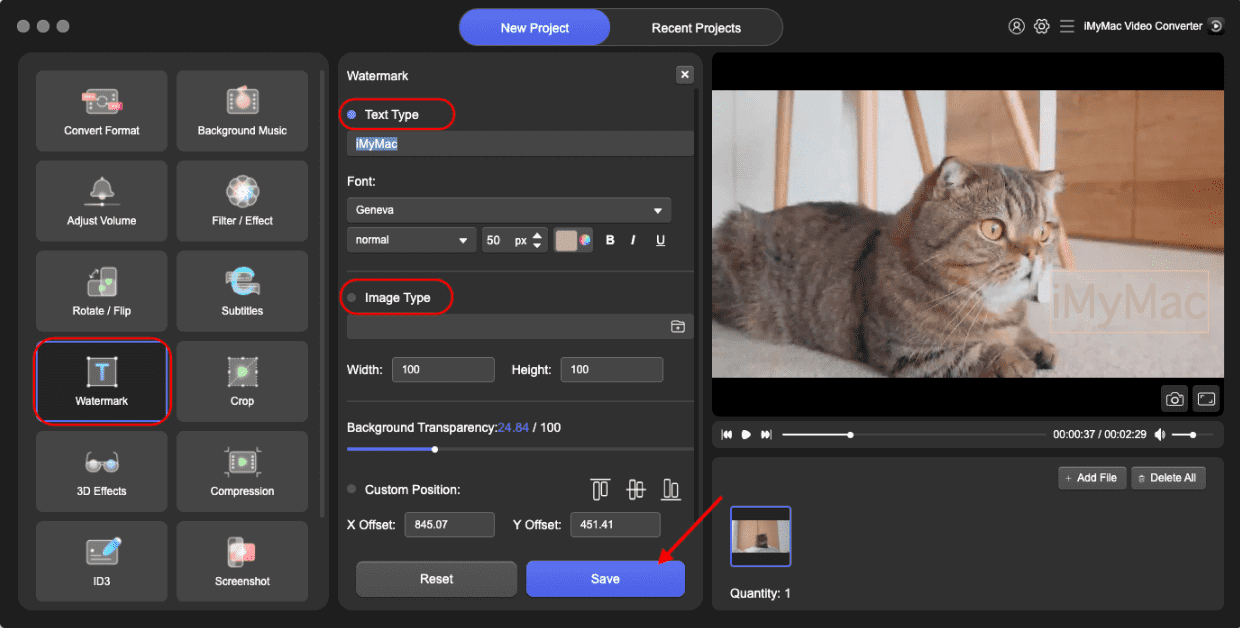
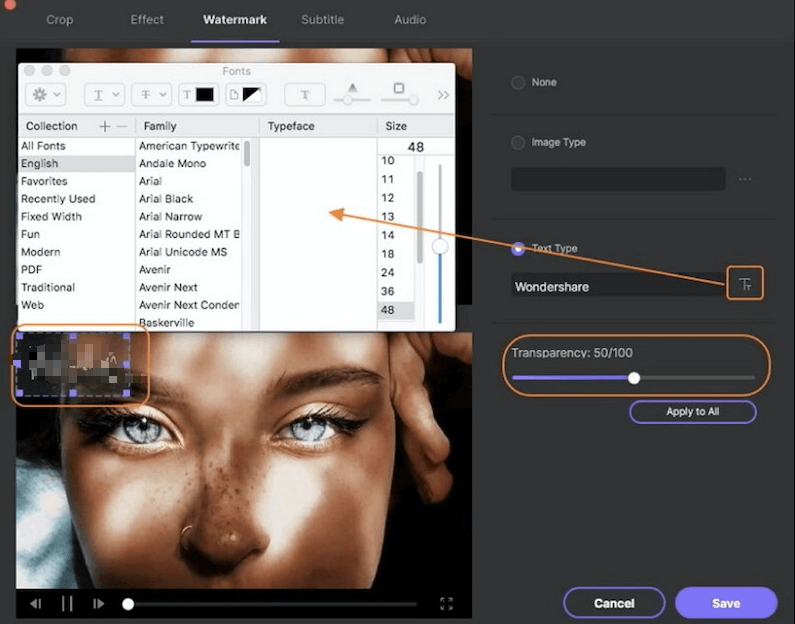
Step 03. Add Watermark
Click the Watermark from the middle part of the interface. Then, add the desired watermark that you wish to put inside the video. Simply type in the text you like to make a text watermark or upload an image to make an image watermark. Then click Save.
Step 04. Make Other Adjustments
You can also make other adjustments if you wish. You can change resolution, change file format, and add subtitles. You can crop out the blank parts of the video too.
Step 05. Convert The Watermark Video Files
Then, choose a destination folder where you want the files to be saved and click the Convert button on the bottom right side of interface. Wait for the process to complete and you’re done.
Part 3. Free Watermark Software Online
You can also add a watermark to video files using online tools. We do not recommend this method though. First of all, you have to upload your video file. Although most online tools guarantee the removal of files after a certain time period, you’re still unsure if they’re actually doing it. Thus, the privacy of your files isn’t guaranteed.
In addition, there are other limitations to what you can do with online tools to add a watermark to video. Most of the time, there are size limitations. For instance, you can only upload 100MB worth of video, or even less.
Plus, there are fewer editing tools you can use. Sometimes, only a limited number of video file formats are supported. If you own a file that isn’t supported, you might as well use iMyMac Video Converter without limits on Mac.
Below are three online tools to add watermark to video files on Mac (or Windows):
Tool 01. Watermark
The first online tool to add a watermark to video files is Watermark. As you can see from its website, the online platform looks very professional and slick. Plus, it is easily understandable. WATERMARK enables users to edit with limitations. For instance, cropping and resizing is possible. Other advanced editing features aren’t available.
Here are the steps to use the watermark online tool:
- Go To Its Website. First, you have to open your browser and visit the website.
- Get Started. You can click Get Started on the middle portion of the page.
- Upload Files. Upload the files by locating them on your hard drive. Or, you can upload using other apps as well.
- Wait For Upload To Complete. Wait for the process of uploading to complete.
- Click Edit. Now, click the Edit button on the video.
- Make changes. Add watermarks and other basic edits. For instance, you can resize or crop the video.
- Now, you can download the files that have been watermarked. Or, you can easily export them to other applications.
Tool 02. Kapwing
Kapwing is another tool to add watermark to video. It helps you with the said job. The interface is very neat and understandable. But, WATERMARK is a better online choice because of its editing features and better-looking interface.
Here are the steps to follow to use Kpawing for adding watermarks:
- Go To Website. The first thing is to open your browser and go to website.
- Upload Files. You can upload files by clicking the button for it. Or, you can paste a URL you want to add.
- Add Watermark. You can add a watermark by adding images or text. You can make basic editing features as well.
- Click Export Video. The next thing is to click Export Video.
- Sign In. To remove KAPWING’s watermark, you should sign in.
- Finally, after you have signed in, you should download the video with your own watermark in it.
Tool 03. Fastreel
Fastreel is a tool to add watermark to video files made by MovAvi. It has a neat-looking website. Apart from adding watermarks, you can also use them with browsers like other online tools. You can resize your logo and position it in any place you’d like. They also guarantee media files will never be stolen or damaged.
Here are the steps to use Fastreel to add a watermark to video files:
- Go To Website. First, visit the website.
- Upload Files. You can add files that are less than 500MB. You can upload by clicking the upload button or dragging and dropping files.
- Add Watermark. Then, add the watermark to the videos. Use PNG or JPEG only. Change position or size if you wish.
- Click the button for Continue in order to save the changes.
- Launch Export Settings. Open the window for Export Settings. Select output settings and download.
We have taught you how to add watermark to video files easily. You can use online tools, but remember that there are limitations on editing tools and the size you can upload. So, better use iMyMac Video Converter in order to add watermarks without limits!
