


When I close the lid of my MacBook and I open it back, I can get back to using it without even typing in my login password.
I’m worried that it would allow someone to get to my files while I’m away. Is there a way to lock Mac screen?
 Hi, you can lock your Mac screen with a password. This way, no one but you can access your Mac.
We’ll teach you how to do that. If that’s not enough, we have a tool that would help you better secure your files.
So, let’s get started…
Contents: Part 1. How to Set up your Mac’s Lock Screen?Part 2. How to Lock Your Mac Screen?Part 3. How to Secure Your Mac?Part 4. Conclusion
Part 1. How to Set up your Mac’s Lock Screen?
Protecting your data and files is of utmost importance. This is why knowing how to lock your Mac screen is very useful.
Unless you enable password protection, closing the lid of your MacBook won’t keep prying eyes from accessing your files. You will first need to set up the lock screen.
Doing so will require users – authorized and unauthorized ones – to enter a password before they can unlock and use your Mac. You’ll know that your Mac is locked when it goes back to the login screen.

Take note that locking your Mac is different from putting it in sleep mode. While a locked Mac allows background tasks to run, a Mac that is put to sleep will stop all of them to save power consumption.
If you have unsaved changes, it is better to lock your Mac’s screen. If you are no longer working on anything and you want to conserve your Mac’s battery, sleep mode is the way to go.
To set up your Mac’s lock screen, here’s what you need to do.
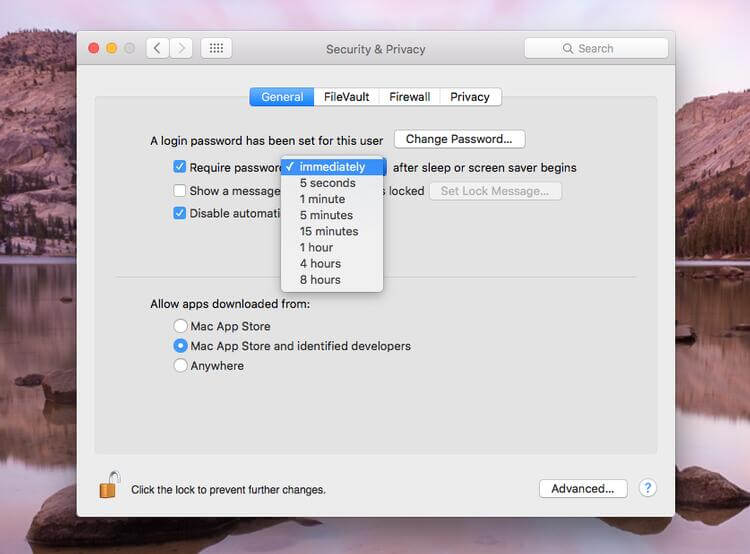
Open System Preferences. You can find it by clicking on the Apple icon or looking for it in the Dock.
Click on Security & Privacy. Make sure that you are in the General tab.
Tick the option for “Require password…”
A drop-down menu will appear. You will be asked to choose the length of time before your Mac requires a password.
Your login password will be used as the password when your Mac is locked. If you wish to change it, hit Change Password.
You can set your new password here. Make sure to set a strong password to best protect your Mac.
Now that you’ve activated Mac’s lock screen and configured the settings, it’s time to learn how to actually lock your Mac.
Part 2. How to Lock Your Mac Screen?
The Easiest Way to Lock Your Mac Screen.
If you have a MacBook, MacBook Air or MacBook Pro, the most straightforward way to lock it is to shut the lid. Once you open the lid, you’ll see the login screen and have to enter your password.
Then again, you may want a way to secure your Mac without having to shut the lid. The easiest and fastest way to do that is to use keyboard shortcuts. This applies to iMac, Mac mini, and iMac Pro too.
For Mac running High Sierra, press Command + Control + Q. For older Mac models, simply press Control + Shift + Power or Control + Shift + Power. Check which shortcut works on your Mac.
If you want to put your Mac in sleep mode, hold the Command + Option + Power (or Eject) keys together.
Just a word of caution: putting your Mac to sleep will close all tasks running in the background. Make sure to go into sleep mode only if you have saved your work and nothing important is running on your Mac.
To log back in, press any key on your keyboard and the login screen will appear. Enter your password to proceed.
Other Ways to Lock the Screen.
If you don’t think you can remember the keyboard shortcuts, you can still lock your Mac with other shortcut options. By setting them up, guarding your Mac and your data becomes just a few clicks away.
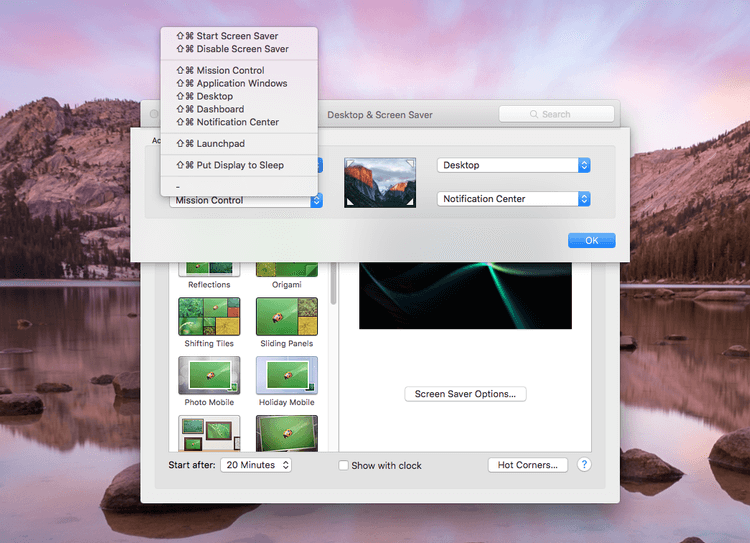
#1: Hot Corner.
Hot corners are literally corners on your Mac. Once you set them up, navigating your mouse to one of the four corners of the screen will perform the action that you’ve assigned.
You can use one hot corner to act as a shortcut for locking your Mac. Here’s how.
Open System Preferences and select Desktop & Screen Saver.
Press Hot Corners. You will find this button in the lower right corner of the window.
You will see four drop-down menus. Select a corner that you want to use for the sleep shortcut. Click on the menu corresponding to your choice. Choose Put Display to Sleep and hit OK.
Putting the display to sleep and locking your Mac is just the same thing. Background tasks will still continue to run.
#2: Fast User Switching.
This feature allows you to switch from one user account to another very quickly. It basically does what locking your Mac would and returns to the login window. Follow the steps below to activate it.
Head to System Preferences and choose Users & Groups.
Click on the lock icon in the bottom left corner of the window.
Enter your password to proceed and select Login Options.
Mark the box beside Show fast user switching menu as. You will then be asked to choose how you would like the switch menu to appear.
You will see the fast user switching menu as your full name, account name or icon next to the menu bar. Whenever you want to lock your Mac, simply click on it and select Login Window.
#3: Apple Menu.
For this one, you’ll send your Mac to sleep. Click on the Apple icon in the top left corner of your desktop and hit Sleep.
Part 3. How to Secure Your Mac?
If maintaining your data’s privacy is a priority for you, locking your Mac screen might not be enough. You may want to know a way to permanently delete confidential files or remove your browser search history.
Both can be done with iMyMac PowerMyMac’s set of tools. The latter can be done with iMyMac PowerMyMac - Privacy.
Aside from wiping off your search history, you can also delete autofill history and downloaded files. You can also remove cookies and other unnecessary browser data to at least free up some space on your Mac.
It works with different browsers including Safari, Chrome, and Firefox, among others. Here’s how to use the software.
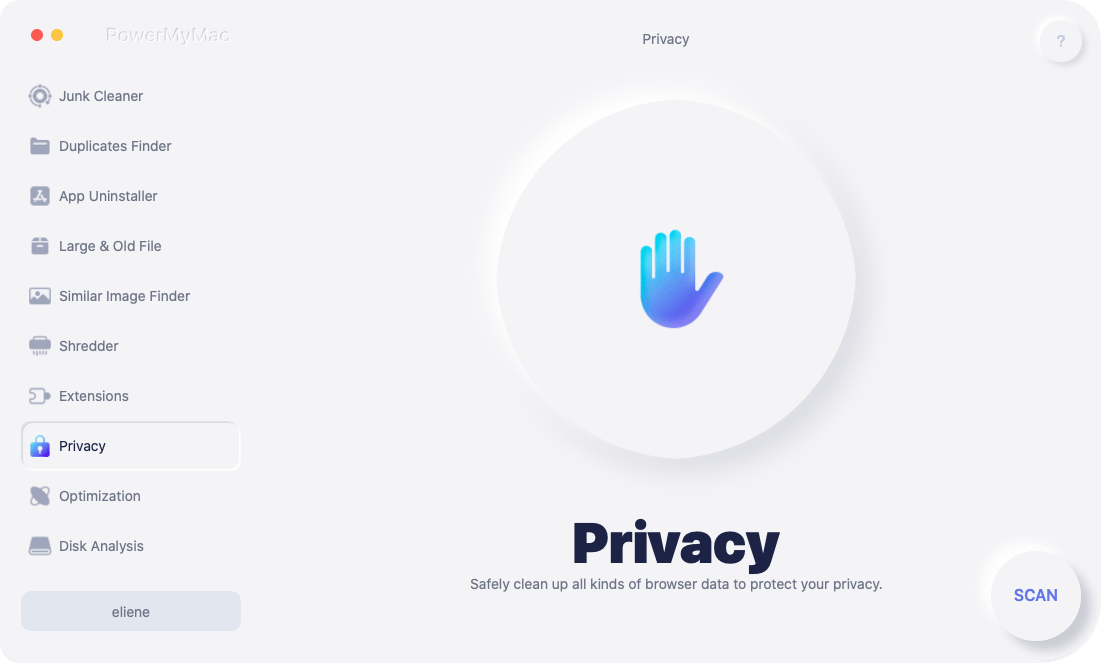
Step 1: Download and Launch iMyMac PowerMyMac
Let’s start by downloading the software on your Mac. Run it and you will see a list of tools on the left tab of the window. Choose Privacy.
Step 2: Choose Privacy Option and Start Scan
To begin looking for browser data on your Mac, hit Scan.
Step 3: Choose Browser Data to Delete
When the software is done scanning your Mac, you will see a list of your browser on the left. Click on the first one on the list.
The detected browser data will appear on the right. Tick the box next to the items that you want to delete. You can also tick Select All to delete all of the found data. Do the same for the rest of the browsers.
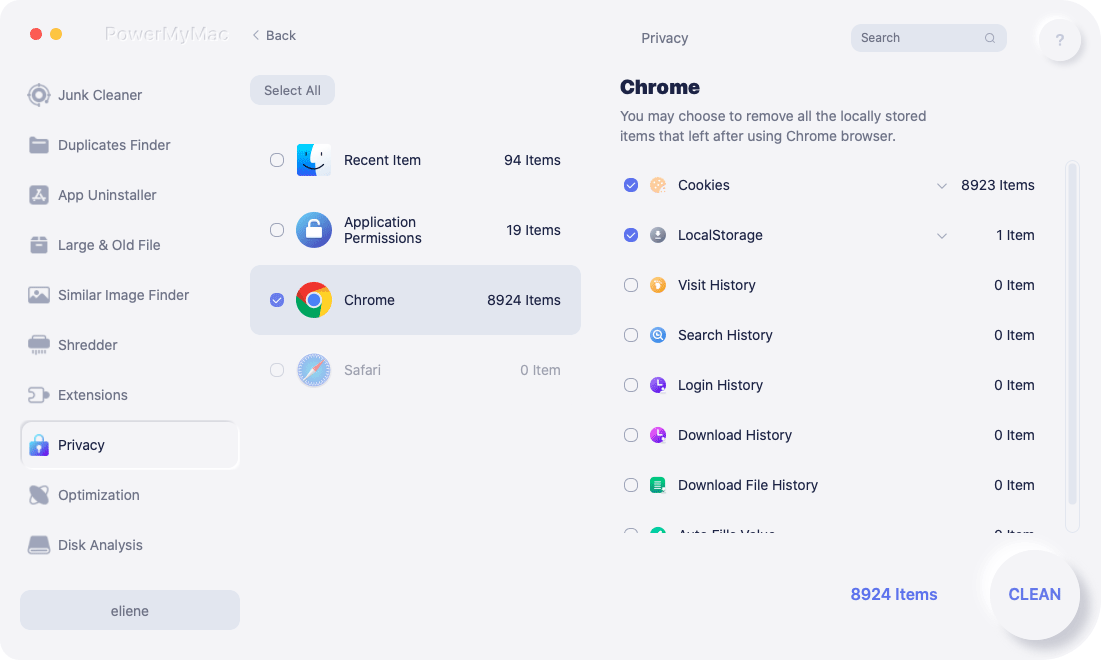
Step 4: Delete Selected Browser Data.
Once you have selected the items for deletion, click the Clean button in the bottom right corner of the window.
People Also Read:How to Update MacHow to Empty Trash on Mac
Part 4. Conclusion
Knowing how to secure your Mac and its data goes a long way. Lock Mac Screen helps protect your privacy and prevent others from getting to your files.
Locking your Mac screen is one way to do that. Another is by using a special software like iMyMac PowerMyMac. With its range of tools, including Privacy and File Shredder, keeping your files private isn’t that difficult!


Francine2020-12-10 19:13:17
Comment déverrouiller mon écran sur Mac. Merci !
Carlos Chacón2020-01-15 17:54:46
Mi problema: No puedo arrastrar las ventanas que abro. Tampoco obedece al puntero si quiero ampliar el tamaño de la ventana (o achicarla). Problema de hoy. ¿Alguien me puede ayudar?