


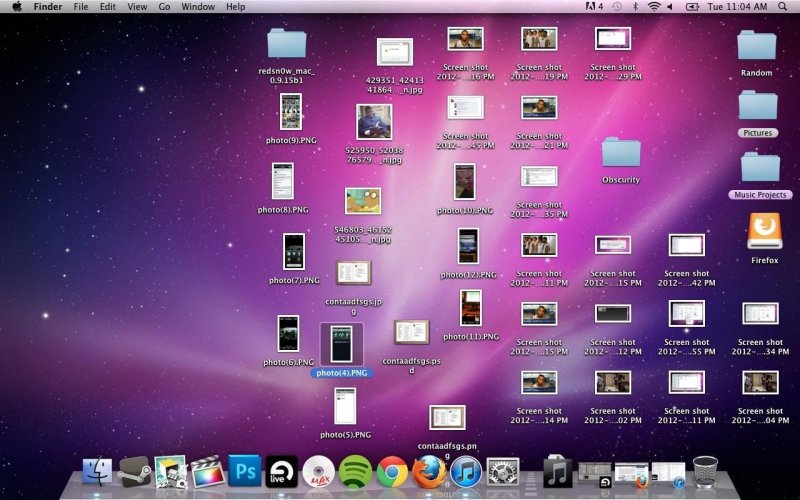
Social media increased our interest of taking photos of almost everything that we see, and we want to share, and your photos might be scattered everywhere on your Mac.
We have some tips for you on how to organize photos on Mac, from decluttering up until making everything automated when you sync your device on your Mac.
Some features of Facebook and Instagram can allow you to take photos directly on the app without saving it on your internal storage, but what if these apps decided to shut down?
Your photos will be gone, that’s why we take photos from our camera to capture and save memories for the future, or for a presentation and other purposes.
Contents: Part 1. Put all of Your Photos in Mac Photos AppPart 2. Declutter Photos by Removing Duplicates and Similar ImagesPart 3. Ways to Organize Photo Library on MacPart 4. Conclusion

Part 1. Put all of Your Photos in Mac Photos App
If you save photos as well on different locations such as iCloud storage, external hard drive, phone storage or flash drive it would be great to start by consolidating all of them
Sync, Transfer and Use iCloud Photo Library
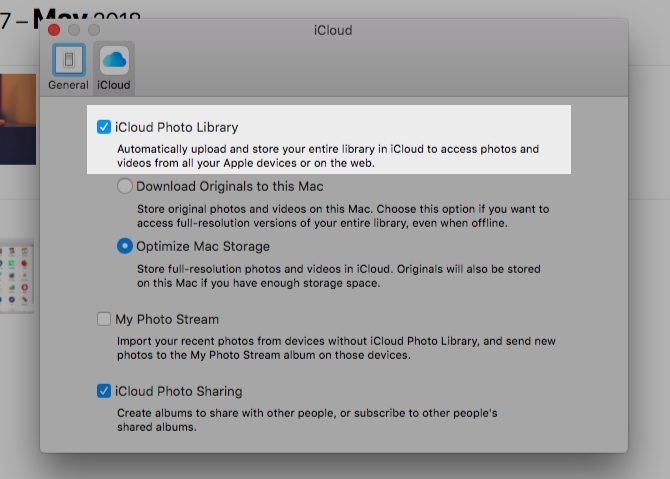
- Enable your iCloud Photo Library if turned off. Go to System Preference > Select iCloud on photos > Select Options tab > then choose iCloud Photo Library
- Then your photos will be uploaded the duration will depend on the size and the stability of your internet connection
- Sync and Transfer all of your devices on your Mac, you may use cable to transfer files or via airdrop or plug in your flash drive then transfer photos on your Mac
- Bring them all into one folder, there might be chances that you might have multiple libraries since the sources of the photos came from different devices
By consolidating photos in one library you might need to do some library switching to do it the steps are as follows:
- Open Launchpad
- Press and Hold the Option key then select on Photos App to view the libraries
- You may now switchfrom one library to another photo library when you open it
Part 2. Declutter Photos by Removing Duplicates and Similar Images
Prior to the organization of your photos its always best to remove the unnecessary first to save some space as well on your storage.
How to Remove Duplicates and Similar Images
There are times that we can take a picture we take more than one shot just to make sure that we get the perfect shot considering that lightning and positioning. Here is some option to see your duplicate or similar images:
- Sort photos by events, select View> Sort Events > Select on the sub menu by Date, Location and from oldest to newest
From here you can see the similar images and choose which ones to retain and to delete one by one and trust me this can take you some time to finish. You can use iMyMac PowerMyMac to do the job for you in one go.
Remove Duplicate and Similar Images using iMyMac PowerMyMac
What can iMyMac PowerMyMac can do is to scan your entire internal storage and identify all the similar photos for you, you don’t have to do the sorting or browsing. It will show you via list and all you have to do is to select which to keep and to delete.
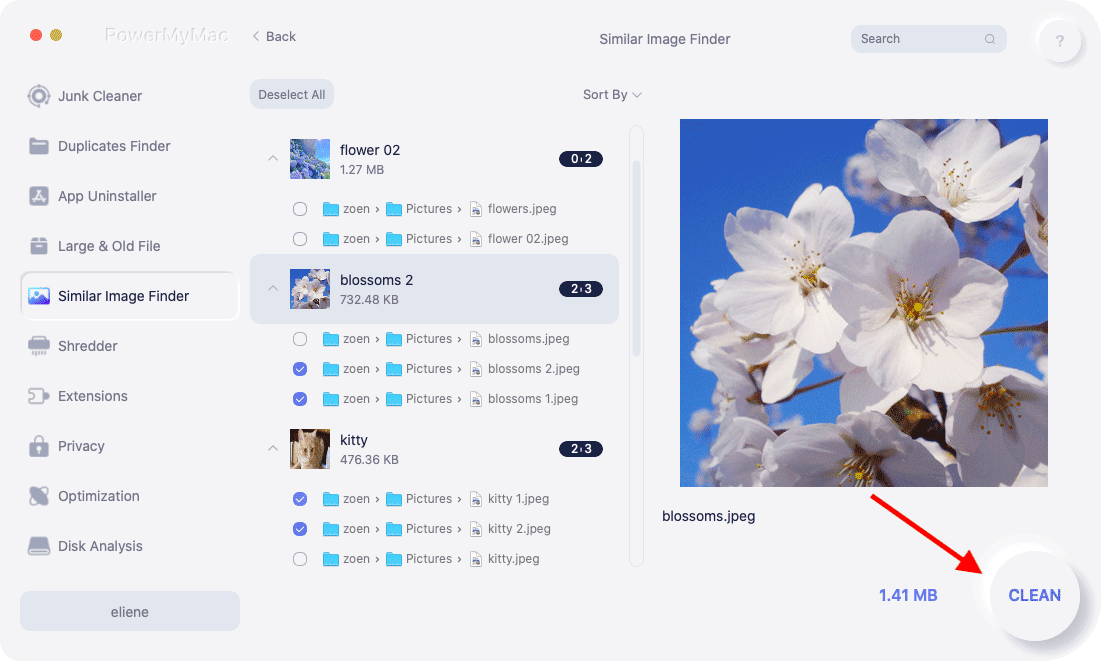
Steps to use Similar Image Finder in iMyMac PowerMyMac:
- Download and Launch the App from imyMac.com
- Open the app then select the Similar Image Finder module.
- Click on the Scan icon
- When finished it will show you the amount of the files that were found
- The combined Similar Images will show on the screen and it will give you a preview on the right side of the screen
- Once you are done selecting click on the Clean icon at the lower right corner of the screen
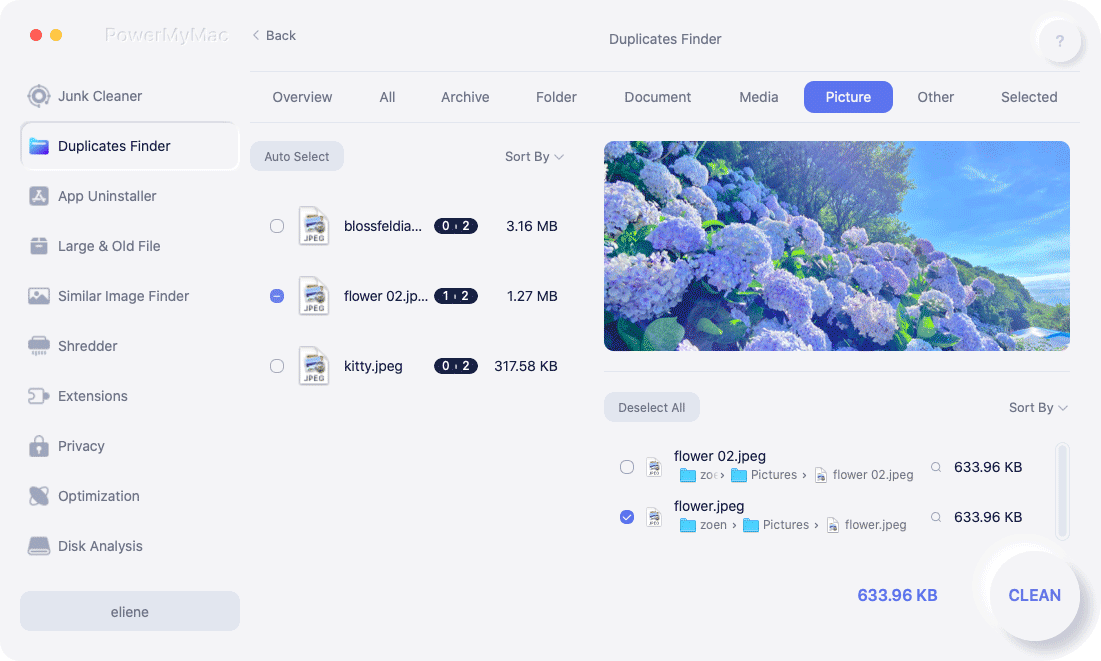
The difference of this from Similar Image Finder is this feature can detect the exact same image while the Similar Image finder can also detect almost the same images with minimal changes.
This can also detect duplicate images that the format was modified, example from JPEG to PNG that is the same image or vice versa.
Just repeat the steps from Similar Image finder and only select Duplicates Finder on Step 2.
Delete a Photo Library on Mac
Some applications can create their own photo gallery on your Mac for example Snapchat and Instagram and other photo editing applications that you just used once and only contains very few images. Select the Photo Library > then drag it to Trash
As a part of decluttering you can move its photos to your desired location before deleting the Library
Part 3. Ways to Organize Photo Library on Mac
Now that you are finished doing the consolidation and declutter, its now time to organize your photos on how you would like it to be, there are several options that you may have and here are some of them
Set up a New Photo Library
Your photos might come from different sources and some users wants to create a folder from which device it came from so its easy to remember, or folder for an occasion example are wedding ceremony or birthday party.
Press on the Option Key > Select Photos Apps > Select Create New icon > Select Library > Name your Folder then OK.
How to Combine More than Two Photo Libraries
There is no quick step to merge more than two libraries, on this guide its just plainly moving all the photos from one library to another, to do so follow the steps outlined below:
- Open Photos Press Option Key > Choose one library to consolidate
- Select Edit on the Menu Bar then Select All
- Select File on the Menu bar again > Select Export, you will see two options:
- Export Unmodified Original. This will export all the images without the changes that has been made
- Export Photos. You have the liberty to select which ones to export by format including the ones that are edited or modified
- Select the TO library where you want these photos to go
- Go to the other libraries that you want to consolidate then repeat the steps above
- Close and reopen Photos by using Options choose the library that these photos are going to
- You can select Import or simply drag the photos in the library
Tagging People
Under your options in Photo Library there is also a folder for People which you can utilize, you can tag people by names and your relationship with them from childhood friends, family and colleagues, this feature will scan the faces on the photos, you can click on the face and enter their name once.
In this way you can also locate photos of them by typing their name on the search bar.
Adding Location
Similar like People, Places is also available on your Photo Library. You can add a location on a picture to put them into one single folder.
It will collect all the images in one place to easily locate them specially when your GPS is always turned on your device can capture the location.
But if not then you can add it manually by going to the Image then select the Info icon at the right top corner of the screen > Info page will pop-up then input the location under Add Places.
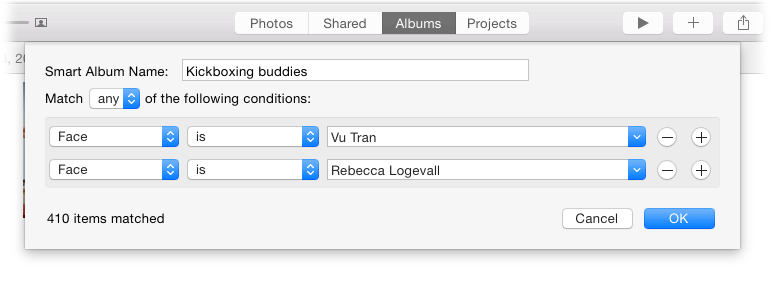
Set up Smart Album
In Photos App it can create a folder for you automatically, you just need to adjust your preferences. It can collate photos that was taken on a specific timeline example during Summer here are the steps on how to make a Smart Album
- Open Photos then Click onthe Add button (+) on the My Albums on the left side of the screen
- Choose Smart Album, then Create a Name for the album
- Set up the parameters on your preferred category then Hit on OK button
Part 4. Conclusion
Organizing your photo library can be tedious specially if you already have tons of picture to delete, consolidate or to group, reason behind we would highly recommend to set up your preferences if you have a new device so the transition of photos on your storage will be smooth.
Also, its best to have iMyMac PowerMyMac and utilize its feature of Similar Images Finder and Duplicates Finder to save you some time and effort you can also use its other features such as Junk Cleaner to delete broken images and free up your storage. Now you know how to organize your photos on Mac.


Anjo Schuite2024-06-27 13:45:16
Bedankt voor de tips, maar ik wil graag: - mijn foto's ordenen op de aanmaakdatum / exif data - weten of in de library mijn originele foto's zitten of door FOTO.app veranderde foto's / gecomprimeerd Ik kan nergens hierop een antwoord vinden. Ik werkte voorheen met Aperture maar dat werkt niet meer en daar kon ik kiezen of ik de originele bestanden op de plaats op mijn HD wilde bewaren incl origineel. Met vriendelijke groet Anjo Schuite