


With iCloud toggled on across your Apple platforms, you can readily access your troves of data. Apple’s iCloud service plays a pivotal role in the use of Macs or iOS devices. Users grow fond of its services as iCloud is intricately linked to their Apple world experiences.
However, you may be forced to delete your iCloud before you trade in, separate an Apple ID from other users or other reasons. If you want to delete iCloud account from Mac permanently, this article feeds into your quest.
In all bits and pieces, we’ll explore easy-to-perform steps to wipe away your iCloud account from your Mac.
Contents: Part 1: The Basics and Reasons of Erasing iCloud AccountPart 2: How to Delete iCloud Account from macOSPart 3: Other Options for Purging iCloud AccountPart 4: Wrapping-Up
Part 1: The Basics and Reasons of Erasing iCloud Account
Why Delete Apple ID and iCloud Account?
At the outset, wiping out your Apple ID permanently should be a last resort in case you want to trade in or hand over to a new user. This is because you can erase or reset a Mac to factory settings to remove all Apple ID accounts from the machine.
You may want to obliterate your Apple ID and iCloud account by manually deleting from Mac. An Apple ID acts as the login flight path to the full-blown ecosystem branched off into iCloud, iTunes, and the App Store for a vast majority of users. Some Mac users require a Mac devoid of iCloud functionality and Apple ID-related data for a public workstation or a shared communal device.
Where you may have assessed the Mac for organizational iCloud account, you need to delete it to personalize the computer. Just don’t turn a blind eye to the reality as purging an Apple ID from a computer nukes all pieces of data. Create a backup and preserve a copy of files, contacts, and your wealth of personal data.

Salient points evident in the process:
- Deleting iCloud means you will be immediately logged out of apps like essages, face tie and other resources you have installed on it. You’ve to install them in your fresh iCloud account.
- Create a backup for all the significant data
- To access other services like iCloud Keychain, you’ve to subscribe from the initial account.
- Examine destinations such as camera roll to salvage idiosyncratic files or data
Part 2: How to Delete iCloud Account from macOS
Remove iCloud Account from Mac
It’s important you create a backup prior to modify severe system settings lest you suffer inadvertent data hemorrhage.
- Head to the Apple menu on the top left edge then tap on System Preferences.
- Choose “iCloud” under the preference panel options.
- Select “Sign Out” under the iCloud preference panel.
- You may opt (highly recommended) to maximize options and click on “Keep a Copy” of core data on your local Mac.
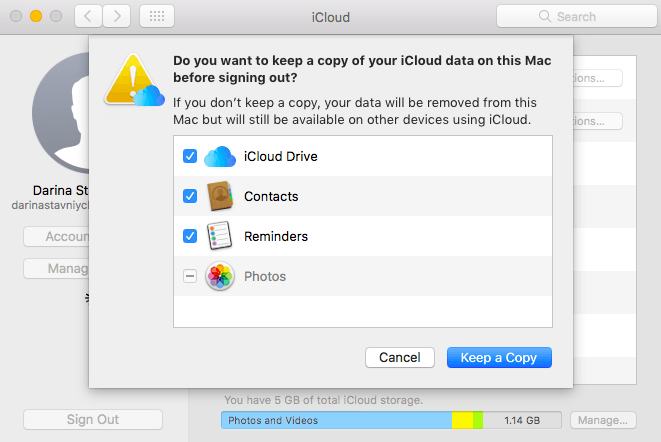
Once you log out of your Apple ID or iCloud account, the Mac jettisons all iCloud features, items, or other Apple ID affiliated data. However, you can log into another Apple ID.
If you want to retain some data from iCloud drive, reminders, calendars, or contacts, select the checkbox neighboring them.
Remove A Device from iCloud
- Navigate to com via Safari on Mac.
- Fill in your Apple ID and password.
- For the two-step authentication, enter the code you receive in the trusted device.
- Hit Settings.
- Look for My Devices area, tap on the Mac you wish to remove.
- In the sequential window, hit the ‘x’ adjacent to the device you wish to purge from iCloud.
Eradicate the Mac Association from the Apple ID and iCloud Account
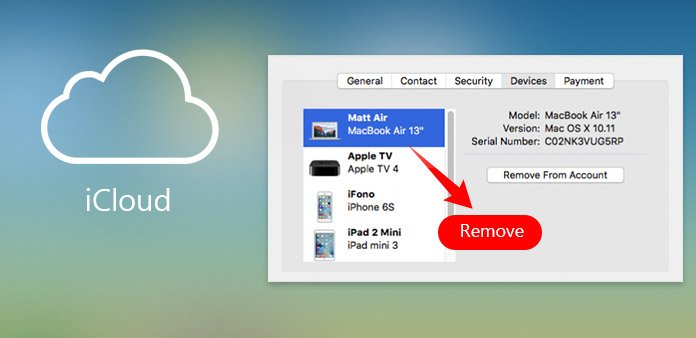
Additionally, Mac users who plan to never use the Mac again or transferring ownership, you’ve to remove the Mac from the iCloud account. You need to remove the computer from the affiliated Apple ID or iCloud account. Your iPhone or iPad makes it a breeze to get the job done.
- Tap on Settings and then click on your name to view iCloud information.
- Select “Devices” and then zero in on the Mac you have erased the Apple ID from.
- Browse down and choose “Remove from Account” to remove that Mac from the affiliated Apple ID/iCloud account.
Part 3: Other Options for Purging iCloud Account
De-Authorize iTunes on Mac
iTunes restricts individual computers authorized playing media in your Library. Accordingly, you need to de-authorize a Mac if you’ll not use it along with that account in the future.
- Fire up iTunes.
- Tap on Account under the menu bar.
- Hovering over Authorizations, select De-authorize This Computer.
Fill in your Apple ID password and hit De-authorize to validate.
Golden Tip
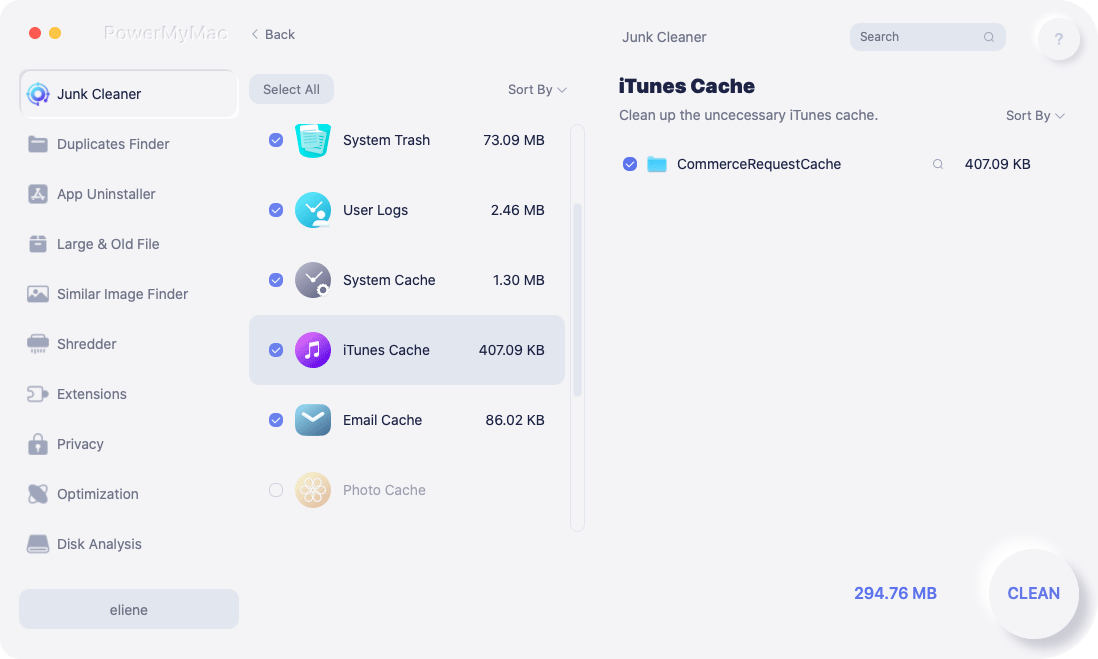
Next, removal of redundant iTunes data is a step in the right direction. iMyMac PowerMyMac makes it super-easy and automatic to mop up obsolete software updates, dilapidated backups and dysfunctional downloads. It’s a bastard to do the job manually; we recommend PowerMyMac, a proprietary and specialized tool that removes unwanted junk efficiently.
The tool has a feature specifically developed for purging iTunes junk. It also comes with a dedicated uninstaller to sift through every grain data and wipe away vestiges of iCloud left by the default process.
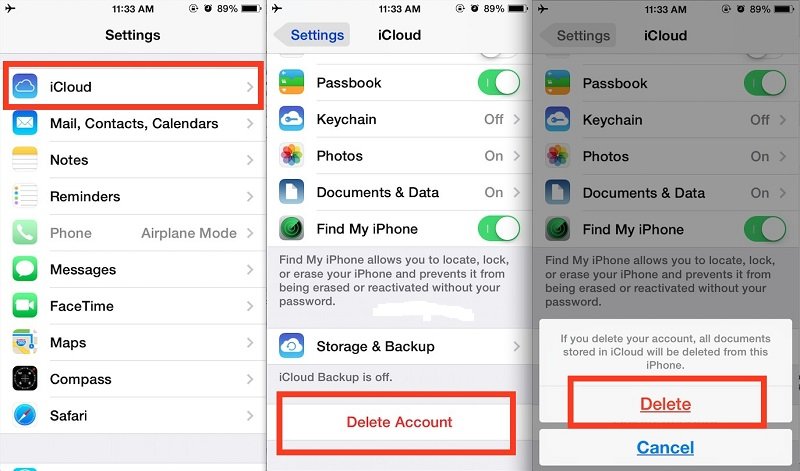
Toggle Off “Find my iPhone”
The “Find my iPhone” feature is a dead giveaway to hackers on the prowl for user’s private data. Uncheck this feature to hold hackers at bay.
- Tap on the Apple menu and select System Preferences.
- Click on iCloud.
- Browse down to ‘Find My Mac’ and deactivate the box near it.
- Fill in your Apple ID data and hit ‘Continue’.
Part 4: Wrapping-Up
In the end, if you delete iCloud account, you wipe away all your private and confidential data archived in it. As you’ve learnt, the process involves a number of steps. Remember to sign out of iCloud on all your devices and Apple ID as well. Everything can be done by a nod and a wink. Create a backup for critical data so you may not be caught napping.
Any queries, views, or experiences about the topic, share in comments below.

