


Many Apple users would tend to use their iCloud account for them to be able to back up all of their important data from their iPhone or Mac devices. And using iCloud Drive, you will be able to gain access on all of the data that you have backed up or synced.
If you are using an iOS device, then you can easily loo for your folders and documents in your File application (for those who are using an iOS 11). Or you can also find them on your iCloud Drive application (if you are using an iOS device running on an iOS 10 or older version.
But the question here is how to access iCloud on Mac? Well, accessing it on your Mac is a little bit different when you try to access it on your iOS device. But you do not need to worry, because we are going to show you in this article on how to access iCloud on Mac.
Article GuidePart 1. How to Enable iCloud Drive on Mac DevicePart 2. How to Access iCloud Drive on Mac Using BrowserPart 3. How to Access iCloud Drive Using FinderPart 4. How to Disable iCloud on MacPart 5. How to Clean Up Your Mac Like No Other
People Also Read:How to Uninstall Multiple Programs on Mac?Clean Up Your iPhoto By Removing Duplicates
Part 1. How to Enable iCloud Drive on Mac Device
If in the case that you were not able to enable your iCloud Drive on your Mac, then you can do it by following this method anytime you wish to do so.
Step 1: On your Mac, go to your Apple menu icon found on the upper-left hand of your screen.
Step 2: From the drop-down menu, go ahead and select System Preferences.
Step 3: Then, another drop-down menu will appear on your screen. So from there, all you have to do is to choose on iCloud.
Step 4: Then, go ahead and click on the little box that you see beside iCloud Drive. Doing this will enable the iCloud Drive on your Mac.
Part 2. How to Access iCloud Drive on Mac Using Browser
You can access your iCloud on your Mac by using any of the web browsers that you have. Here is a step by step method that you can follow.
Step 1: On your Mac device, go ahead and launch any browser that you have.
Step 2: Then on the address bar of your web browser, go ahead and type in www.iCloud.com.
Step 3: Once that you are taken to the login page of the website, just go ahead and enter your email address and your password that is connected to your Apple ID.
Step 4: Once that you have signed in your account, go ahead and choose the arrow that is located beside the password field.
Step 5: If needed, you will be able to receive a notification code and all you need to do is to enter it.
Step 6: Then after that, go ahead and click on the iCloud Drive.
Once that you have accessed your iCloud on your Mac, they will be able to view your files using your web browser on your Mac. Also, you will be able to have your files downloaded on your Mac as well for you to save them or if you want to send them over to someone through email or another platform.
Part 3. How to Access iCloud Drive Using Finder
Another way for you to be able to access your iCloud on Mac is by using your Finder. This way, you will no longer need to use your web browser. To know how here is what you need to do.
Step 1: On your Mac, go ahead and launch the Finder application.
Step 2: Then, go ahead and hit on the iCloud Drive located on the sidebar of the Finder app.
Step 3: Then after that, double-click on any file for you to be able to launch it.
Part 4. How to Disable iCloud on Mac
Now, just in any case that you no longer want to access your iCloud on your Mac, then you can go ahead and have it disabled on your Mac. For you to be able to disable your iCloud on your Mac, here is what you need to do.
Step 1: On your Mac, go ahead and hit on the Apple menu. This is located at the upper-left hand corner of your screen.
Step 2: From there, you will be able to see a drop-down menu. So just go ahead and click on the System Preferences.
Step 3: Then, from the System Preference, go ahead and choose iCloud.
Step 4: Then, go ahead and take out the check mark on the box beside iCloud Drive. Doing this will then allow you to disable your iCloud on your Mac.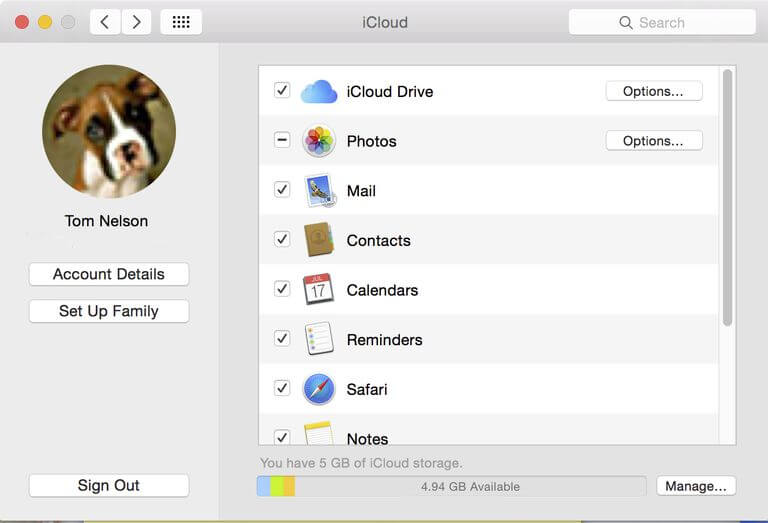
Part 5. How to Clean Up Your Mac Like No Other
Now that you were able to access your iCloud on your Mac, then it is time now for you to make sure that your Mac stays on its optimum status. This way, you will be able to use your Mac without experiencing any issues such as slow performance or a full space on your Mac.
And for you to be able to do this, then you will be able to need the perfect tool that you can use to get the job done. And what we can recommend you to use is the iMyMac PowerMyMac for you to be able to get rid of all unwanted files from your Mac in just one click.
The iMyMac PowerMyMac is considered to an all-in-one software because of its many functionalities. It can actually be a performance monitor because you will be able to check out on how fast and smooth your Mac is running. By this program, you will be able to take a look at your Mac’s CPU performance in anytime that you want.
The iMyMac PowerMyMac is also smart cleanup because it can easily detect as to which files that you have on your Mac are considered to be as a littered file from those files that are considered to be important. With this, you will no longer have to worry about removing those files that are important to you by accident.
The iMyMac PowerMyMac also have an uninstaller feature that you can use for you to completely uninstall any application that you have on your Mac. Using the iMyMac PowerMyMac, you will not just uninstall your applications, but you will also be able to remove any associated files that go with the app. All in just one hit of a button.
Now, for you to be able to know on how you can clean up your Mac, then let us go ahead and start cleaning up your system junk.
The system junk on your Mac is where you will be able to get rid of your System Cache, Application Cache, your System Logs, your Localization, and as well as your User Logs. Cleaning up all these files from your Mac will be able to optimize the performance of your Mac and as well as on freeing up space for your storage.
Here is what you need to do.
Step 1: Get the iMyMac PowerMyMac
First is that you have to get the iMyMac PowerMyMac from our official website and download the program. Then, go ahead and install the PowerMyMac on your Mac.
Step 2: Open the Program
After installing the iMyMac PowerMyMac, go ahead and launch it on your Mac. On the main screen of the iMyMac PowerMyMac, you will be able to check out your Mac’s system status. The details that you see on your screen are real-time as you are using your Mac. So every time you reload the page, it will give you information about the status of your Mac’s system.
Step 3: Select Master Scan Option
From the left side, let us go ahead and choose the Master Scan option to start cleaning up the caches on your Mac.
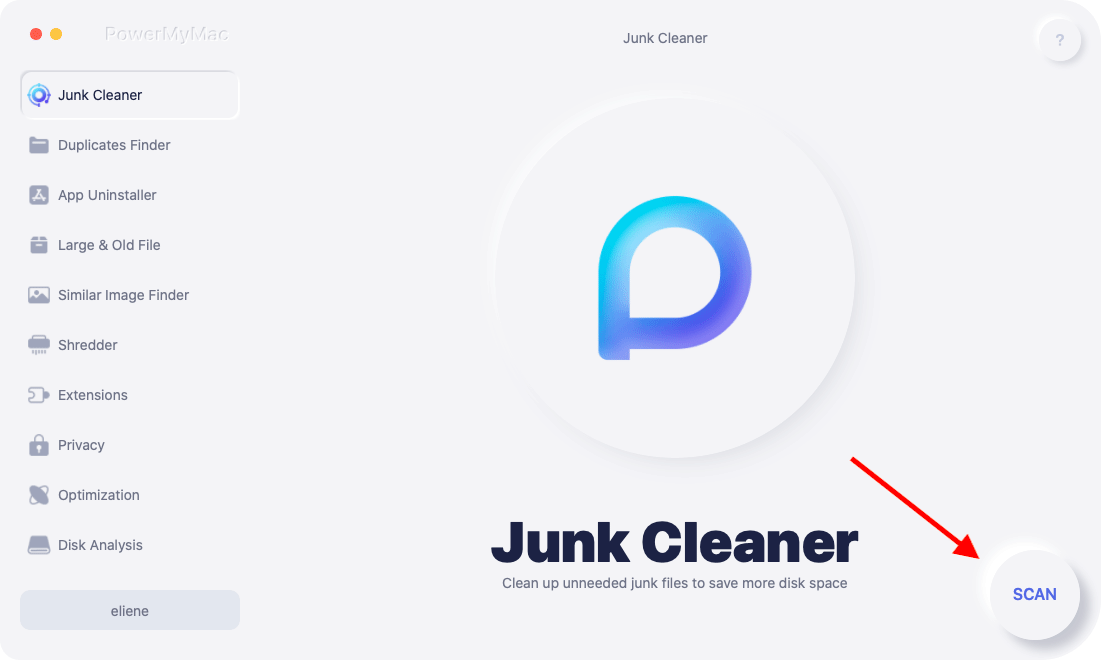
Step 4: Make A Scan
Then click the scan button, PowerMyMac will then ask you to scan your Mac. This way, PowerMyMac will have the power to run through your Mac and gather all of the caches that you have. Simply click on the Scan button located at the lower portion of your screen to begin the scanning process. Then the scanning process will start so all you need to do is to wait until it is complete.
Step 5: See the Results
After the scanning process is complete, then PowerMyMac will then show you the complete result of the scanning process.
Step 6: Choose the Files to Remove from Mac
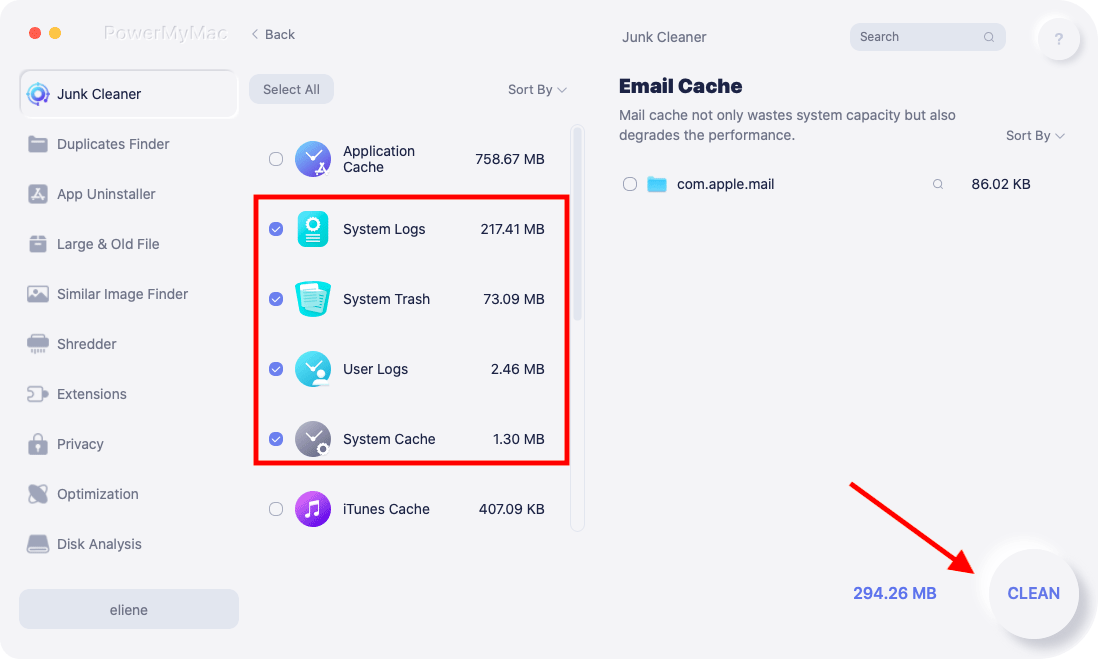
Then, PowerMyMac will then show you a list of categories which you will be able to find at the right side of your screen. You will be able to see their categories such as System Cache, Application Cache, System Logs, User Logs, and Localization.
And if you are going to click one of those categories, you will be able to see all the files that it contains. From there, you will be able to choose all of the junk files that you would want to remove from your Mac. All you have to do is to tick on the circle right beside each file. Or, if you would want to remove them all at once, then all you need to do is to click on the Select All option located at the top of your screen.
Step 7: Clean Up Your Junk
And once that you are already done choosing all the files that you would want to remove from your Mac, then it is time for you to get rid of them. And in order for you to delete the files that you have selected, all you have to do is to go down the bottom of your screen and hit on the Clean button.
And then, the cleaning process will start. So all you have to do from here is to wait until the process is completely done. And once that this is done, you will be able to notice that all the files that you have selected to remove from your Mac will all be gone from the list. That only means that PowerMyMac was able to clean up all of your junk files. And with that, you now have more space on your Mac for new files.
As you can see, having access to iCloud using your Mac is quite very easy to do. You can choose from the methods that we have shown you above so that you will be able to know which one would suit you and which one is easier for you to do.
And since you might have the need to download certain files from your iCloud to your Mac, then having your Mac all cleaned up will be a good idea. This way, you will be able to have more room for new files, and at the same time, you will be able to optimize the performance of your Mac. All thanks to the iMyMac PowerMyMac, you will be able to do all of that with just one click.
Cleaning up your Mac will be a lot easier than it used to with the manual way of doing it. So go ahead and have the iMyMac PowerMyMac downloaded and installed on your Mac and let the easy work be done.

