


I use a Mac device and I love it so much. I always clean it up regularly to remove purgeable space on my Mac through manual means. I take care of my Mac cause it’s very important to me.
Recently, I was cleaning up my Mac device but I cannot empty the Trash. A message pop up as "the operation can’t be completed because the item is locked." and there are some locked files on my Mac device. I want to remove them from it but I can't unlock the file on Mac. How do I delete locked files on Mac?
~Mac Device User
Contents: Part 1. Why Can't You Empty The Trash?Part 2. How to Delete Locked Files On Mac?Part 3. Other Reasons For Being Unable To Empty Your TrashPart 4. Force To Empty Trash on High Sierra Using The TerminalPart 5. Conclusion
Part 1. Why Can't You Empty The Trash?
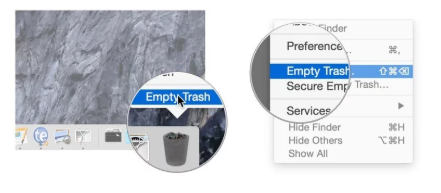
Some of us want to simply clean up our Mac device to free up more space and enhance our device’s performance. And cleaning up our Mac entails emptying the Trash. However, at one point in time, you might encounter that you cannot empty your Mac device Trash.
Your Mac doesn’t allow you to empty your Trash might be caused by several reasons. One reason would be the files you are trying to delete are still being utilized. Another reason would be the files are actually locked or damaged and needs to be fixed. Some file with names that have special characters in it cannot be deleted as well.
This is because Mac might think that it’s important for the functioning of the system. Another reason for files being unable to be deleted is due to the reason of system integrity protection. In this article, we will tell you how to delete the files depending on the reasons we have stated above. Let’s get started.

Part 2. How to Delete Locked Files On Mac?
When you tried to delete a file, sometimes it cannot be deleted because Mac says that the file is being used. There are some solutions to this problem that you can implement in order to actually delete the file.
The first thing you should try is to restart the Mac device. This allows you to ensure that all applications have been closed. Even application files that are running in the background that uses the said file you want to quit can be closed from restarting the Mac device.
Another thing you can do is to empty the Trash and be able to delete the files in Safe Mode. Usually, the file is being used because it is utilized by a login or startup item. That’s why you have to open the Mac in Safe Mode. In this way, 3rd party drivers and also startup programs won’t be opened.
Here are the easy steps you can follow in order to delete locked files on Mac in Safe Mode:
- Shut down your Mac device, then press the power button again to restart your Mac device.
- Press and hold the
Shiftkey during the bootup process. Release your hold on the Shift key when you see the Apple logo on the screen with its progress bar. - Empty your Trash to delete locked files. Then restart the Mac device in order to exit this mode.
What if the methods above didn’t work? Well, you can use iMyMac PowerMyMac to delete the files you want in the Trash. It also can remove your purgeable space on Mac to get more space, just click here to check how it works. Below are the steps to use the said software:
- Download the software and launch it on your Mac.
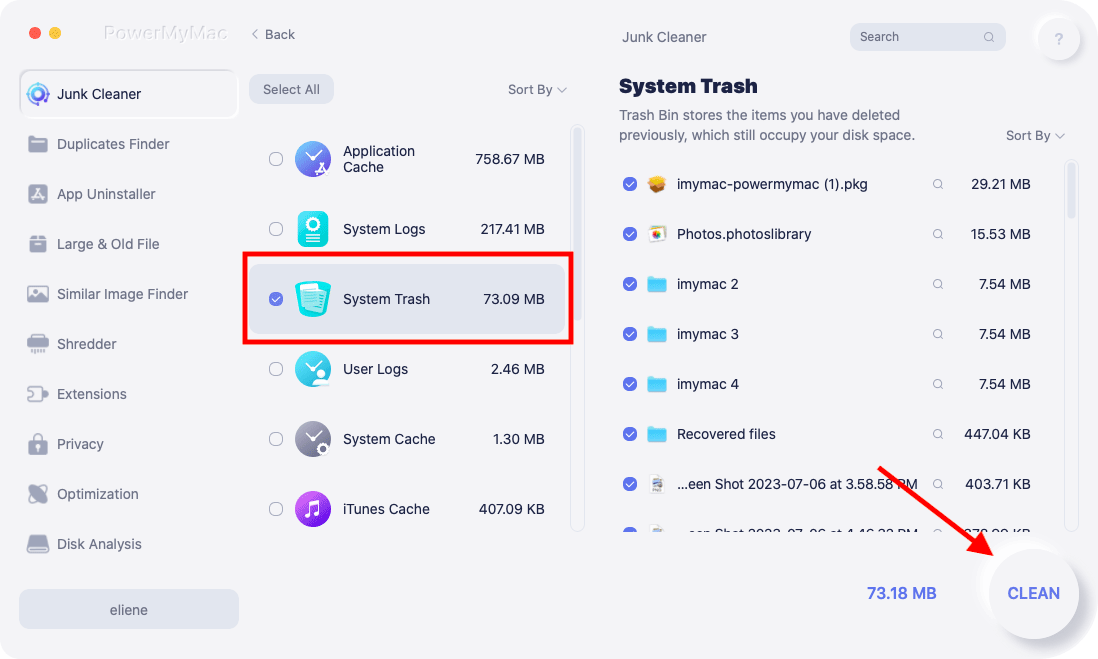
- Click the option named Junk Cleaner on the left side of the screen.
- Press the SCAN button to find all junk files.
- Once the process is complete, it will show junk files in various categories such as System Logs, Application Cache, System Cache, etc. Select System Trash in this case.
- Click the button named CLEAN. Wait until the cleanup process is complete.
Advantages of PowerMyMac:
- It helps you scan your entire Mac device for junk files, unnecessary files, clutter, and old files.
- You are free to use the application for the first 500 megabytes of data.
- After it scans your entire Mac device, you are free to preview each file before actually deleting it.
- The files you preview can be sorted into various categories depending on what you want. These categories include size, date, type, etc.
Part 3. Other Reasons For Being Unable To Empty Your Trash
There are other reasons for not being able to delete the Trash. Below are some things you can do to fix this:
How to Unlock Locked Files on Mac
If your Mac device says that the file is locked, you can follow our guide below to delete the said file. First, you have to ensure that the folder or the file is not actually stuck, After which, right-click the said file or folder. Then, select Get Info. See if it is actually locked. If it is, uncheck the locked option to be able to empty your Trash.
Another reason why a Trash can’t be emptied is due to its file name. The best way to fix this would be to rename the file and try to delete it again.
Use Disk Utility To Repair Your Disk
Sometimes, the file you want to delete is damaged, then this may cause file is locked for editing on Mac. To fix this, would need extra effort on your part. Here’s how to do it step-by-step:
- Shut down your Mac device first.
- Open your Mac device again while holding the keys
Command + Rwhile it is starting up. This will enter the Mac device in Recovery Mode. - Release the hold on these keys once the Apple Logo including its progress bar shows up.
- Select Disk Utility > Continue.
- Select the disk where the file you wish to remove is located.
- Press First Aid in order to repair the damaged disk.
System Integrity Protection Causes
The rootless feature is also called SIP or System Integrity Protection. This was provided on Mac starting version 10.11 in order to prevent attacks from malware that modify protected folders and files on your Mac device.
In order to delete files that are protected by the SIP, you simply have to temporarily deactivate the SIP. This is how you can deactivate the SIP in versions of the Mac OS X El Capitan or higher:
- Open your Mac in Recovery Mode.
- Release the hold on these keys once the Apple Logo including its progress bar shows up.
- Within the macOS Utilities Window, select Terminal.
- Within the Terminal, enter the following:
csrutil disable; reboot - Press the
Enterbutton. Now, a message will display that the SIP is deactivated and you need to restart your Mac device. - Allow the Mac device to automatically reboot itself.
After this, you will be able to empty your Trash. It is suggested that you activate your SIP to ensure that your Mac device is protected. The steps to do so is the same as the one we stated before. However, this time, you will enter the following command: csrutil enable. After you do so, you have to reboot your Mac device for the said command to be activated.
Part 4. Force To Empty Trash on High Sierra Using The Terminal
You can use the Terminal to empty the Trash by force. You must take caution though as it might erase your data. Here are the steps to do so:
- Launch Terminal and type the following:
sudo rm -r - Put a space after the -r
- Ensure that the space is included. Launch the Trash.
- Select all folders and files within the Trash.
- Drag these towards the Terminal and drop them. Now, the location of each file and each folder you have dropped will be displayed on the Terminal’s window.
- Press
Enterbutton.
If you want to do it in Mac OS X, you have to type out the following: sudo rm -rf ~/.Trash/
Instead of typing out sudo rm -r

Part 5. Conclusion
After you have read this guide, you will know now how to empty the Trash that doesn’t allow you to. You will also be able to unlock multiple files Mac and delete locked files on Mac.
For a safer way of deleting files on your Mac and cleaning your device, you can use PowerMyMac. This is a great tool that helps you find clutter and junk files and delete them with a few clicks.


Krafgroup2023-01-20 13:27:41
Ваш вариант меня выручил. Спасибо!
Diego2020-10-12 12:44:32
Gracias a tu consejo pude borrar unos archivos que no podía en la papelera y me estaba volviendo loco.
iMyMac2020-10-12 17:45:53
Un placer ayudarte.
christian2020-09-04 22:18:12
I found a remarkably easy work-around. May or may not work for all people but it did for me. Move said file(s) or folder into a cloud service and then log into that service online and delete via your browser! SO EASY!