


Hi there! Do you know how to sync iPhone to Mac? Find out how plus other tips in this brand new post!
Article GuidePart 1. How to Use iTunes for Mac?Part 2. Sync Mac to iTunes Aver Wi-Fi NetworkPart 3. Sync iPhone to iTunes on Mac via USB CablePart 4. Removing iTunes Cache files and Junks.Part 5. Clean Mac EasilyPart 6. Conclusion
People Also Read:How to speed up El Capitan?How to Clean Install of macOS High Sierra?
Part 1. How to Use iTunes for Mac?
Ever since the release of Apple devices, iTunes has been there too. Backups, downloads, and almost everything on the phone needs to be connected with iTunes.
Luckily iOS innovations are great! Apple made sure that it keeps up with the latest trends and that is to stay connected, updated and synced wirelessly!
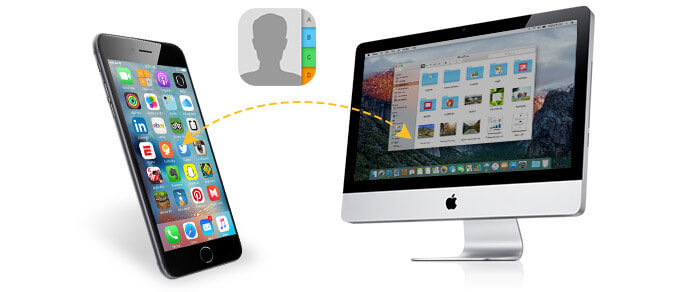
We now have two options for these activities, iTunes, and the iCloud. But let’s talk about the iTunes for Mac.
iTunes for Mac lets you sync your device manually or via Wi-Fi. Before you can enjoy the syncing of iTunes on Mac wirelessly, you need to enable it for the first time. Find out in the next part of the article.
Part 2. Sync Mac to iTunes Aver Wi-Fi Network
As we mentioned earlier, there are two ways on how to sync iPhone to Mac. Syncing option using a Wi-Fi is available on iOS 5 and above. The steps are pretty easy and do not need you to connect with the computer.
- Launch iTunes and check for the latest update
- Connect iPhone to Mac
- Click your device when it appears on iTunes
- Under the Summary tab, go to Options and tick the box for ‘Sync with this iPhone over Wi-Fi’
- Click Apply
- Disconnect the USB cable
When both devices are under the same Wi-Fi network, your iPhone will automatically appear in iTunes and syncs. Make sure you plug your iPhone into a charger.
The iTunes must also be opened on the computer to allow the sync and click on the device icon and the Sync button to begin the syncing.
Tip: If you are having issues with the syncing over Wi-Fi method, try restarting both devices. Once restarted, find the firewall settings and make sure that TCP ports 123 and 3689 and UDP ports 123 and 5353 are open.
If you are planning to restore the device into its factory settings, you need to connect the device to the computer. This process is not supported over Wi-Fi.
What can you sync with iTunes?
- Music, songs, playlists, TV shows, podcasts, etc
- Contacts
- Calendars
- Backups
- Photos and Videos
Part 3. Sync iPhone to iTunes on Mac via USB Cable
The second option on how to sync iPhone to Mac in iTunes is via USB cable or the old school method.
If you are still unfamiliar with the steps on how to sync your device to Mac in iTunes, checkout these:
- Open iTunes and check for latest updates
- Connect iPhone and Mac using an original USB cable
- Click on the iPhone icon when it appears on iTunes
- Search under Settings on the left corner of the iTunes window for the list of the contents that you can sync from the iTunes library to your device
- Select the contents you wish to sync
- Inside the main window click the box next to Sync. Choose the syncing options on each content type. You can customize the sync settings
- Click Apply
How to turn off Sync Options?
In case you are wondering how to turn off the sync options in iTunes, follow these steps:
- Launch iTunes and check for the latest version
- Connect both devices using the USB cable
- Click on your device icon inside iTunes
- Go to Settings found on the left side of the iTunes window
- Select the specific content type you want to turn off the sync option
- Inside the iTunes main window, un-check the boxes for the desired content types
- Click Apply
Part 4. Removing iTunes Cache files and Junks.
Your iTunes can be both the savior of your iPhone and the best enemy. This is because iTunes backups and software updates consume bigger space on your Mac. Yes, iTunes can be a space-eater too!
How to Remove Older iOS Software Updates
If you are usually updating your iPhone in iTunes, instead of using the space on your mobile, iTunes rather keeps the older version.
The updates just pile and clog up the system and may cause latencies. To manually remove older iOS updates in iTunes, follow these steps:
- Simply find this file: ~/Library/iTunes/iPhone Software Updates
- Drag the folder to the trash bin
- Empty the Trash folder
How to Remove iTunes Backups
Older backups are also annoying because of the space they consume. If you want to get rid of the older backup files, then follow these:
- Open iTunes
- Click on Menu then click on Preferences and click Devices
- To transfer the iTunes backup instead; find the backup you want to remove by pressing CTRL+ Click and move it to another folder or somewhere you wish to save the files
- To delete the backup, highlight the folder and click Delete Backup
- Confirm the action
Part 5. Clean Mac Easily
To avoid manual hassles of removing, deleting and getting rid of space-eaters, you can use an automatic option which is to run a cleaner. Use iMyMac PowerMyMac for safer, efficient and guaranteed effective cleaning.
It cleans all iTunes file caches, download caches, and other junks. You don’t have to endure the manual system of removing these contents. What you need is PowerMyMac. Simply run this program and let it scan your device and wait. It will display all the cache files and junks and those nasty space-eaters that clog up your Mac.
Part 6. Conclusion
So there you have it, you have successfully learned how to sync iPhone to Mac from this post. We hope you have followed the steps thoroughly and if you wish to clean your Mac, we recommend using PowerMyMac.
This is the most trusted and well-loved program that analyses, cleans and shreds all those old and unneeded folders and applications, junk files, and many more.
Download it today and enjoy the free version! Don’t forget to share it with friends so they will get the chance to clean up their devices too! Let us know your thoughts in the comments below.

