


 I have a MacBook Pro and I recently installed macOS High Sierra. I made sure I implemented a clean install to avoid problems with it. However, I am still experiencing certain issues. I think even though it’s a great operating system, I will still experience a few troubles. So, how do I troubleshoot these problems?
Don't worry, we've compiled the following 11 problems about macOS High Sierra so far, and will solve these problems for macOS High Sierra one by one.
Contents: Part 1. What Are the Common macOS High Sierra Problems?Part 2. How to Fix These Problems of macOS High SierraPart 3. Conclusion
People Also Read:How to Update MacHow to Clean Up MacBook Storage
Part 1. What Are the Common macOS High Sierra Problems?
Recently, the macOS High Sierra has been opened to the public. However great it may seem, it still has its bugs and flaws.
There are various problems reported on the macOS High Sierra and certain fixes can be implemented to repair them.
So, what are the various macOS High Sierra problems you might encounter with?
- Failed download of macOS High Sierra.
- Frozen installation of macOS High Sierra.
- Disk space is not enough for the macOS High Sierra installation.
- When “Preparing the Backup,” Time Machine got stuck.
- Slow macOS High Sierra or the operating system freezes randomly.
- After macOS High Sierra was installed, Mac wouldn’t start.
- Slow Wi-Fi after macOS High Sierra was installed.
- The application crashes or doesn’t launch on macOS High Sierra.
- Reduced battery life after macOS High Sierra installation.
- macOS High Sierra password problems.
- macOS High Sierra mail problems.
Part 2. How to Fix These Problems of macOS High Sierra
1 - Failed Download Of macOS High Sierra
When you start downloading macOS 10.13, sometimes the download will immediately stop and show the message “macOS High Sierra download has failed.” The message “Installation of macOS could not continue” could also be displayed. Why is High Sierra not installing? This may be caused by a poor or slow Internet connection. It may also result from too many users downloading the operating system simultaneously. You can try to fix this by restarting the Mac App Store. You can also try to re-download after a few minutes.
- Visit the Apple menu (located in the upper left corner of the screen)
- Select Force Quit
- Search for the App store app within the list that appears. Quit the app.
If you can improve your poor Internet connection, try it out. You can use a faster Wi-Fi network. You can also connect to the Internet via cable. However, before you resume the installation of the operating system, you should delete every partially downloaded file. These files are usually named macOS 10.13 High Sierra. Then, try downloading again.
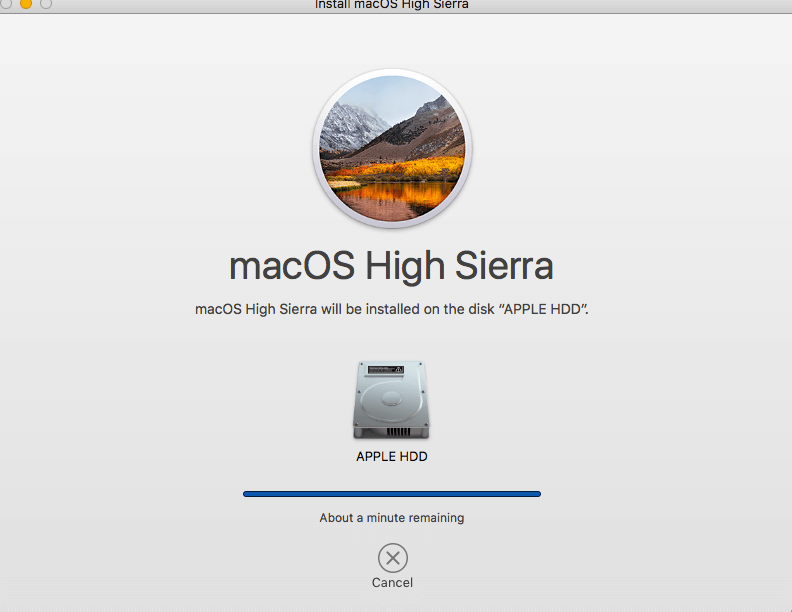
2 - Frozen Installation Of macOS High Sierra
Now, you might have finished downloading macOS High Sierra. But once you click the installation file, nothing happens. You might have pressed Continue, but the button is now greyed out. This means the Mac installation failed. Now what you should do is to Control + Click the installation icon. Then, select Quit. Visit Applications and search for the installation file of macOS High Sierra. Repeat the process of installation. Have patience. Sometimes, it takes a few minutes to start.
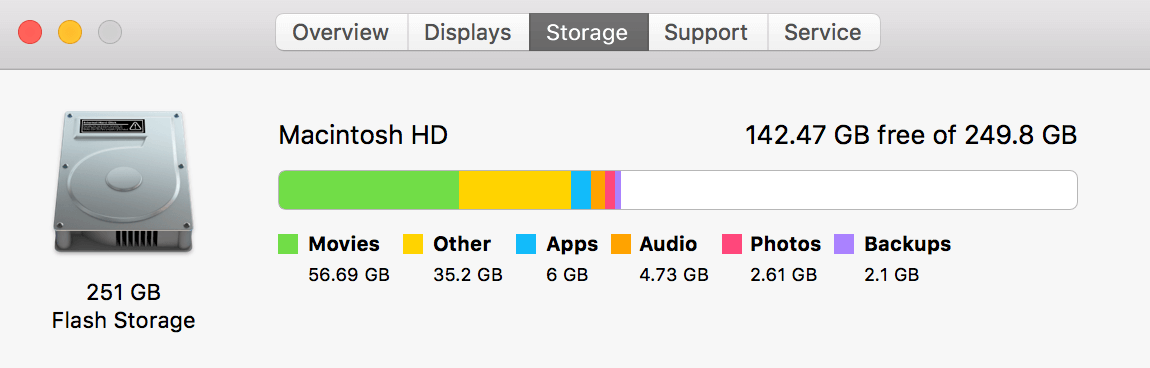
3 - Disk Space Is Not Enough for macOS High Sierra Installation
It takes about 8GB on your drive to install macOS High Sierra. This doesn’t seem too big. However, it might require you to have a minimum of 15 to 20 GB of disk space for the said operating system to run without issues. Therefore, the first thing to do is to find out what’s taking up so much space.
- Visit Apple Menu
- Go to About This Mac
- Press Storage tab
In order to get more space on your Mac, you should use a device called PowerMyMac. Here’s how to use it:
Step 1. Download and Launch the Application on Your Mac
Download iMyMac PowerMyMac from our official website and launch it. In the main screen, you can check your Mac system status.
Step 2. Scanning System Junk
Choose the Junk Cleaner. Click on the "SCAN" button, and wait for a moment. When the scanning is finished, the program will display all the junk files to you and will help you classified the junk files so you can check out the files by folder. You can also click the "Rescan" button to scan your iMac/MacBook/MacBook Air/MacBook Pro again.

Step 3. Select Files You Want to Delete
Click on the category like "Application Cache", the detail data for the category will show on the right side. Select the data you want to clean and click on the "CLEAN" button.

Step 4. Wait for Process to Be Finished
After a moment, those unnecessary files will be erased, many of them will be marked as "Zero KB".
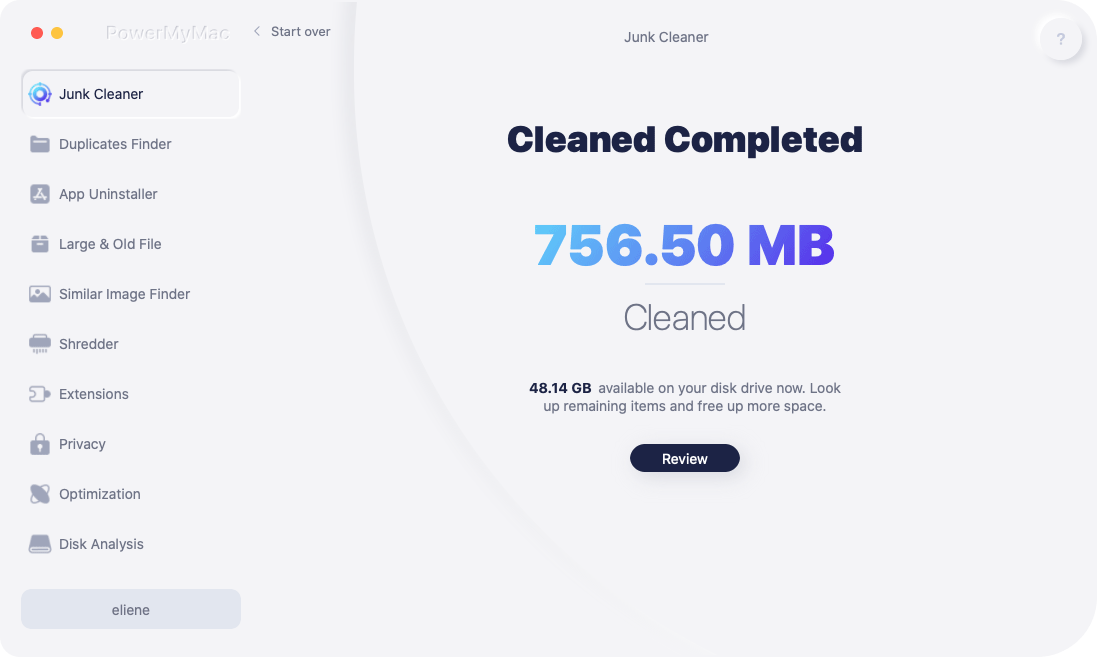
Now, after you Mac is cleaned and has enough space, you are ready to install macOS High Sierra.
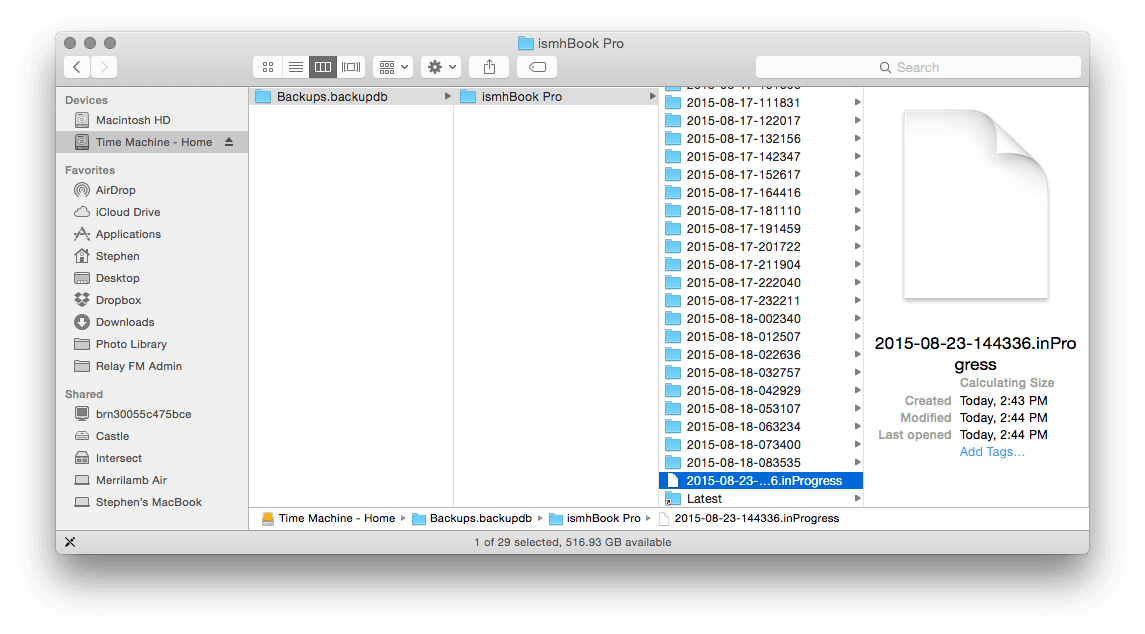
4 - When “Preparing the Backup”, Time Machine Got Stuck
This issue is still found on the macOS High Sierra problems. The Time Machine usually gets stuck while it displays the “Preparing Backup” message. This may result in being unresponsive for hours.
Step 1 - Stop the backup procedure being done. Go to the Settings menu of the Time Machine. Press the red [X] in order to stop the backup process.
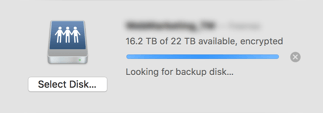
Step 2 - Find the temporary backup file called .inProgress. Delete it. Use the Finder to visit the Time Machine drive. Then, open the folder called “Backups.backupd.” While in it, find the folder that contains the name of your Mac within it. Then, type out .inProgress inside the search bar located above. Find the file with the extension .inProgress and then delete this file.
Step 3 - Restart the Mac device. Now, repeat the backing up process utilizing Time Machine.
5 - Slow macOS High Sierra or the Operating System Freezes Randomly
Why is macOS High Sierra so slow? You should try to be patient and give the system time. If this doesn’t work, you should reboot your Mac device. Some users have stated that their computers started running slower after the installation of the macOS High Sierra.
First, you have to know what causes the slowdown. Visit Applications and then visit Activity Monitor. Check out which applications are heavy on your Mac’s memory. Force quit these applications because they are eating up CPU resources.
Another method you should try is to clean up your system caches. These are temporary files that accumulate in your system libraries. Sometimes, they result in software conflicts. To manually clean up your user cache, do the following:
- Launch Finder.
- Press Go To Folder located in the menu named Go
- Type out
~/Library/Caches - Press
Enter - Visit each folder and clean files inside. Remember that you do not delete the files. You just have to delete the insides.
- Repeat steps above. However, during this time don’t type in
~/Library/Caches. What you have to do is to type/Library/cachesTake note that this isn’t a safe procedure. Accidentally, you can remove the wrong folder.
In order to clean your system caches safely, you must use PowerMyMac as stated above. In this way, you’ll remove junk files without causing trouble to your system.
6 - After macOS High Sierra Was Installed, Mac Wouldn’t Start
Now, you have installed macOS High Sierra successfully. However, for some reason, the Mac will not boot up after the High Sierra update. In this case, you might want to reset NVRAM. NVRAM refers to non-volatile RAM. It is used for the storage of system settings such as startup disk selection, time zone, display resolution, or kernel panic preferences. When you reset your NVRAM, you are helping yourself to perform a fresh boot--just like doing it from scratch.
- Turn on your Mac device while holding the following,
Option + R + Command + P - Hold the pressing of these keys for approximately 20 seconds
- Release them once you hear the second startup soundNow, your NVRAM just went through a reset. You can also open Disk Utility to repair boot problems.
Entering Internet Recovery ModeInternet Recovery launches your Mac from the external servers of Apple. If your boot sector is damaged, you can use this tool. It can help with hardware issues on macOS High Sierra. The utility will implement memory tests and it will perform a configuration of your Mac device in order to successfully boot it up.
Here’s what to do to start Internet Recovery:
- Restart Mac device
- Wait until you hear the startup chime. Then hold
Command + R + Option - Release them after the animated globe is displayed. Your system will then download a specific recovery image from the Internet.
- Just follow the instructions on the screen to proceed.
7 - Slow Wi-Fi after macOS High Sierra Was Installed
Slower connections happen after the installation of the macOS High Sierra. To fix this, an update of your Wi-Fi preferences is necessary. But before you do this, you have to delete the current settings.
- Click the Finder
- Press
Command + G +Shift - Type this out:
/Library/Preferences/SystemConfiguration/ - On that specific directory, choose the files with the extension .plist. These are probably corrupted current
preferences.plist
com.apple.network.identification.plist
com.apple.airport.preferences.plistNetworkInterfaces.plist
com.apple.wifi.message-tracer.plistpreferences.plist

Move these files towards the Trash bin, then restart the Mac device. Changes will not take place. New preferences are automatically made to replace old ones.
8 - The Application Crashes or Doesn’t Launch on macOS High Sierra
This is one of the common macOS High Sierra problems`, Apple moved towards a 64-bit architecture. Thus, 32-bit applications are not supported with the latest OS. Some developers haven’t converted their applications to a 64-bit architecture. If the application continuously crashes or doesn’t launch on macOS High Sierra, you have to update it to its latest version. You can also check out the site of the app’s developer and read about its compatibility with High Sierra.
9 - Reduced Battery Life after macOS High Sierra Installation
Battery life might be drained quickly after installation of the macOS High Sierra. To look more into this problem, visit the Activity Monitor and check which processes are actually demanding of energy. You have to visit the Applications. Then, go to Utilities and then Activity Monitor. Click the tab labeled Energy for more details.
If a specific application is heavy on energy, you can reinstall it. You can also consider replacing the applications with a lighter alternative that is energy efficient.
Here are other things you can do in order to save battery life:-Deactivate location services-Disable graphical effects and animation-Make your screen dim (less bright)
10 - macOS High Sierra Password Problems
Although macOS Sierra is advertised as the most secure iOS, 3 password scandals have already happened. In September 2017, Patrick Wardle (a technology expert) proved that Keychain passwords can be retried without the need to provide your master password.
This vulnerability pointed out by Wardle can actually be accessed through an unsigned application. It does not concern macOS High Sierra alone but other macOS versions previously released too. This major root password bug allows full access to Mac devices without the need for a password. If you have not yet set your Mac’s root password, you should do so immediately.
The root password is similar to a ground-level admin password. The fastest way to set it is through the Terminal. Here’s how to do it:
- Launch the Terminal
- Type out
sudo passwd -u root - Enter your current password
- Enter a new password
- Enter the new password again
Actually, this isn’t the only issue with passwords. A problem has arisen wherein the High Sierra displays the original password instead of showing the hint. To solve this issue, you should install the Supplemental Update of the macOS High Sierra.You can also protect your data through encryption tools.
11 - macOS High Sierra Mail Problems
Errors also happen in macOS High Sierra’s Mail app. Sometimes, email notifications won’t work after the installation of the OS has been done. This can be repaired through System Preferences.
- Visit System Preferences
- Go to Notifications
- Select Mail
- Reset alert style. Change it from Banner to Note
- Switch alert style back to Banner
So what other issues are there? Sometimes, your Mail application becomes slower. Here’s an explanation. The Mail app is probably overload with a lot of messages. Plus, it might still have leftovers from the previous operating system. This results in the slowing down of your Mail app and it may take hours to search for a certain message.
Actually, there are applications that offer a fix. These applications will reorganize or reindex your Mail database on the latest macOS High Sierra.
Part 3. Conclusion
macOS High Sierra is not free of flaws. Well, everything’s not perfect. The said latest operating system of Apple has a lot of issues.
However, these macOS High Sierra problems can be fixed with the right guide. A particular issue, for example, can be fixed by simply cleaning up your device with PowerMyMac. Whatever problem you might be facing with your new operating system, simply read this guide to free you from worries.

