


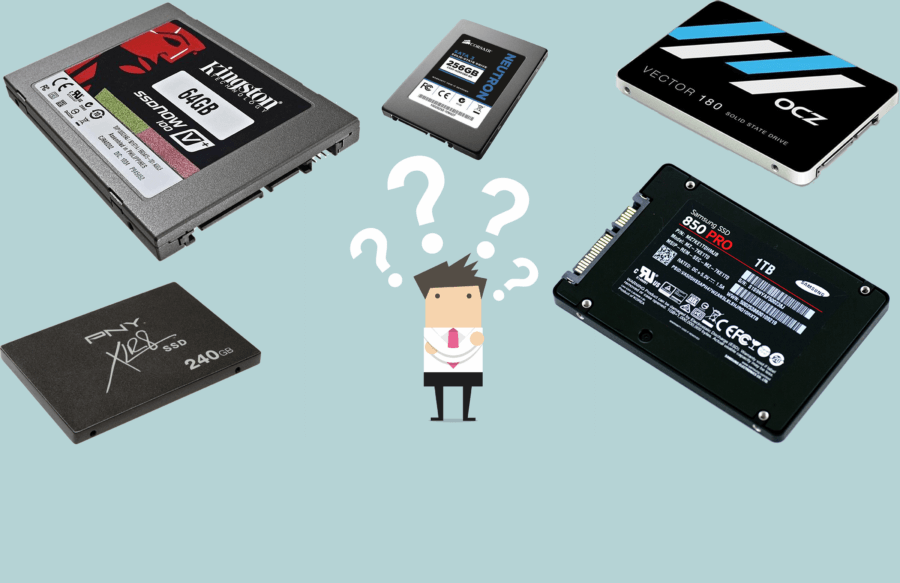
I always store important data in my solid state drive. It good for safekeeping all my files.
However, it seems like my SSD life is low. Does it mean it’s about to fail?
How do I fix this? Also, what if I lose all my data? Is there a good tool to help me with safekeeping my files?

 Of course! I will tell you what is SSD life and how to Prolong SDD Life. Read Along!
Sound good? Let's dive right in...
Article GuidePart 1. Introduction of SSD Life.Part 2. Why Is Your SSD Nearly Failing?Part 3. How To Prolong The Solid State Drive’s Life?Part 4. The Best Ways to Prolong the Life of Your Life?Part 5. Conclusion
Part 1. Introduction of SSD Life.
SSDs are called solid state drives and is a storage device that is nonvolatile. It has the ability to store data into solid-state flash memory.
Traditionally, solid state drives are not hard drives because there is no involvement in moving parts. Another term for SSD is solid-state disk.
Solid state drives are faster versus that of the traditional hard disk drive (HDD). They also use less battery power than HDD.
Although it has these advantages, they have a limited lifespan. They can fail at any point in time without any warning. When this happens, you might lose important data stored within your SSD.
When your SSD life is low, it means it has almost reached its lifespan’s limit. If you’ve got an alert that says Low SSD Life, you need to back your data up.
In this way, you don’t lose your most important data when your SSD fails.
Part 2. Why Is Your SSD Nearly Failing?
This is how SSDs work. Before they can input new data in a specific sector, they have to delete the data stored in that same sector.
We call this cycle “Program-Erase.” A solid-state drive’s lifespan is limited to a specific number of program-erase cycles. The faster the number of program-erase cycles get used, the faster your SSD fails.
Below are few of the reasons why your solid state drive is nearly failing:
1 - Your Trim is not enabled.
The Trim command is one way to optimize the writing of data into a solid state drive. With this optimization feature, it prolongs the life of the SSD.
If your Trim is not enabled, then your SSD gets worn out faster. The solid-state drives provided by Apple enables Trim by default.
However, for drives sourced from third parties, you have to manually enable the Trim.
2 - Your disk is filled up by more than 80%.
When more than 80% of your solid state drive is filled, the job of algorithms for wear-leveling becomes harder to do.
It’s harder for these algorithms to minimize the number of cycles and to prolong the life of the solid-state drive.
3 - You launch applications that implement writing of log files and caching to the solid state drive.
There are applications that temporarily write files to your SSD when you launch them. Cache and log files are all unnecessary data.
And these unimportant data gets written on your SSD and waste the cycles necessary to prolong the life of the drive.
Part 3. How To Prolong The Solid State Drive’s Life?
There are different ways to prolong the life of your SSD. Here’s how:
1 - Make sure at least 25% of your dive is free of files. This means, you only use up to 75% of your SSD’s storage space. You can implement the tool we will introduce later to clean up your drive.
2 - Uninstall applications that temporarily writes files into the SSD.
3 - Always monitor the health of your SSD. You can use the iMyMac PowerMyMac tool to do this. You can completely monitor the health of your drive on the software’s main interface.
Now, let’s hop on to the main solution used to prolong your SSD’s life, cleaning up its storage space.
Part 4. The Best Ways to Prolong the Life of Your Life?
You can use iMyMac PowerMyMac to clean up unnecessary files on your computer. This can be a good way to prolong the life of your solid state drive.
Here’s a step-by-step guide on how to do it:
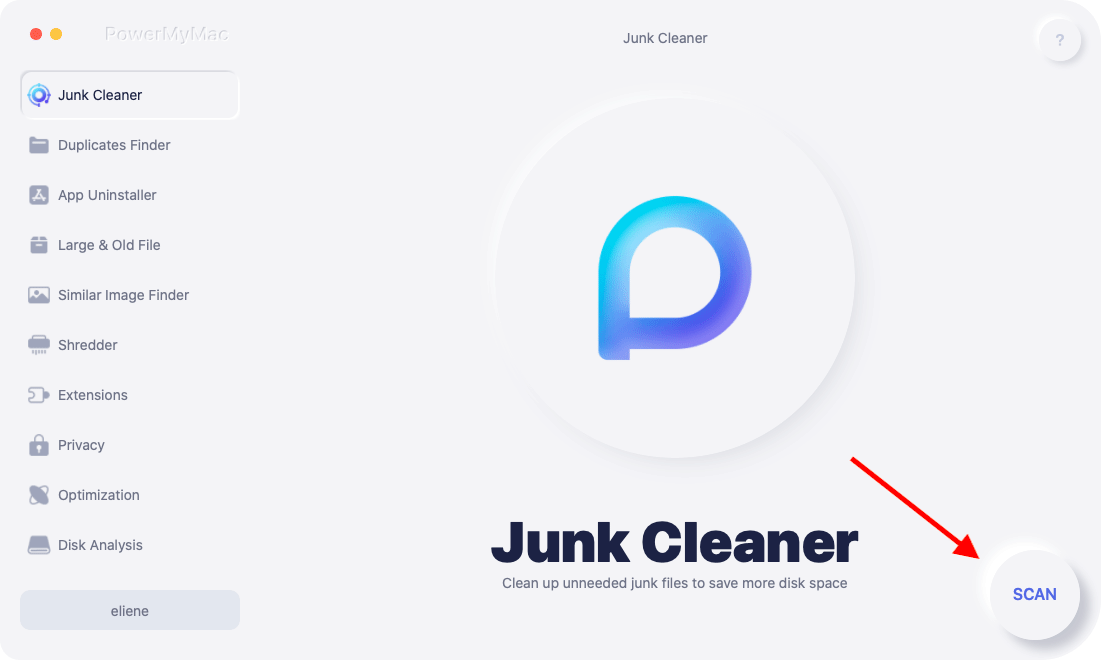
Step 1: Download iMyMac PowerMyMac And Open It
You can download the iMyMac PowerMyMac and open it on your computer. The system status of your Mac will be displayed on the main interface of the software. On the left-hand side of the interface, click “Master Scan”.
Step 2: Scanning Process
Press the “Scan” button and wait until the process is completed. After which, the program will display all Junk files in your Mac.
These junk files are classified into different categories. Classifications include Application Cache, Photo Junks, Mail Junk, System Logs, System Cache, User Logs, and Trash Bin, among others.
Step 3: Review and Select Items to Clean Up
For each category, you can find different files under it. Click on a particular category and choose which files you want to clean. After which, you have to click the “Clean” button and the cleaning of files for the process to start.

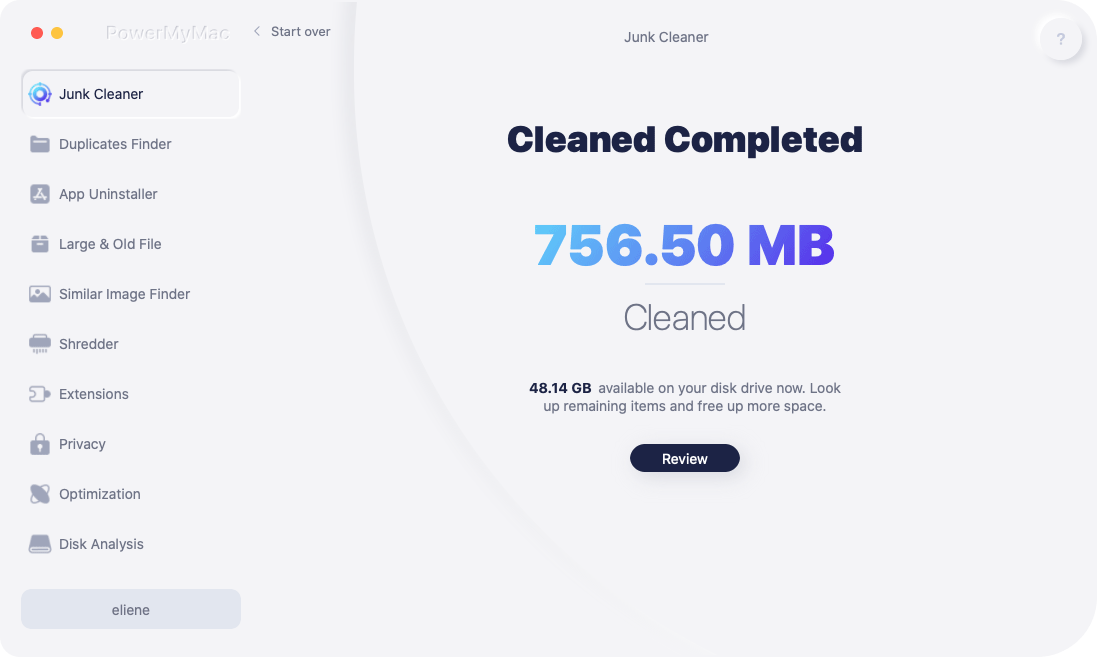
Step 4: Clean Up Mac System Junk is Done
After the cleanup process is done, the unnecessary files have already been erased. A lot of them will be regarded as 0KB. However, some of them will not be marked as such. This is because the said folders are auto-recreated ones.
People Also Read:How to Empty Trash on MacHow to Update Mac
Part 5. Conclusion
Your solid state drive (SSD) is a very important part of your Mac. It is where your files are stored for safekeeping.
That’s why you have to take care of it. Although SSD failure cannot be avoided, it is best to prevent it from happening.
One way to do this is to make sure you only use up 75% of the drive. You can start doing this by cleaning up your drive with iMyMac PowerMyMac.
With the said software, you can free up space in your solid state drive and maintain its health.

