


Maximize the use of your Mac. Connect it to your TV. That way, you can mirror everything from your Mac to the big screen. Sounds pretty exciting but do you know how to connect MacBook to TV?
There are lots of reasons why you should know that. If you use your TV as an external monitor for your MacBook, you get to watch your favorite Netflix series or movies on it. You could definitely level up your viewing experience if you’re able to watch your favorite Netflix series or movies on a bigger screen.
Another good reason is that it comes in handy when you need to make presentations. With your MacBook connected to the TV, your audience is not going to have a hard time viewing your content. Suffice it to say, you could easily engage your audience if your MacBook is projected on a bigger screen.
So, if you have a MacBook, why not maximize the use of it by learning how to connect it to TV. This article will show you how to do it.
Contents: Part 1. Two Critical Things to Do Before Connecting Macbook to TVPart 2. Simple Steps on How to Connect MacBook to TVPart 3. Bonus: Consider Using the PowerMyMac to Ensure Performance of MacBookPart 4. Conclusion
Part 1. Two Critical Things to Do Before Connecting Macbook to TV
Before learning how to connect MacBook to TV, there are two things you need to consider. Read on to find out what these two things are.
Make Sure MacBook is in Top Condition
The first thing to consider is the condition of your Mac. Is your Mac in good condition to hook up with your TV? Here’s the thing. Your MacBook works double time when hooked up with the TV, adding a lot of pressure on the graphics processing unit or GPU. Your MacBook could heat up if it’s not up for the task. When it does heat up, it could fail to perform. Even worse, it could crash. You wouldn’t want that to happen to your Mac Book, right?
So, before you connect your MacBook to the TV, make sure to check on the condition of your MacBook. It has to be in tip-top shape to be able to connect to the TV.
Make Sure to Choose the Right Cable
The second thing to do is to check on the ports so that you know which kind of cable to use. You need to look at what you're plugging your MacBook into.
For older MacBook models, all you will need is a simple HDMI cord. These are the various models of MacBook that require only an HDMI cable: Mac mini released in 2010 and after, Mac Pro released in 2013, and the MacBook Pro with Retina Display released sometime between 2012 and 2014.
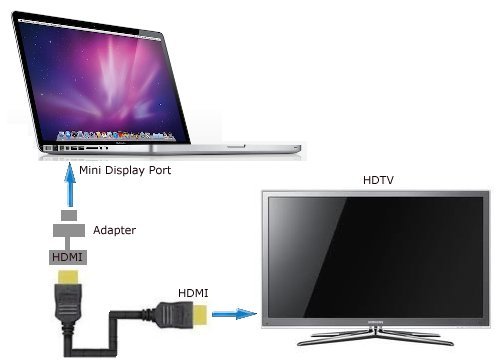
For newer MacBook models, you’re most likely not going to find an HDMI port. A newer MacBook will have a Thunderbolt 2 port. In case your MacBook is a newer model with a Thunderbolt 2 port, then you would be needing an adapter. That particular adapter is called the Mini Display Port to HDMI. Together with that, you would also be needing an HDMI cable.
Unfortunately, Apple does not manufacture the Mini Display Port to HDMI. Hence, you won’t be able to get this particular kind of adapter in any Apple Store. However, you can get them from online stores such as eBay or Amazon.
There’s also a great chance that the latest MacBook model will have Thunderbolt 3 port. This particular port will need a USB-C to HDMI adaptor. Fortunately, this particular adapter is available in Apple stores. Keep in mind that it’s always best to stick to Apple products.
Part 2. Simple Steps on How to Connect MacBook to TV
Now, you’re all set to learn how to connect MacBook to TV. The two options below will show you how to connect to a non-Apple and Apple TV.
Option #1. Connect MacBook to Any Kind of TV
If you want to connect your MacBook to any kind of TV, just follow the steps below.
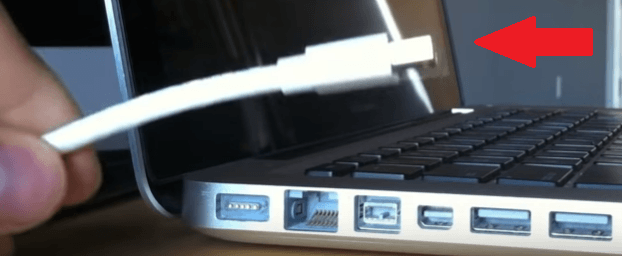
Step 1. Plug-in Mini Display Port to HDMI Adapter
First thing you need to do it to plug in the tiny end of the Mini Display Port to HDMI adapter into the side of your MacBook. Then plug in the HDMI cord into the DVI adapter. Then take the other end of the HDMI cord and find out where to plug it into the TV. It should be on either the side or the back of the TV. Plug it into any available HDMI socket.
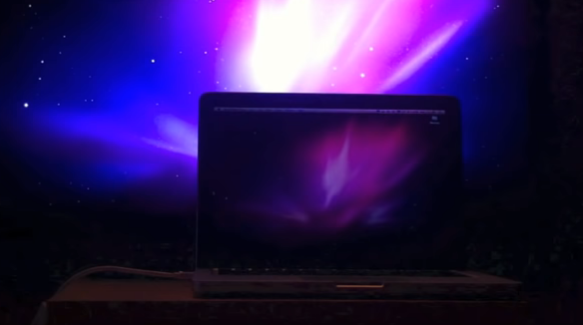
Step 2. Look Out for the Blue Flash
At this point, the screen of your MacBook should be flashing blue. If nothing is happening to your TV screen, set it up to the right input mode by pressing the source button on your remote.
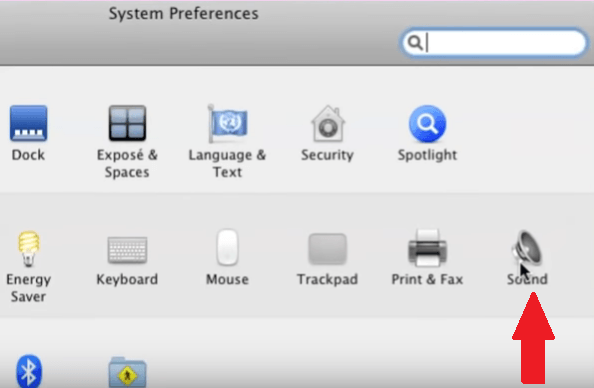
Step 3. Set up Sound Connection
You can now set up sound connection. Click on System Preferences on your taskbar. Once System Preferences is launched on the screen, select your TV as the sound output device.
Step 4. Set Up Displays
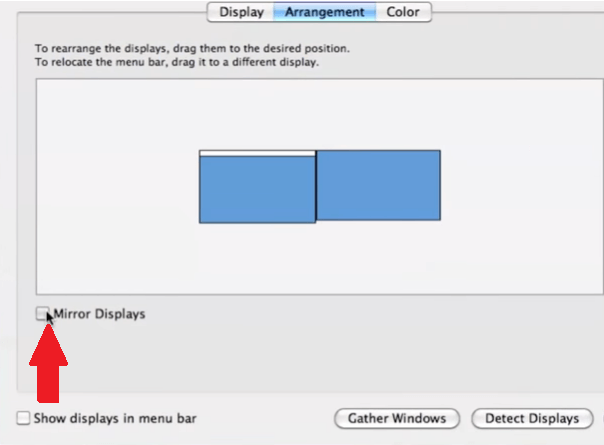
Go to System Preferences and click on Displays. Once you launch the Displays window, look for the Arrangement section. If you don't see it, click on Detect Displays tab on the bottom part of the window.
Once you click on it, Arrangement should appear. Make sure to check the box beside Mirror Displays. If you want your TV screen to be the primary display, uncheck the box.
Step 5. Get Rid of Black Bars
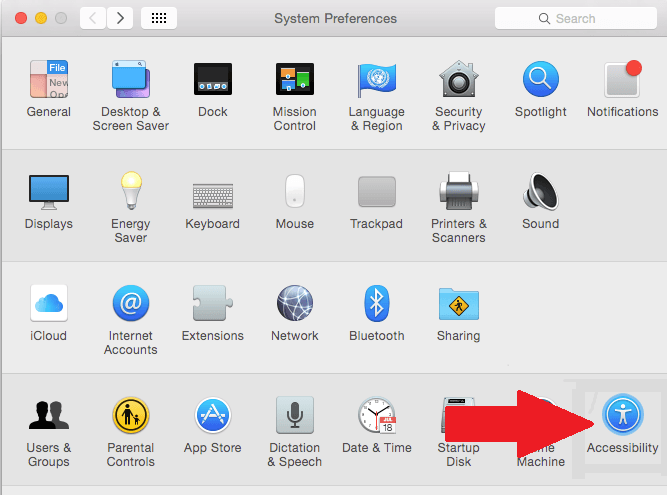
If you’re seeing some black bars on either side of the screen, you can get rid of them by going to System Preferences. Click on Accessibility. Click on Zoom. When you see Use scroll gesture with modifier keys and Use keyboard shortcuts, check on both of them to zoom.
Option #2. Connect MacBook to an Apple TV
You can also connect your MacBook to an Apple TV. The steps below will show you how you can use your Apple TV as an external monitor.
Step 1. Click on Airplay on your MacBook
Go to the top of the screen to find Airplay. Once you have found it, click on it.
Step 2. Connect to Apple TV
Once you lick on the Airplay icon, you will see a list of Apple TVs that are in your location. To connect to an Apple TV you see on the list, just click on the one you prefer.
Step 3. Look out for the Four-Digit Code
At this point, you should be able to see the four-digit code on the projector screen or your MacBook should have automatically connected to the Apple TV.
Part 3. Bonus: Consider Using the PowerMyMac to Ensure Performance of MacBook
Whether you’re connecting your MacBook with the use of a cable or Airplay, you need to ensure that it’s working well. If your MacBook is not in the best of health, it won’t be able to connect to an ordinary TV, let alone an Apple TV.
To make sure that your MacBook is always in good running condition, you can consider using the iMyMac PowerMyMac. It does exactly what it promises to do which is to clean up your MacBook. That way, it can be optimized to function well once it is hooked up with an external monitor.
Since the PowerMyMac is able to clean out junk files and uninstall unneeded apps, you’re guaranteed more space on your MacBook. With more space on your MacBook, you’re sure that it’s going run well.
There will be fewer chances of it heating up while it’s hooked up with the TV. As you very well know, a MacBook that heats right away up spells trouble. You wouldn’t want that to happen to your MacBook, would you? You can check out the PowerMyMac below to have a free trial.

Part 4. Conclusion
There you have it. As you can see, it’s pretty easy to connect MacBook to TV. Whether you’re connecting to an ordinary TV or an Apple TV, you can easily do it. It’s just a matter of choosing the right cable to connect to an ordinary TV. If you opt to connect to an Apple TV, well, you just have to follow the simple steps listed above.
To avoid any issues that could possibly occur, it’s best that you keep your MacBook in good health. The reality is that your MacBook would have to work harder to connect and project on a bigger screen. Hence, it needs a lot of space to be able to perform well. So, clean it up with the iMyMac PowerMyMac to avoid any possible issues.
Do you use your TV as an external monitor for your MacBook? If yes, how do you connect your MacBook to your TV? Feel free to share some of your tips and tricks with our readers.

