


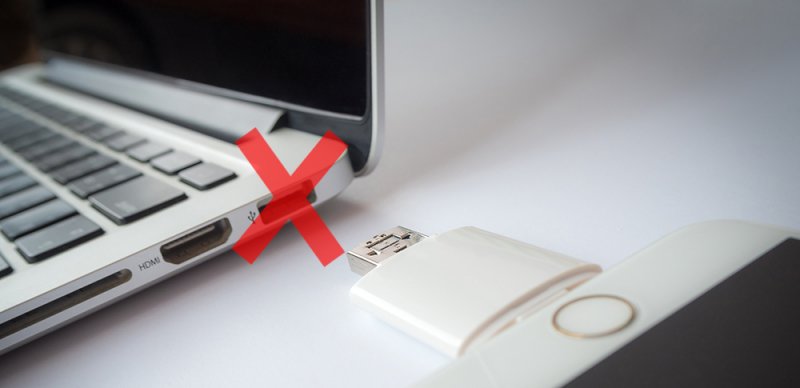
It can happen anytime. You plug in a USB into one of the ports of your Mac and it’s not recognized. You try the other port and the same thing happens. What happening? All of a sudden, the USB ports not working Mac.
It’s okay if it’s just one port but you would really wonder why both ports aren’t recognizing your USB. To make matters worse, your USB works on other computer ports. You’re certain that there is something wrong with the USB ports on your Mac.
So, what should you do? For starters, do not worry because this article will show you how to resolve the issue of USB ports not working Mac.
Contents: Part 1. The Magic of Restarting Your MacPart 2. Solutions to USB Ports Not Working on MacPart 3. Conclusion
Part 1. The Magic of Restarting Your Mac
Before we jump right into the various options on how to resolve the issue of USB ports not working Mac, let’s talk about the magic of restarting your Mac.
Restarting your Mac could do a lot of wonders for your Mac. If you’re encountering an issue such as USB port not working on your Mac, then try restarting your Mac. For all you know, it just needs a restart to the USB ports working.
If the issue of USB port not working Mac persists, check the cable. You might be using one that’s worn out or damaged. If these two simple solutions don’t work out, then it’s time to move on. Read on to learn about the various options you have to resolve the issue.
Part 2. Solutions to USB Ports Not Working on Mac
Here some solutions for you. Make sure to read each one so that you wouldn’t have a hard time resolving the issue.
Option #1. Uninstall Problematic Apps with PowerMyMac
If your USB ports are not working on your Mac, it may be that there are some problematic apps that you need to uninstall as soon as possible. Think about it. There might have been some apps that you have downloaded in the past.
For all you know, these apps were downloaded from dubious sources. Now, they’re problematic. It could be that they contain malware that’s causing them to conflict with the functionality of the USP ports.
The question is, how do you find these conflicting apps and eventually get rid of them? Well, the easiest way to do that is with the use of the iMyMac PowerMyMac. If you want a smart way to clean up your Mac, then you should try it.
All you need to do is to click on a couple of tabs and those conflicting apps are gone. The steps below will show you how to use the PowerMyMac.
- Download the PowerMyMac
- Go to the App Uninstaller Module
- Review and Select Apps
- Clean up Mac
Continue reading the detailed steps listed down. They will help you understand how easy it is to use the PowerMyMac.
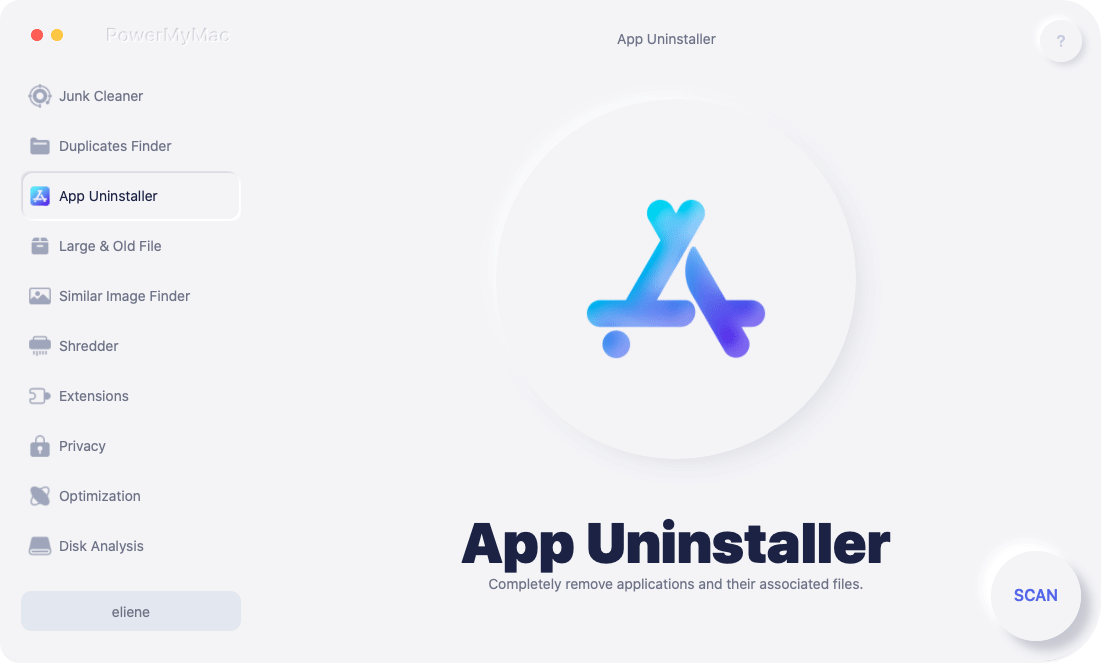
Step 1. Download the PowerMyMac
PowerMyMac is a reliable program that you can download from a safe website called imymac.com. Soon as you’re done downloading the program, make sure to launch it on your Mac.
Step 2. Go to the App Uninstaller Module
Select the App Uninstaller module from the left side of the screen, then a SCAN button will appear on the main screen. Click on it to start scanning the apps you have installed in the past.
Step 3. Review and Select Apps
Once PowerMyMac is done scanning, the list of all your apps will show up on the main screen. Review these apps and select the ones that could be conflicting with the USB functionality.
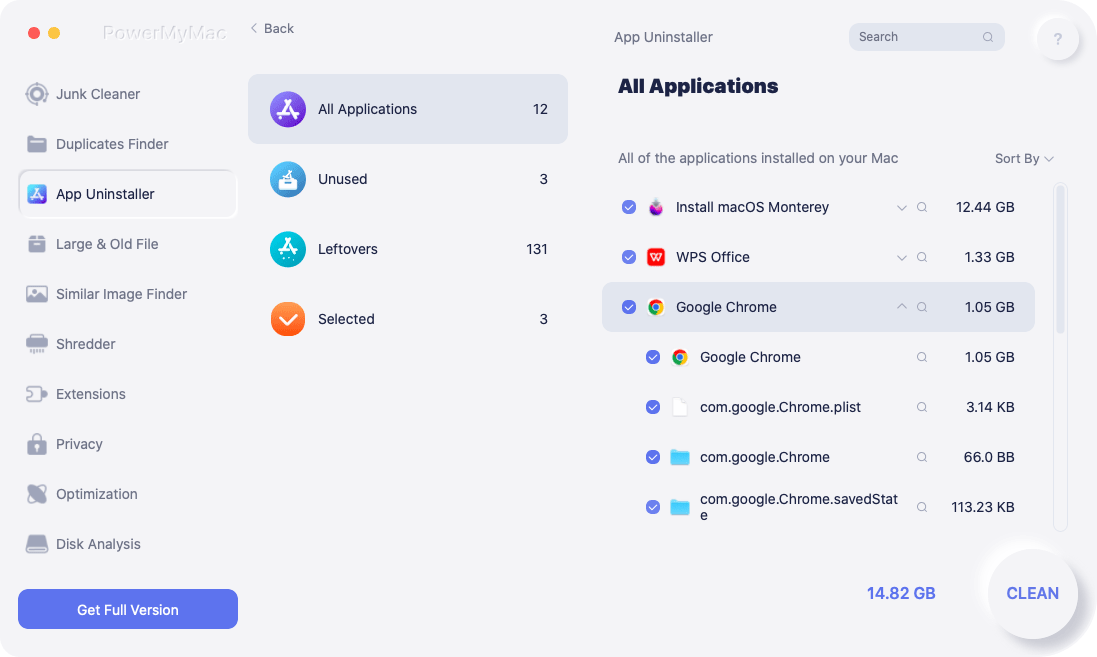
Step 4. Clean up Mac
Now that you have chosen the apps, just click on the CLEAN button at the bottom part of the screen, then the problematic apps will disappear. That’s a lot easier than searching all the apps that you have installed in the past and removing them one by one.

Option #2. Reset the System Management Controller of your Mac
The System Management Controller or SMC controls all the load level functions on your MacBook Pro. When it’s reset, it fixes things on your Mac such as fans running at high speed, keyboard backlight issues, Mac not responding when you press the power button. USB ports not responding, and a whole host of other issues.
Resetting the SMC might just solve the issue. The steps below will show you how to do it.
Step 1. Shut Down Your Mac
The first thing you need to do is just shut down your Mac. You can do that just by doing going to the menu on top and selecting Shut Down from the drop-down list. You can also hold down your power button for 10 seconds if the Shut Down option doesn't work.
Step 2. Start Your Mac
Hold down the Shift button, Control button, and Option button all at the same time. Then hold down the power button for 10 seconds and let go. Then just hold your power button down again to start your Mac. If your Mac has the T2 security chip, go to Apple and select the Shut Down option.
After your Mac shuts down, hold down your power button for 10 seconds then let go of it. Press your power button again to turn it back on. If that doesn't work, then shut down your Mac again. Press and hold down the right shift key and the left option key. Hold them down for 7 seconds and hold down the power button for seven seconds. Then let go.
Step 3. Wait for Mac Logo to Show up on Screen or Boot Itself
At this point, the screen of your Mac is black. Press the power button and let the Mac logo come up. Once you see the Mac logo, you have reset the SMC on your Mac.
Keep in mind that for Apple devices such as Mac Pro, iMac, and Mac mini; you can just unplug it the power cord. Wait 15 or 20 seconds, then plug it in. Wait another 5 or 10 seconds and power on the system again.
Option #3. Reset NVRAM/PRAM
It’s also a good idea to reset the NVRAM or the PRAM, depending on what you have on your Mac device. Modern Macs have a bit of NVRAM--the NV stands for non-volatile. It stores information like your selected startup disk, speaker volume, screen resolution, and time zone.
The steps below will show you how to reset it in case you’re having some issues like USB ports not working on Mac.
Step 1. Shut Down Mac
The first thing you should do is to shut down your Mac. Take your cursor to the menu on top and click on the Apple log and choose Shut Down from the drop-down list.
Step 2. Turn on Mac
You can now turn your Mac on. To do this, press and hold down the following keys: Option, Command, P, and R. Make sure to do this immediately.
Step 3. Wait for Start-Up Sound
Now, wait for the start-sound. So, when you hear some kind of chime, you can let go of the keys.
Option #4. Check for Some Updates
Do you update your Mac regularly? You might have been ignoring the notifications for updates. Well, it’s about time you check for some updates. The steps below will show you how.
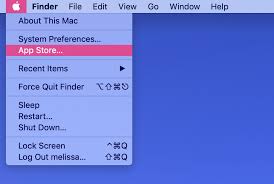
Step 1. Go to App Store
The first thing you need to do is to go to the Apple logo on the top menu. This is right next to the Finder. Click on Apple. When you see App Store from the drop-down, click on it.
Step 2. Click on Updates
Once you’re in the App Store, take your cursor to the Update tab and click on it. You will see this on the menu which is at the top, the mid part of the screen. It’s the last tab, right after the Purchased tab.
Step 3. Check for Updates
If there are updates available, you would see them listed down on the screen. Once you see some available updates, make sure to take some time to click on each one to start the process.
Part 3. Conclusion
Don’t worry if your USP ports are not working on your Mac. The solutions listed above can help resolve the issue.
Have you experienced any issues with the USP ports on your Mac? How were you able to solve them? Feel free to share your expertise with our readers.


Vito2020-10-14 12:08:40
Quanto scritto vale anche se è solo una delle due porte (USB-c in quanto si tratta di un MacBook Air 2019) a non funzionare? perché nel mio caso una delle due non funziona, mentre l'altra si