


Do you happen to need a Mac recorder that you can use to record a video on a Mac? Do you know that you can achieve this task through your Mac’s built-in webcam? Whatever purpose you may have aside from recording a video on your Mac, you can do this easily by using an app you already have on your Mac and the FaceTime camera.
Though you know how to record a video on a Mac in different ways, we are only going to give you the easiest method on how to record a video on a Mac in this article. This is by using QuickTime Player. This app produces recorded videos that you can share, upload, edit, and use however you like. So if you want to know more, keep on reading!
Article GuidePart 1. Record a Video on a Mac Using QuickTime PlayerPart 2. How to Record Video on Mac Using iMoviePart 3. How to Record Video on Mac Using Photo BoothPart 4. How To Convert Your Recorded VideosWrapping it Up
Part 1. Record a Video on a Mac Using QuickTime Player
- Launch QuickTime Player on your Mac. You can find it in your Applications folder.
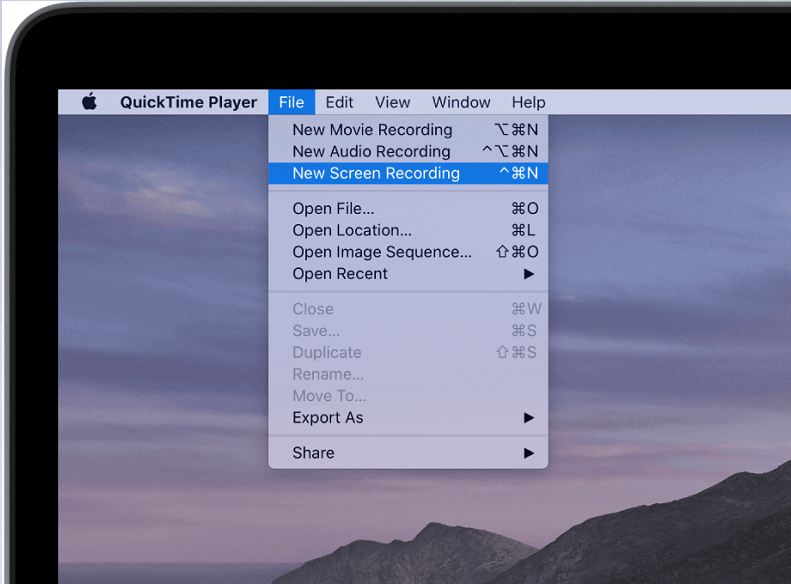
- Once in the app, click on File from the app’s menu and then choose New Movie Recording.
- Once your FaceTime webcam is activated, it will be shown on your screen. Just click on the record button. This will begin the recording process of your movie.
- After you are done recording, click Stop to end your recording. You can also trim your video optionally if you want to.
- Now, go on and click File on QuickTime Player’s menu again but this time choose Export or Save.
- The last step is to set a name for your recorded video, choosing the output location, and then clicking on the Save button.
This is how to record a video on a Mac, Note that the default output format of your recorder video will be.MOV. This MOV format is compatible with a lot of devices and you can upload MOV files directly to social media sites. They are viewable on Android, Mac, Windows, iPad, and iPhone devices with the appropriate player. But if you want to convert your recorded video to other formats, we can show you how in the next section.
Also, the resolution of your recorded videos will depend on your Mac’s model because each Mac will have different webcam resolutions. But in general, expect a resolution from 480p to 720p for most of your webcam recordings.
QuickTime Player is not only for recording videos, but it also comes with other useful features such as screen recording to capture videos being displayed on your Mac and recording audio and sound using your computer’s microphone. The screen recording process is similar to the movie recording process.
You can also record a video on your Mac directly using iMovie and other apps but as we have said earlier, QuickTime Players is the most efficient, fastest, and easiest method to learn how to record a video on a Mac. This is the simplest option you have for recording videos on your Mac. Now, let us go into how you can convert your recorded videos into other formats compatible with your devices in the succeeding section.
Part 2. How to Record Video on Mac Using iMovie
iMovie is also a popular choice as a video editing tool in Mac for novices since it is easy to operate. You have the capability to record tutorials or demos using iMovie easily either by using the in-built camera of your Mac or using an external device.
- Open iMovie
- Click on File and select “New Event”
- Click on the “Import Media”
- Select the front camera of your device
- Tap on Record to begin the recording process
- Click on the save button once finished.
Part 3. How to Record Video on Mac Using Photo Booth
You can also record video on Mac with the help of Photo Booth. With this application, it is an easy and fun way to create selfies and even record small videos. You can utilize a variety of effects before starting your video by clicking on the Effects button once you have opened the application.
- Double check to ensure that you have selected video in the bottom left corner of the application
- Click on Record
- Click on Stop to finish the recording process
- When saving your video, click on File > Export
Part 4. How To Convert Your Recorded Videos
Aside from being a video player and editor, iMyMac Video Converter is an all-in-one tool that can also convert any of your desired videos into any format you prefer. It even allows you to personalize your videos and convert audio files aside from videos. You can expect conversion speeds that are faster than normal with this app so you can get your videos in your desired formats in no time.
Key Features of iMyMac Video Converter
Now, let us discuss the core feature of iMyMac Video Converter:
Conversion of Different Videos
iMyMac Video Converter is capable of converting any of your desired audio and video files into a wide array of formats including DVD files. These formats include MKV, MP4, MOV, WMV, FLV, M4V, AVI, 3GP, M4A, SWF, AAC, MP3, VOB, FLAC, OGG, WAV, WMA, AC3, and others.
Video Enhancement
You can now fix your shaky, dark, and overexposed videos through iMyMac Video Converter by upscaling their quality. The app also allows you to adjust settings such as contrast and brightness values.
Video Editing
With iMyMac Video Converter, you can freely edit your Mp4 video files and to crop, flip, rotate, and combine our videos as well as add subtitles, watermarks, and external audio tracks among others.
High-Speed Conversion
iMyMac Video Converter can achieve up to 6x faster conversion speeds because it supports various hardware acceleration technologies: NVENC, AMD, HD Graphics, and NVIDIA CUDA. Now, you can convert your videos without re-compression and quality loss.
Support for Various Video Resolutions
Conversion of 3D videos is made possible through iMyMac Video Converter. It supports the following video resolutions:
- 1080P (FHD), 4K (UHD), 720P (HD), and 480P (SD)
Moreover, it allows you to rip your homemade DVDs to MP4.
Support for a Wide Array of Devices
Get rid of incompatibility issues with this powerful video converter. It can produce videos compatible with iPod, iPad, Samsung Galaxy, Nokia Lumia, iPhone, Blackberry, Google Nexus, Kindle Fire, Moto X, and more.
Steps to Convert Your Recorded Videos
- Install the app
- Add the recorded video you want to convert to the app
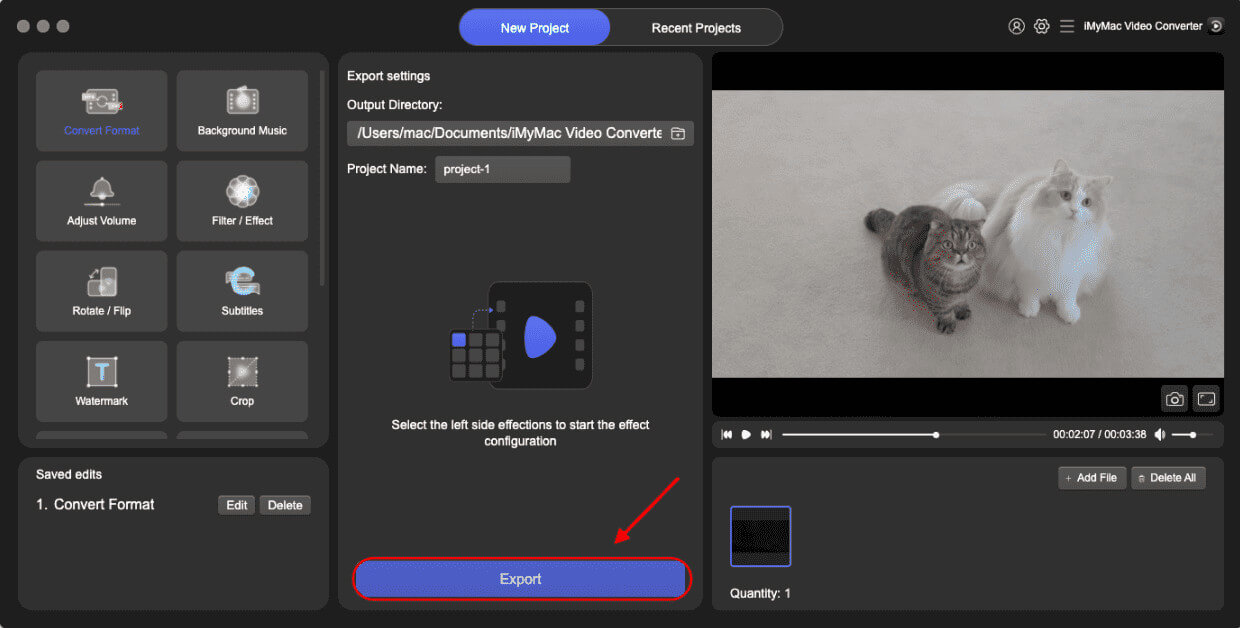
- Click Convert Format and select an output format & storage location
- Start the conversion process by clicking on Convert.
Wrapping it Up
Being able to learn how to record a video on a Mac without paying anything is a fun experience. You do not need to purchase third-party apps or install anything before you learn how to record a video on a Mac. You can simply use a built-in app on your Mac which is QuickTime Player. And in case you are not satisfied with the MOV output format, you can convert your recorded videos using iMyMac Video Converter.
